
In SharePoint Online, folders are still widely used to organize content – mainly in document libraries where projects or departments are grouped at the top-level. However, when users want to apply a SharePoint Document Library filter by folder name, the platform lacks built-in support.
Image: “SharePoint Document Library with Top-level Folders”
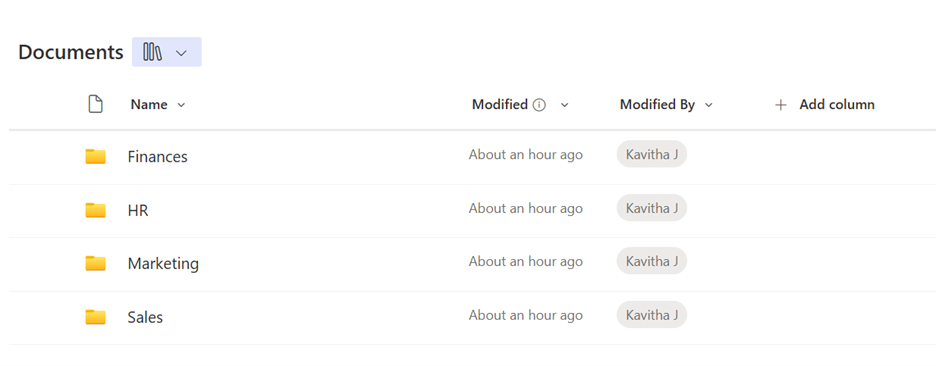
In one of my projects, users wanted to create a view that showed only documents under a specific top-level folder (like Department HR, Finance, etc.) – including its subfolders and all documents inside.
At first glance, it seemed this should be possible with built-in view settings. But I quickly learned: SharePoint does not support filtering by folder name out of the box.
Here’s what I found, what doesn’t work, and the scalable solution I implemented – including PowerShell and Power Automate scripts for anyone facing the same challenge.
What Works?
Navigating into a Folder
When you manually enter a folder (e.g., click into “Department HR”), the filter panel works on that folder’s content only. You can filter by metadata like Status or Modified By, but it won’t search across the whole library.
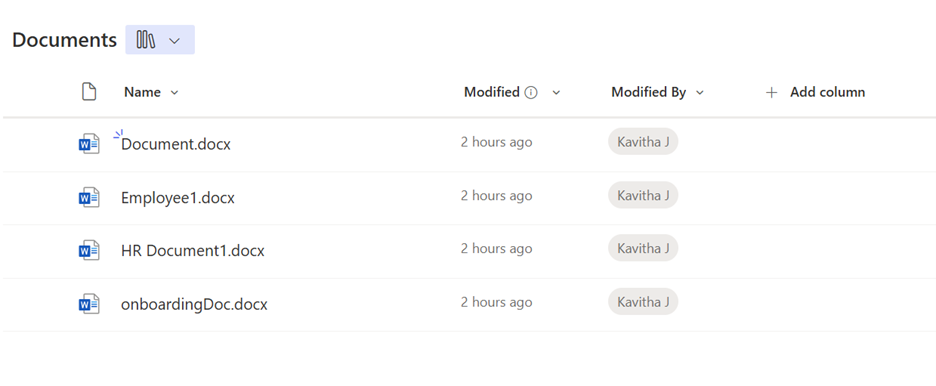
Flat Views Using “Show All Items Without Folders”
In view settings, if you choose “Show all items without folders,” SharePoint flattens the structure so you can filter and group across all documents, but the folder structure becomes invisible.

Image: “Document View Settings – Show All Items Without Folders”
Metadata Filtering (Best Practice)
If documents are tagged with a Project Name or similar metadata, SharePoint’s filter panel and custom views work beautifully, even in large libraries.
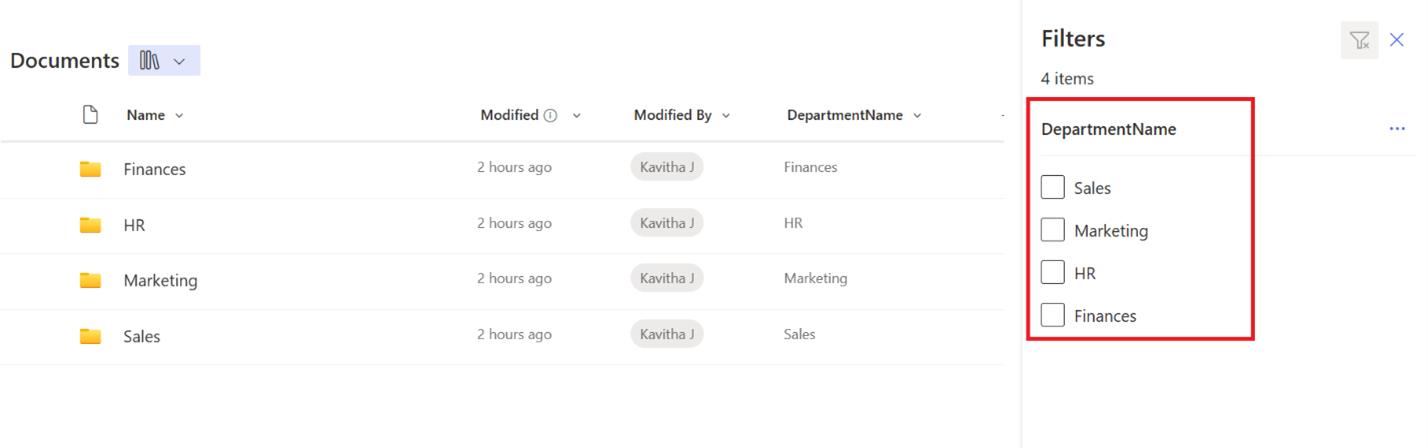
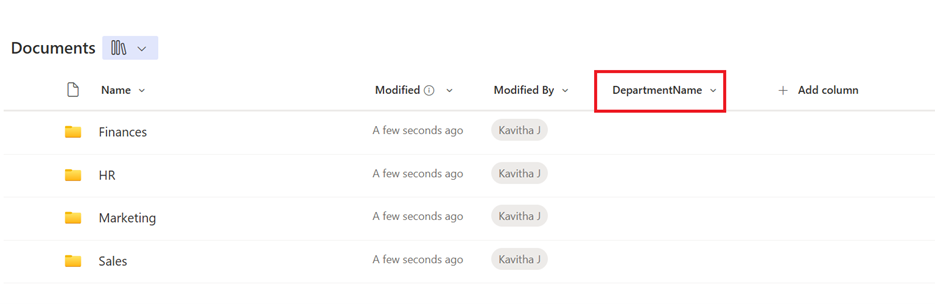
Image: “Filtering by DepartmentName Metadata”
What Doesn’t Work?
| Feature/Expectation | Limitation |
| Filter view by folder name | Not possible via view settings or built-in filters |
| “Folder Name” column in the view filter | Doesn’t exist out of the box |
| View settings → Folders → Filter specific folder | You can only choose: show in folders or without folders |
| Filters across subfolders in normal views | Doesn’t work unless the folder is open or the structure is flattened |
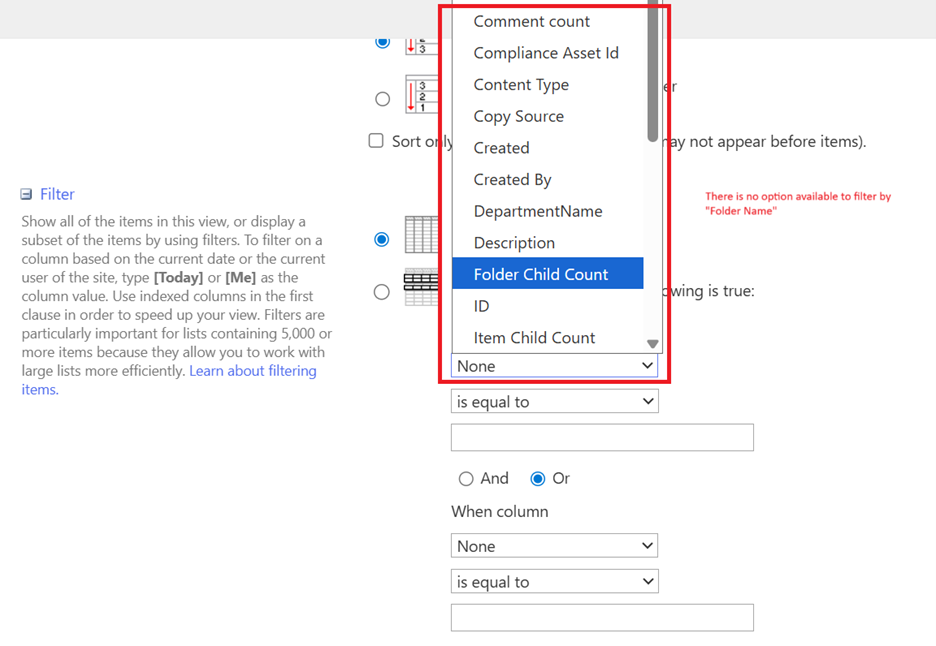
Image: “View Settings: No Folder Name Option in Filters”
Real-World Workaround: Metadata + PowerShell + Power Automate
To meet the project requirement (filter by folder), I implemented a workaround using metadata to simulate folder filtering – and automated the tagging.
The Plan
- Add a DepartmentName metadata column.
- Bulk-update all existing documents and folders based on their top-level folder.
- Automatically tag new files/folders using Power Automate
Step 1: Add the Metadata Column
- Go to the SharePoint document library
- Click + Add column → Single line of Text
- Name it: DepartmentName
- Optionally, add values like: HR, Finance, Sales, Marketing, etc.
Step 2: Use PowerShell to Tag Existing Files

Use PnP PowerShell to loop through items and set the DepartmentName (DepartmentName as Top-level Folder Name) metadata based on their folder path.
# Connect to your SharePoint site
Connect-PnPOnline -Url "https://xxxxx.sharepoint.com/sites/Centra" -UseWebLogin #replace it with your site

# Set library and column
$libraryName = "Shared Documents" #replace it with the Library name
$metadataColumn = "DepartmentName" #replace it with the coloumn name

# Get all items (files and folders)
$items = Get-PnPListItem -List $libraryName -Fields "FileRef", $metadataColumn

foreach ($item in $items) {
    $filePath = $item["FileRef"]  # e.g. /sites/Centra/Shared Documents/Document.docx
    Write-Host "`nItem ID $($item.Id) - Path: $filePath"

    # Split path into segments
    $segments = $filePath -split "/"
    $sharedDocIndex = $segments.IndexOf($libraryName)

    if ($sharedDocIndex -ge 0 -and ($sharedDocIndex + 1) -lt $segments.Count) {
        $candidate = $segments[$sharedDocIndex + 1]

        # If candidate contains a dot, treat as file => skip
        if ($candidate -notmatch "\.") {
            # It's a folder name, update
            $departmentName = $candidate
            Write-Host "Extracted Department: $departmentName"

            # update list item
            Set-PnPListItem -List $libraryName -Identity $item.Id -Values @{ $metadataColumn = $departmentName }
        }
        else {
            Write-Host "Skipping item ID $($item.Id) — directly under Shared Documents (file)."
        }
    }
    else {
        Write-Host "Skipping item ID $($item.Id) — no folder found after Shared Documents."
    }
}
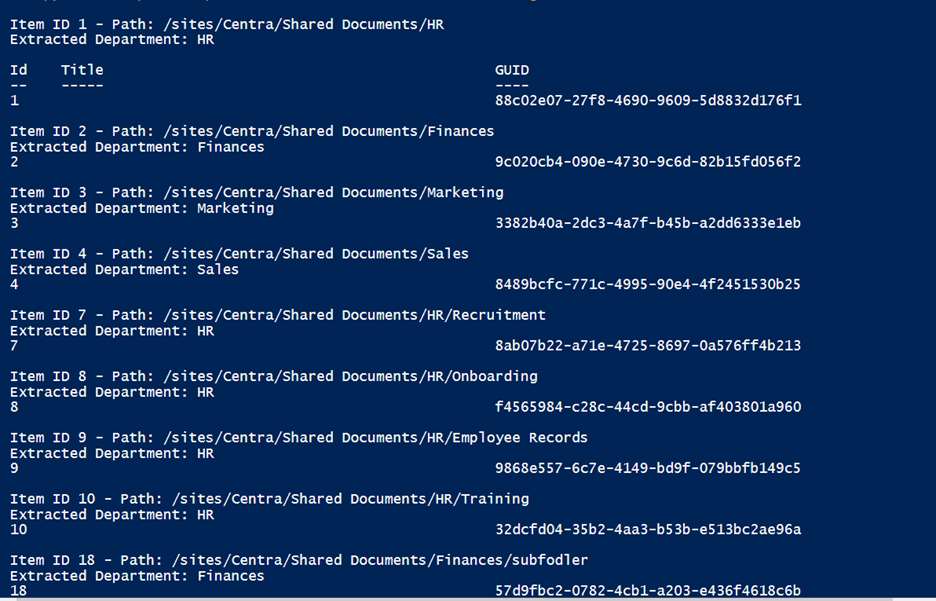
This script checks the item’s path and extracts the first folder name after Shared Documents. If the item is in the root (i.e., not inside a folder), it skips updating.
To help you understand, here are some example paths and how they update the “DepartmentName” metadata column:
| File or Folder Path | Script Behavior | Extracted DepartmentName |
| `/sites/Centra/Shared Documents/Document.docx` | Skipped – file in root | None |
| `/sites/Centra/Shared Documents/HR` | Folder – top-level | HR |
| `/sites/Centra/Shared Documents/HR/Employee Records/file.docx` | File inside the subfolder under HR | HR |
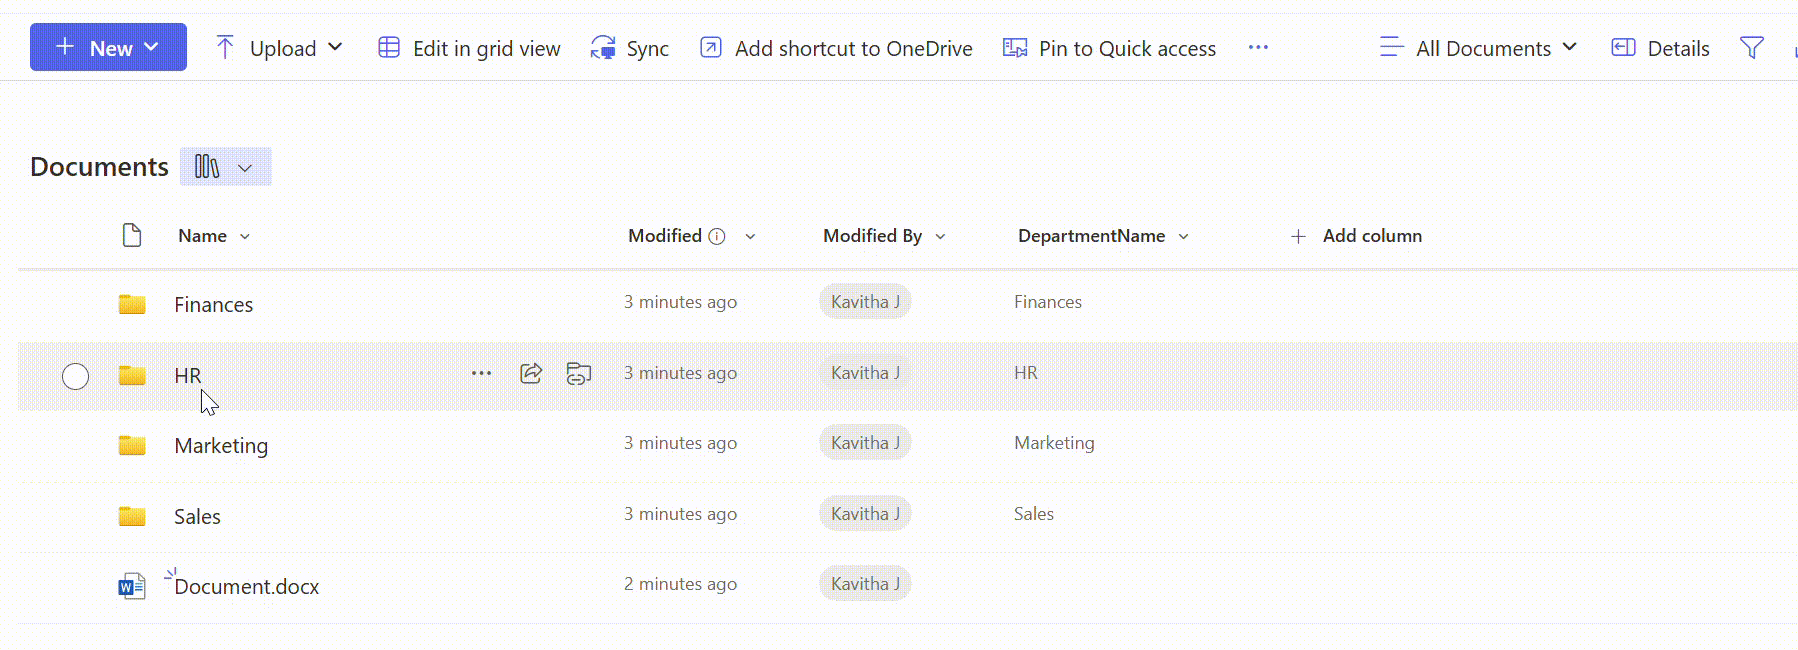
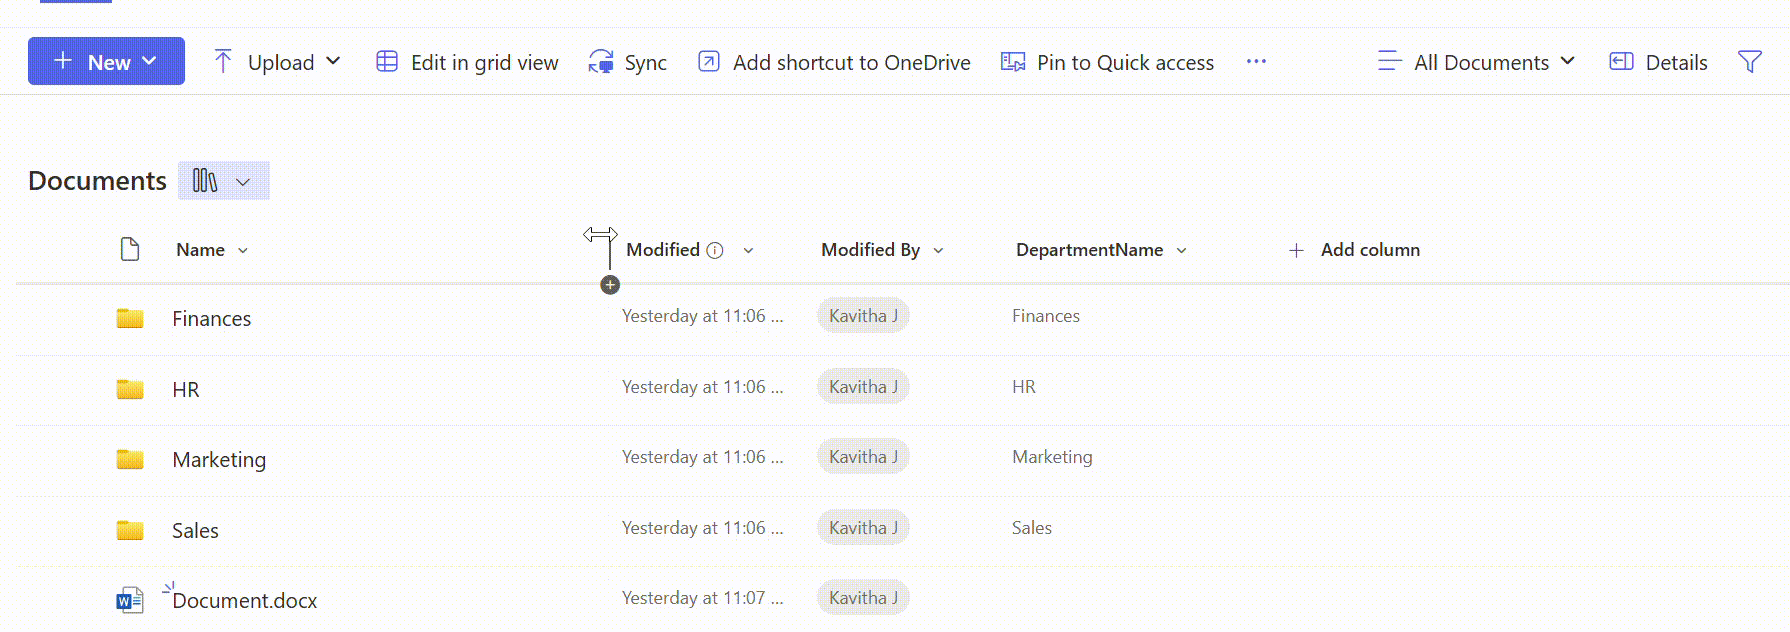
Result: Every document now has its DepartmentName metadata filled based on the top folder location.
Step 3: Power Automate – Auto-Tag Future Uploads
To ensure new documents are tagged automatically, set up a Power Automate flow:
Trigger:
- When a file is created (properties only)
- Library: Documents
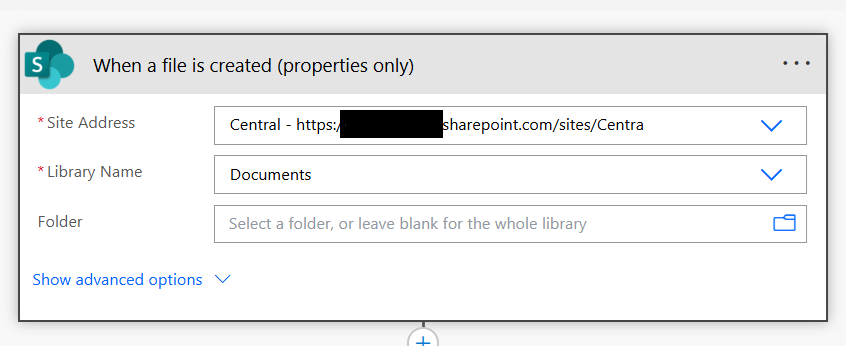
- Library: Documents
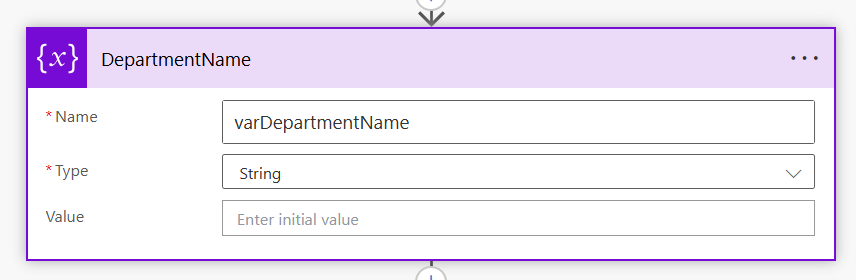
Action 1: Initialize a variable
- Name: varDepartmentName
- Type: String
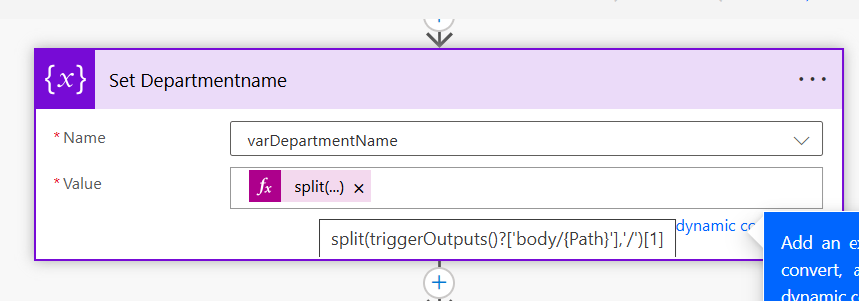
Action 2: Set a variable with the folder name
Use this expression:
-
split(triggerOutputs()?['body/{Path}'], '/')[1] - Adjust the index in the split() expression based on folder depth.
Example:
- Consider a Path from trigger: “Shared Documents/HR/Employee/file.docx”
- Split Result: [“Shared Documents”, “HR”, “Employee”, “file.docx”] -> “HR” is at index [1] in this case.
That’s why we use: split(triggerOutputs()?[‘body/{Path}’], ‘/’)[1]
This retrieves the top-level folder name (e.g., HR), which can be used to set metadata like DepartmentName.
Action 3: Update file properties
- ID: ID from the trigger
- DepartmentName: use the variable (varDepartmentName)
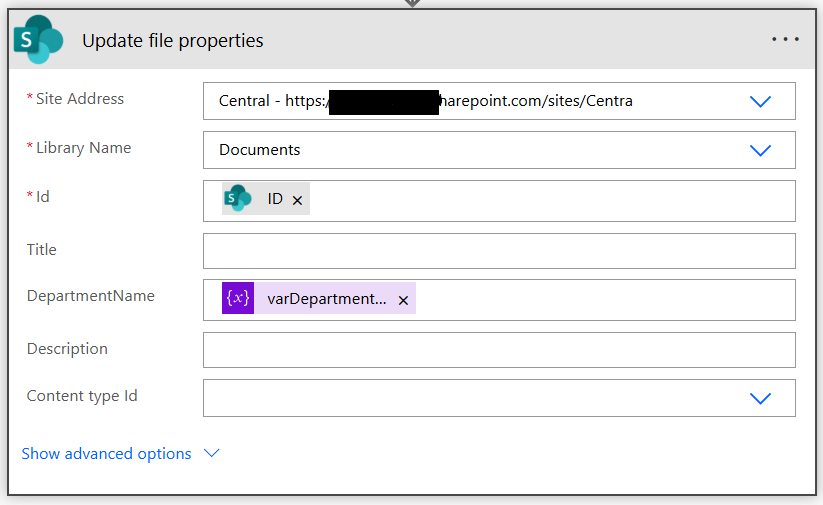
Result: New files or folders uploaded into folders will be auto-tagged with the correct Department name.
Gif: “Auto-tagging flow in action”
Step 4: Create a View for Each Project in the SharePoint Document Library
Now that all documents and folders are tagged, you can create filtered views like:
-
Department HR
Filter: DepartmentName = HR
-
Department Finances
Filter: DepartmentName = Finances
You can also group or sort by Department name.
Conclusion
While SharePoint doesn’t support folder-level filtering, it offers powerful filtering and organization when you shift from folders to metadata.
By combining PowerShell for existing files and Power Automate for future uploads, you can create a scalable and maintainable structure that:
- Works across 5,000+ items
- Enables dynamic filtering and views
- Simplifies user experience
Pro Tip: Index your DepartmentName column to improve performance in large libraries.