In some situations, we need to set a maximum zoom scale or disable zoom completely on our website. This blog explains how to achieve that behavior in Optimizely Spire.
In Optimizely, the meta viewport tag rendered on the page comes from the src\FrontEnd\modules\server-framework\src\PageRenderer.tsx file. However, since this file is part of the server framework, we cannot override it directly.
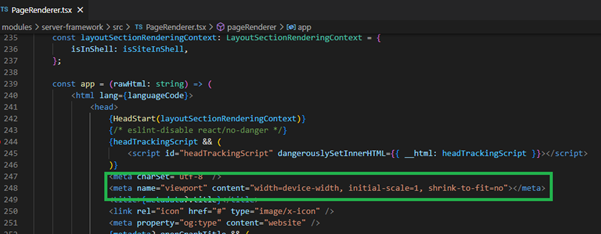
The meta viewport tag in the PageRenderer.tsx file is as per below. Optimizely sets the initial zoom scale to 1 by default and does not specify a maximum scale value.
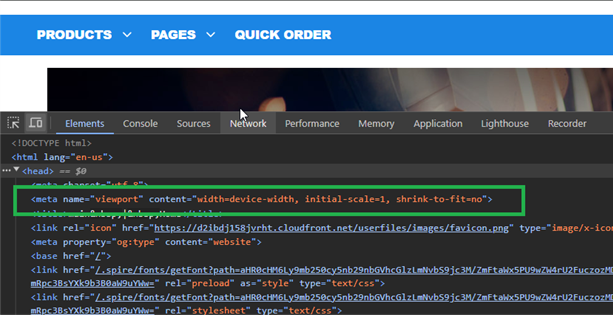
In the browser, it looks as shown below.
Due to limitations, we cannot override the PageRenderer.tsx file, so we have another option to update the meta viewport.
That option is the utility file addMaximumScaleToViewport.ts. This file is present under src\FrontEnd\modules\client-framework\src\Common\Utilities\addMaximumScaleToViewport.ts. Using this utility, we can customize the zoom level.
How to Override the Page Render File in Our Blueprint/Theme
- Assume you have already created a blueprint under `src\FrontEnd\modules\blueprints`, for example, `CustomBlueprint`.
- Inside the blueprint, create the following folder structure: `src > Overrides > Common > Utilities`
- Then copy the utility file from `src\FrontEnd\modules\client-framework\src\Common\Utilities\addMaximumScaleToViewport.ts` directory and add that file inside `src\FrontEnd\modules\CustomBlueprint\src\Overrides\Common\Utilities`
How to Make Changes to the File
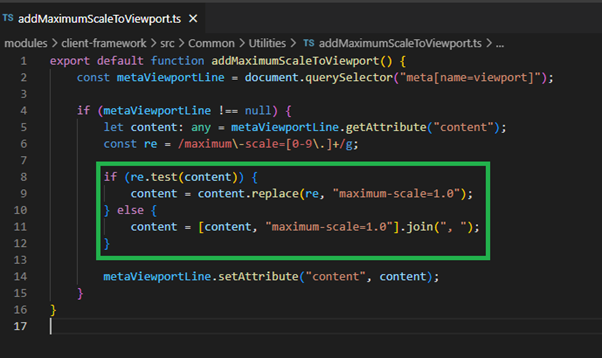
We need to update the highlighted section. Modify the maximum-scale attribute to reflect the correct zoom value regardless of the desired zoom level.
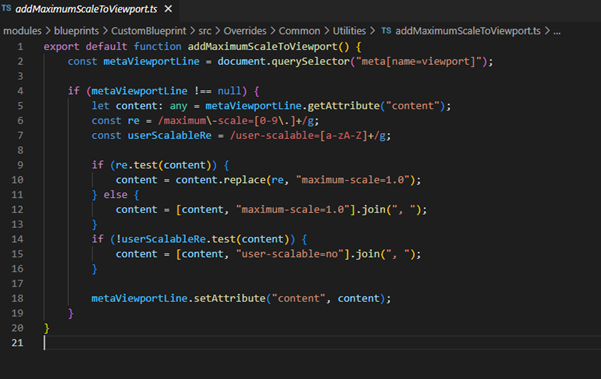
You can also add the user-scalable attribute with the maximum-scale option here.
How to Call the Utility File
By default, Optimizely does not call this utility file on all pages.
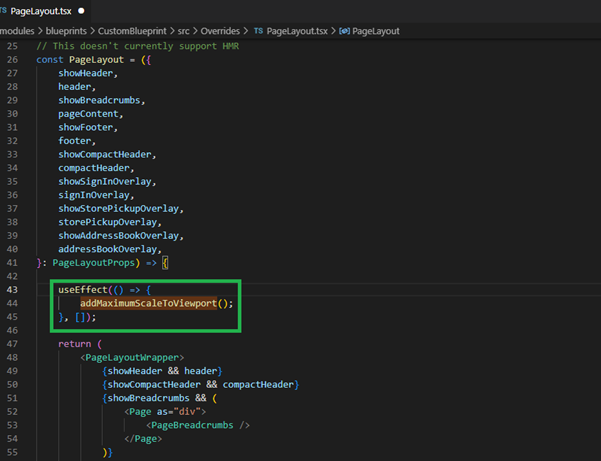
To ensure it renders on every site page, we can call the utility file in the PageLayout.tsx file.
We can use PageLayout.tsx file to call utility file. This file is present in src\FrontEnd\modules\content-library\src\PageLayout.tsx directory.
To override this file, add it to the src\FrontEnd\modules\blueprints\CustomBlueprint\src\Overrides directory.
Now you have the overridden file in the mentioned directory.
Then call the utility as shown below.
In certain situations, there may be a need to either prevent zooming on a website or to provide a zoom option. This blog offers a straightforward approach to customizing zoom levels in Optimizely Spire.


Thanks, Purushottam Rathi for this informative blog. This is really helpful while working on zooming issues in optimizely.
Nice Information, It will help a lot.
Thanks for your comment, Prasad Joshi! I really appreciate it!
Thanks for your comment, Sunidhi Sahu! I really appreciate it!