
If you use ServiceNow as your knowledge management platform, you might want to make your knowledge articles searchable and accessible from Microsoft Search. Microsoft Search is a unified search experience that helps you find what you need across your organization, including files, sites, people, and more. By connecting your ServiceNow knowledge articles to Microsoft Search, you can enable your users to find and request them directly from the Microsoft 365 apps.
In this blog post, we will show you how to configure ServiceNow knowledge articles as a data source for Microsoft Search using the Microsoft Graph connector. The Microsoft Graph connector for ServiceNow knowledge articles allows you to index your knowledge articles and their properties, such as name, description, category, and availability. You can also apply filters and refinements to your knowledge articles to make them more relevant and discoverable for your users.
To configure ServiceNow knowledge articles for Microsoft Search, you will need the following prerequisites:
- A Microsoft 365 tenant with Microsoft Search enabled.
- A ServiceNow instance with knowledge articles that you want to make searchable.
- An admin account for both Microsoft 365 and ServiceNow.
Once you have the prerequisites, you can follow these steps to configure ServiceNow knowledge articles for Microsoft Search:
Step 1: Create a data source in Microsoft 365 Admin Center
The first step is to create a data source in the Microsoft 365 Admin Center that will connect to your ServiceNow instance and index your knowledge articles. To do this, follow these steps:
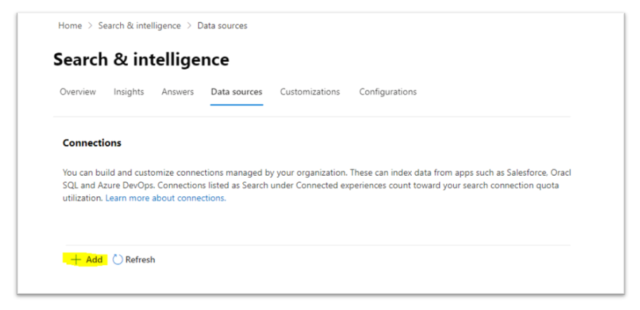
- Go to Microsoft 365 Admin Center – https://admin.microsoft.com/
- Navigate to “Settings” > Search & Intelligence > Data Sources
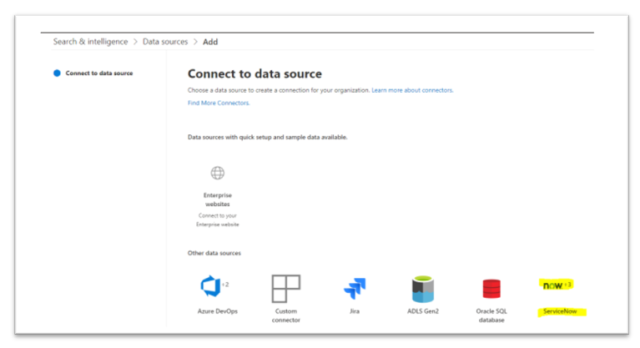
- Click “Add”
- Click “ServiceNow”
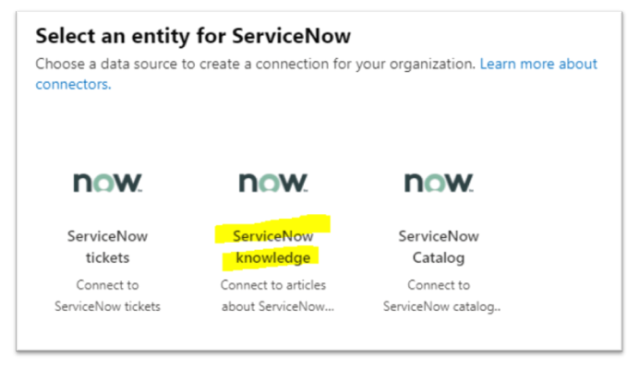
- Select “ServiceNow knowledge”
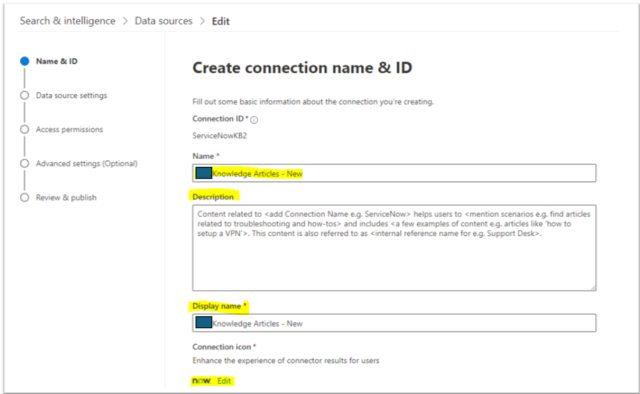
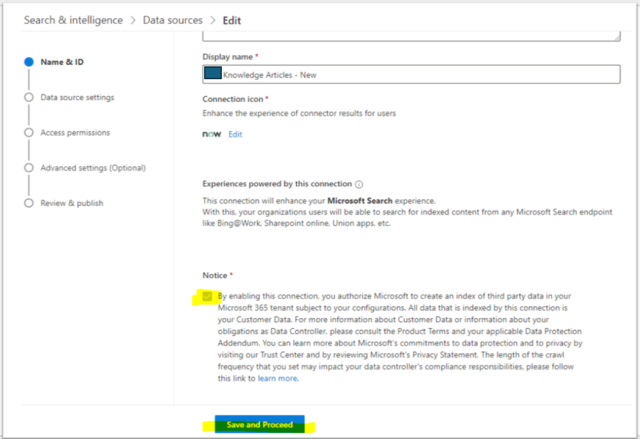
- Fill out Name, Description, Display name, Upload logo
- Scroll down, Check the box under “Notice” Click “Save and Proceed”
Step 2: Configure the connection details and authentication
The next step is to configure the connection details and authentication for your ServiceNow instance. To do this, add the following information:
- ServiceNow instance URL
- Select the authentication type: ServiceNow OAuth
- Client ID
- Client Secret

- Click “Sign in”
- You will see “Connection Successful” message
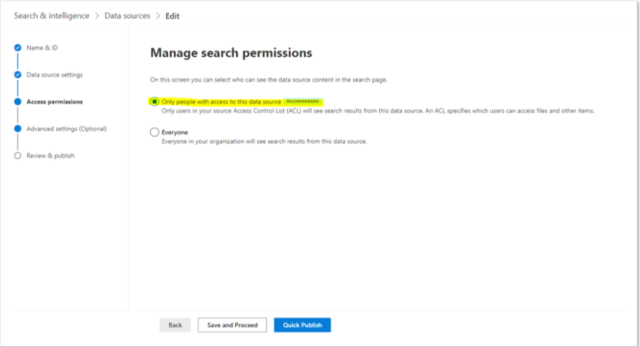
- Select “Only people with access to this data Source” option

Step 3: Configure the properties and query string
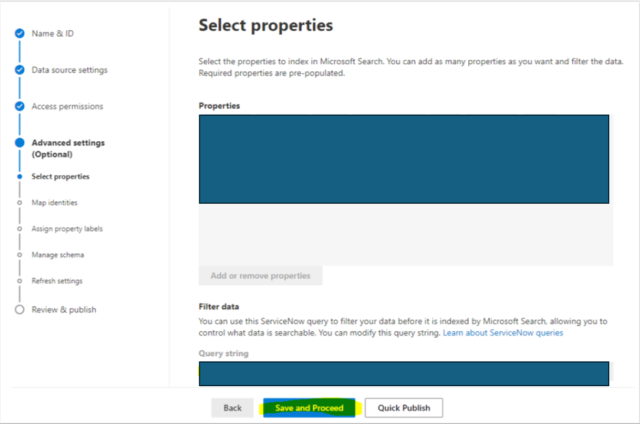
The third step is to configure the properties and query string for your knowledge articles. The properties are the metadata fields that will be indexed and displayed for your knowledge articles in Microsoft Search. The query string is the filter that will be applied to your knowledge articles to limit the scope of the data source. To do this, follow these steps:
- Make sure you have all the needed properties in this section. You can add or remove properties as needed.
- Apply the needed “Query string” to filter your data.
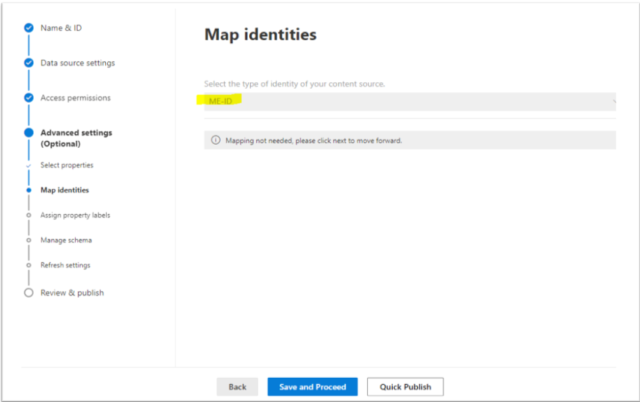
- Select “ME-ID” – If you choose Microsoft Entra ID as the type of identity source, the connector maps the Email IDs of users obtained from ServiceNow directly to UPN property from Microsoft Entra ID.
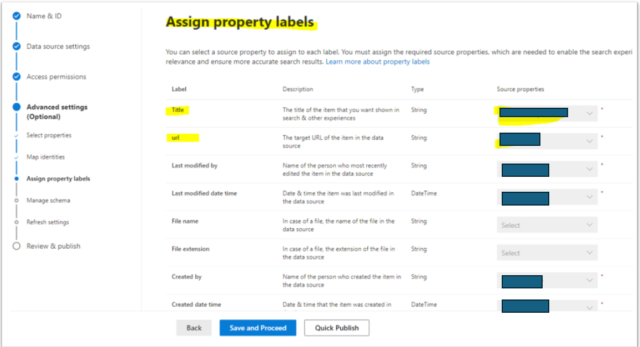
- Assign Property labels – You can assign semantic labels to your source properties. The properties on this page are pre-selected based on your data source, but you can change this selection if there’s a different property that is better suited for a particular label.
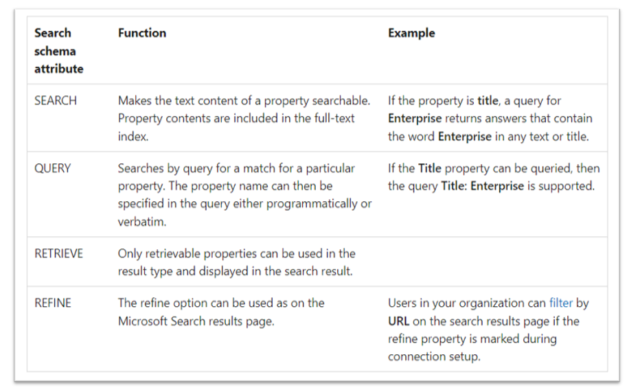
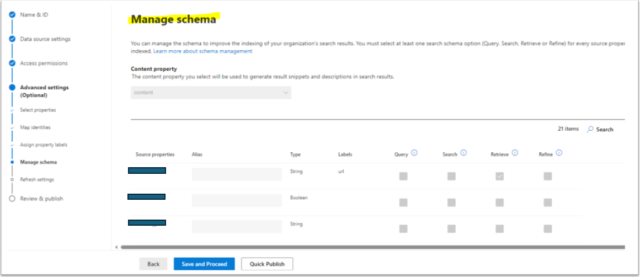
- Manage schema – You can set the search schema attributes to control the search functionality of each source property. A search schema helps determine what results display on the search results page and what information end users can view and access.
Search schema attributes include options to Query, Search, Retrieve, and Refine.
Note: You can’t edit this once Connection is configured, so you will need to make properties refinable if you would like to have filters in Verticals. (I learned this the hard way by re-configuring the entire connection)
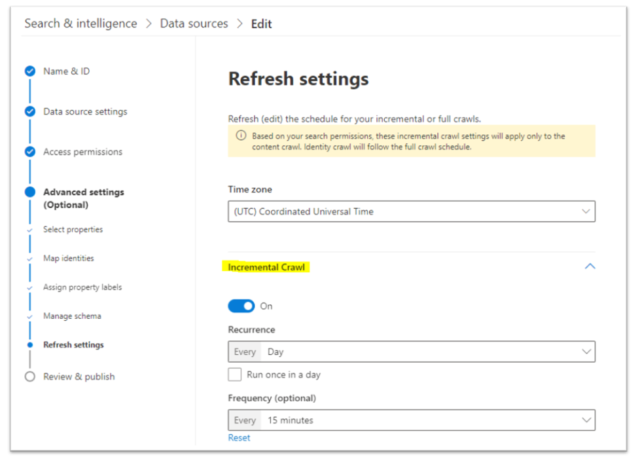
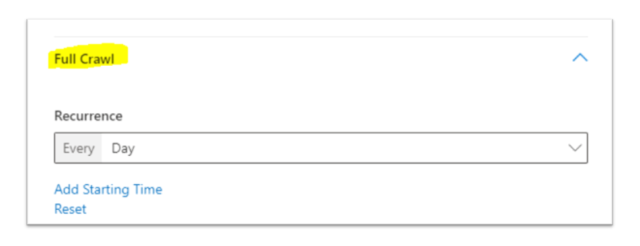
Step 4: Configure the crawl schedule
The fourth step is to configure the crawl schedule for your data source. The crawl schedule determines how often your knowledge articles will be updated in Microsoft Search. You can choose between incremental crawl and full crawl. Incremental crawl will only index the changes since the last crawl, while full crawl will index all the knowledge articles in your data source. To do this, follow these steps:
- Set the schedule for your Incremental Crawl and Full Crawl
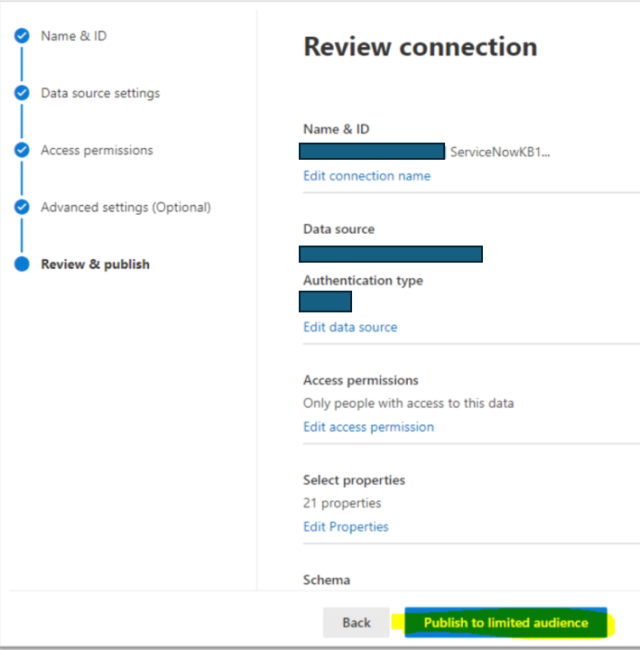
Step 5: Review and publish your data source
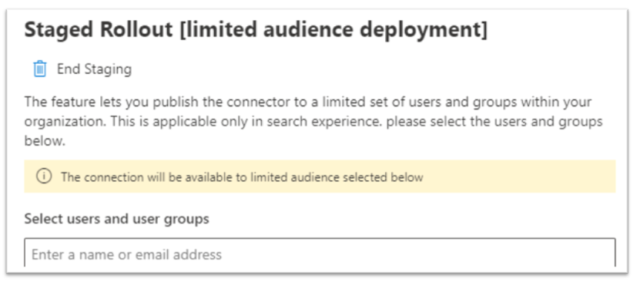
The final step is to review and publish your data source. You can preview some of the knowledge articles that will be indexed and check the connection status. You can also publish your data source to a limited audience for testing purposes before making it available to everyone in your organization. To do this, follow these steps:
- Here you can “Publish to limited audience” and add users names who can view ServiceNow Search Results in Microsoft Search
Once you have configured the connection, you can enjoy the benefits of having your ServiceNow knowledge articles integrated with Microsoft Search. Your users can easily find relevant information from ServiceNow within Microsoft Search results, without leaving their familiar Microsoft 365 apps and services. This can improve their productivity, collaboration, and satisfaction.
We hope this blog post was helpful and you learned how to configure ServiceNow knowledge articles for Microsoft Graph Connector. If you have any questions or feedback, please let us know in the comments section below.
For more information, please refer to the Microsoft Graph connector documentation and the ServiceNow connector documentation.
Disclaimer: Parts of this blog post were generated with the help of artificial intelligence.