
I (somehow) only recently discovered and began using the REST Client Visual Studio code extension created by Huachao Mao (GitHub: https://github.com/Huachao/vscode-restclient). It’s essentially an in-editor, Markdown-like HTTP request authoring and execution tool that allows developers to build a request (or multiple requests) in .http and/or .rest files. Think of it as a more Spartan, utilitarian version of Postman that lives right in the Visual Studio Code editor. Here’s a quick animation depicting the process of writing out and sending a simple request:
Environments and Variables
The first thing you’ll want to do after installing the extension is set up your environments and variables. The REST Client extension handles environment variables (secret or otherwise) in a way that I consider to be elegant, which is to say it doesn’t handle them at all (and that’s a good thing!) 😉. The extension pulls environments and variables from Visual Studio Code settings (read: the settings.json file) which, upshot, is never (er…at least shouldn’t ever be) under source control; developers need not worry about committing secrets to the repository. Unlike Postman, the REST Client extension doesn’t concern itself with the handling, storing, or transmission of variables. Granted, there’s a convenience tradeoff: developers must share their variables and secrets using an external tool or service. For sensitive values, that should be something like Azure Key Vault, CyberArk, etc.
Here’s an excerpt from a sample Visual Studio Code settings.json file that defines a few variables in three different environments:
{
  ...
  "rest-client.environmentVariables": {
    "$shared": {
      "shared-variable-1": "foo",
      "shared-variable-2": "buzz",
      "shared-variable-3": "fizz"
    },
    "dev": {
      "variable-1": "foo",
      "variable-2": "buzz",
      "variable-3": "fizz"
    },
    "uat": {
      "variable-1": "foo",
      "variable-2": "buzz",
      "variable-3": "fizz"
    },
    "prd": {
      "variable-1": "foo",
      "variable-2": "buzz",
      "variable-3": "fizz"
    }
  }
  ...
}
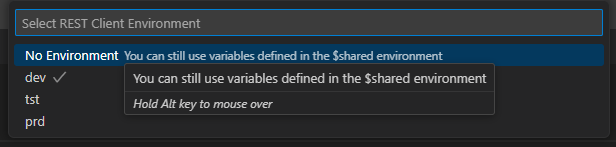
Variables defined in the $shared section are available across any and all environments (or if No Environment is selected as the current environment). While viewing a .http or .rest file in the editor, to switch between environments, developers can click on the current environment in the Visual Studio Code status bar (in the lower-right, by default)…

dev is the currently selected environment).…or they can use the hotkey Ctrl + Alt + E:
Requests
The extension supports a wide range of request types. You can execute requests by clicking the Send Request link button (which the extension injects into the editor, just above the HTTP method) or by using the hotkey Ctrl + Alt + R with your cursor positioned within the request block (I usually place my cursor on the line with the HTTP method). As shown in the GIF (yes, it’s a hard “G,” folks), above, responses appear in a new, side-by-side window in Visual Studio Code. Here are a few sample requests:
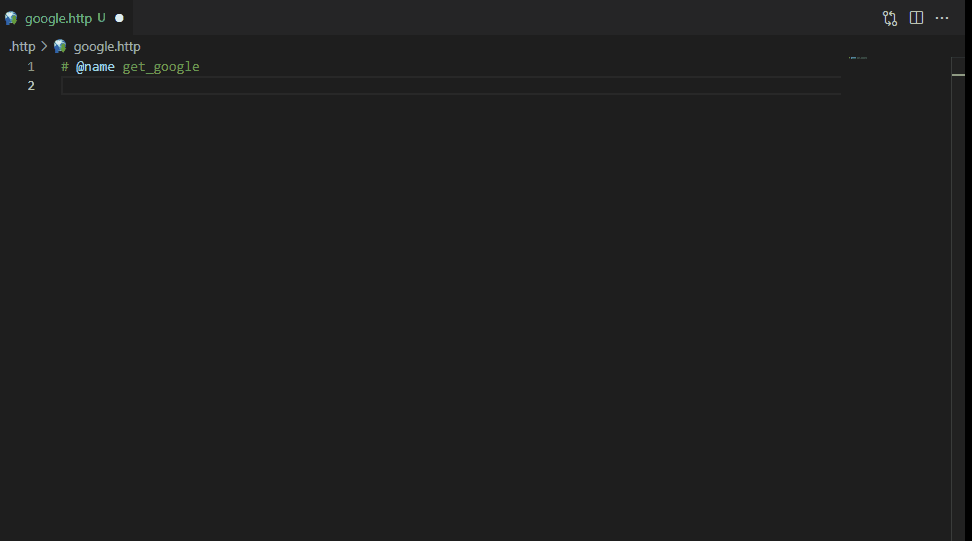
A simple GET:
# @name get_google
GET https://www.google.com
A JSON POST to a test API:
# @name post_test_api
POST https://jsonplaceholder.typicode.com/posts
Content-Type: application/json

{
    "title": "Test Post",
    "body": "This is a test post.",
    "userId": 123
}
The extension supports multiple requests in a single .http or .rest file. It’s often useful to group related and/or dependent requests in the same file. Consider this next example which makes a POST request to get a Content Hub access token, stores the access token in a variable, and then uses the variable in a second request to query for assets in Content Hub. Note the use of the following variables (which, again, are stored in Visual Studio Code’s settings.json file in a section specific to the extension):
contentHubUrlcontentHubUsernamecontentHubPasswordclientIdclientSecret
# @name content_hub_access_token
POST {{contentHubUrl}}/oauth/token
Content-Type: application/x-www-form-urlencoded

grant_type=password
&username={{contentHubUsername}}
&password={{contentHubPassword}}
&client_id={{clientId}}
&client_secret={{clientSecret}}

###

@content_hub_token={{content_hub_access_token.response.body.access_token}}

# @name get_content_hub_assets
GET {{contentHubUrl}}/api/entities/query?query=Definition.Name=='M.Asset'
Authorization: Bearer {{content_hub_token}}
When run sequentially, the first request sets the content_hub_token variable and the second request gets the variable and uses the value in its Authorization header to authenticate against Content Hub to pull the assets.
Pros and Cons
I can’t cover all the features of this extension in a single blog post–there are just too many 😅. For full documentation of the REST Client extension, please see the project’s GitHub page here: https://github.com/Huachao/vscode-restclient. That said, here are some additional thoughts (both positive and negative) after having used the extension on a few projects now:
Pros ✅
- If Visual Studio Code is already your editor of choice, then the REST Client extension is just a few clicks away–no need to install and use an external application to send your HTTP requests.
- The clean, Markdown-like syntax for building requests is intuitive and developer-friendly.
- The ability to dynamically set variables based on responses and use those variables in downstream requests allows for powerful request chaining.
- The
.httpand.restfiles can be safely committed to source control and shared with your development team. - Defining and swapping between environments is quick and easy.
- The extension displays “red squiggles” under variables it can’t resolve in a request file (which usually means the variable isn’t defined or you have the wrong environment selected).
- Responses are displayed in a separate, side-by-side window and include all the headers and the response payload, if applicable (with collapsible sections ✨).
- The extension supports different variable types: environment (including shared), file, and prompt (meaning the extension asks the user to enter a value when the request is executed).
- Hotkey support can boost developer productivity.
Cons ❌
- If you’re not using Visual Studio Code, then this extension won’t be too useful.
- At the time of writing, to my knowledge, there isn’t a way to execute several requests in sequence by just executing the “first” request–requests have to be executed one at a time (and in the correct order, depending on upstream dependencies).
- If you’re committing the
.httpand/or.restfiles to source control, other developers on your team will need the extension installed, too. - Developers must share environment variables (especially sensitive ones) outside of the extension (and outside of Visual Studio Code entirely).
- I’ve only noticed it happening when my response payloads are quite large, say, ~1 MB (and, in fairness, this could be a Visual Studio Code thing), but I have experienced occasional crashes of Visual Studio Code while attempting to send subsequent requests.
Closing Thoughts
Developers have plenty of options (and preferences) when it comes to writing and executing HTTP requests for development or testing purposes. To list a few of the tools I find myself using most often (in addition to the REST Client extension, of course): cURL (👴), PowerShell (usually Invoke-WebRequest or Invoke-RestMethod), one-off console applications written in C#, Python, etc., and yes, Postman. Each of these tools has its merits and developers should use whatever tool works best for them and their team(s). The REST Client extension is simply another tool in our toolbox.
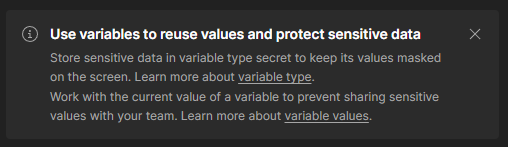
While this post isn’t about Postman, I wanted to briefly discuss how Postman handles the syncing of environment variables and how that process contrasts with the REST Client extension’s handling of variables (and remember, the extension doesn’t, really handle variables other than reading them from settings). If you’re using Postman’s convenient workspace syncing features to replicate environment variables and requests across different machines (and/or the Postman web UI), be aware that, depending on how you’ve configured your environment variables, sensitive values can potentially be transmitted over the wire. Yes, the HTTP traffic is encrypted using SSL and, yes, the values are encrypted at rest on Postman’s servers but, still–there’s a secret going “outside the wire” and getting stored by a third-party system 😬. To avoid secrets being transmitted, don’t set the Initial value field for variables, and instead exclusively work with the Current value field. The Postman web and desktop clients do call this out (on the environment interface; see the screenshot below), but, arguably, it isn’t as obvious as it should be to developers.
Due to its convenience, straightforward syntax, implicit use of Visual Studio Code settings to delegate the management of environments and variables, and its overall rich feature set, I’ve found the REST Client extension to be a great tool to have when working with the APIs I typically encounter when building modern web applications. Composable Sitecore solutions, for example, can involve integrations with various Sitecore SaaS products including Content Hub, Experience Edge, XM Cloud, XM Cloud Deploy, Sitecore Search, etc. Having the ability to commit, for example, a content-hub.http file or an experience-edge.http file to source control to describe requests and share them with your development team can clearly be useful.
If you haven’t already, go install the REST Client extension and check it out for yourself! 👨💻