Burp Suite is a popular tool for web application testing, and one of its most powerful features is the Intruder. The Intruder allows you to perform automated tests on a target, such as brute-forcing or parameter fuzzing. In this blog, we’ll take a closer look at Intruder in Burp Suite and explore some best practices for using this tool effectively.
Getting Started with Intruder
Before you can use the Intruder, you’ll need to have Burp Suite installed and running. Once you’ve done that, navigate to the “Intruder” tab in the top navigation bar. From here, you can configure your test and start the scan. You’ll need to configure your test. Navigate to the “Intruder” tab and select the “Positions” subtab. This is where you’ll specify the parts of the request that you want to target.
To do this, select the “Add” button to add a new position. You can select either “Sniper” or “Battering Ram” mode, depending on the type of attack you want to perform. In “Sniper” mode, you’ll only target one parameter at a time, while in “Battering Ram” mode, you’ll target multiple parameters simultaneously.
Once you’ve selected your mode, you’ll need to specify the attack type. Burp Suite supports several different types, including brute force, cluster bomb, and pitchfork. You can also specify the payload type, which is the data you want to send to the target. For example, if you’re performing brute-forcing, the payload would be a list of potential passwords.
Configuring the Test
To configure your test, you’ll need to provide Burp Suite with the necessary information. This includes:
- The target – This is the URL of the target you want to test.
- The payload – This is the data you want to send to the target. For example, if you’re performing a brute force test, the payload would be a list of potential passwords.
- The test type – This is the type of test you want to perform. Burp Suite supports several different types, including brute force, cluster bomb, and pitchfork.
Once you’ve configured your test, you can start the scan by clicking the “Start attack” button.
Interpreting the Results
Once the scan is complete, you’ll be presented with a list of the requests that were sent to the target. This can be overwhelming at first, but it’s important to take the time to carefully review the results.
One of the most important things to look for is any unexpected or unusual behavior. For example, if the Intruder discovers a password that shouldn’t be publicly accessible, this could be a sign of a security vulnerability. Similarly, if the Intruder discovers a parameter that appears to be vulnerable to SQL injection or another common test vector, this could be cause for concern.

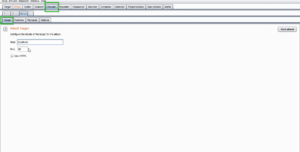
Fig 1: Target Tab in Burp Suite
Best Practices for Using Intruder
To get the most out of Intruder, it’s important to follow some best practices. Here are a few tips to keep in mind:
- Make sure you have permission to perform the test. Unauthorized access to a target is illegal and can result in serious consequences.
- Use a variety of payloads. Don’t just rely on a single list of potential passwords – mix things up to ensure that you’re covering all your bases.
- Take the time to review the results carefully. Don’t just look at the requests that were successful – make sure to also review the failed requests to see if there are any patterns or vulnerabilities that you may have missed.
- Don’t rely solely on automated tools. While Intruder is a powerful tool, it’s important to also perform manual testing to ensure that you’re catching everything.
Conclusion
Intruder is a powerful tool for web application testing, allowing you to perform automated tests on a target and identify potential security vulnerabilities. By following best practices and carefully reviewing the results, you can make the most out of Intruder and improve the security of your web applications. However, it’s important to keep in mind that Intruder should be used responsibly and with permission to avoid any legal issues or ethical concerns.

