In the previous blog, I demonstrated how to create a new component in JSS Next.js app. If you must have noticed, I added it to an existing Main placeholder, however most of us come across scenarios where we have to create new placeholders to build the desired page design.
So, in this blog, I will add a new placeholder and display it in experience editor to facilitate adding more components in it.
Create Placeholder in Sitecore
Create a new placeholder in path: /sitecore/layout/Placeholder Settings/Project/<Project-Name>/<Placeholdername>
I have created placeholder with the key : jss-container

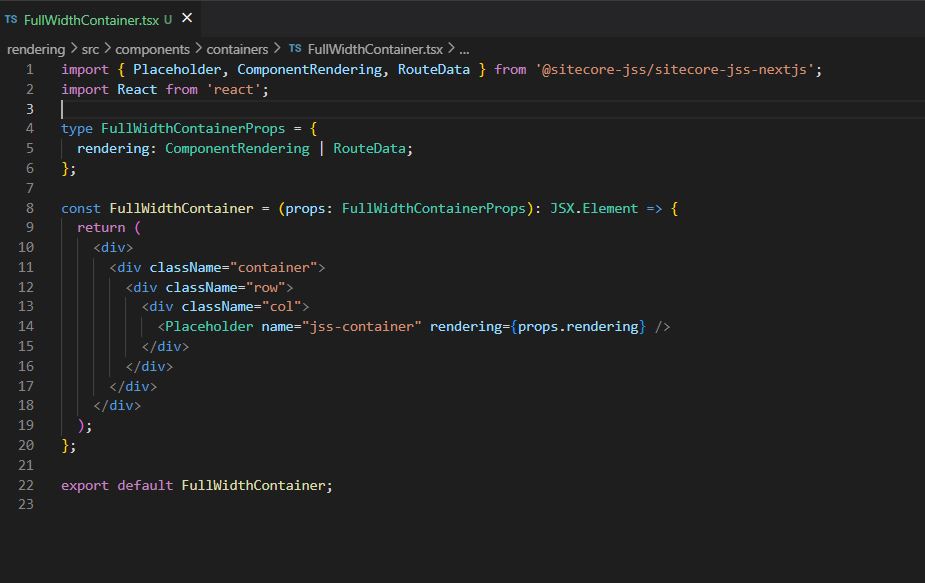
Create placeholder in Code
Now, add the placeholder in our frontend component code.

- To know how to create a JSON rendering, please refer to my previous blog.
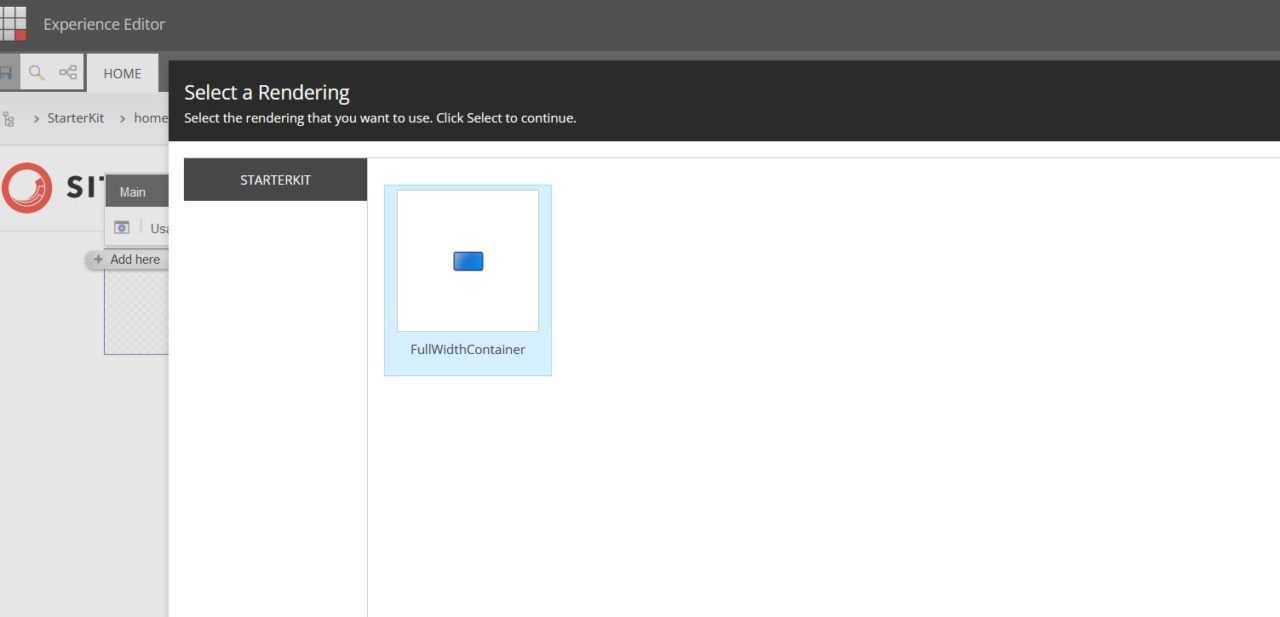
Being a conventional Sitecore developer, one would directly jump on to adding components to the newly created placeholder in EE. So, now I added the rendering “FullWidthContainer” in the jss-main placeholder in Experience Editor.
The rendering item was already added to “Allowed Controls” field in Main placeholder: /sitecore/layout/Placeholder Settings/Project/<project-name>/jss-main to make it available here.

After adding the rendering and saving changes, I got the below error instead of getting the newly added placeholder.

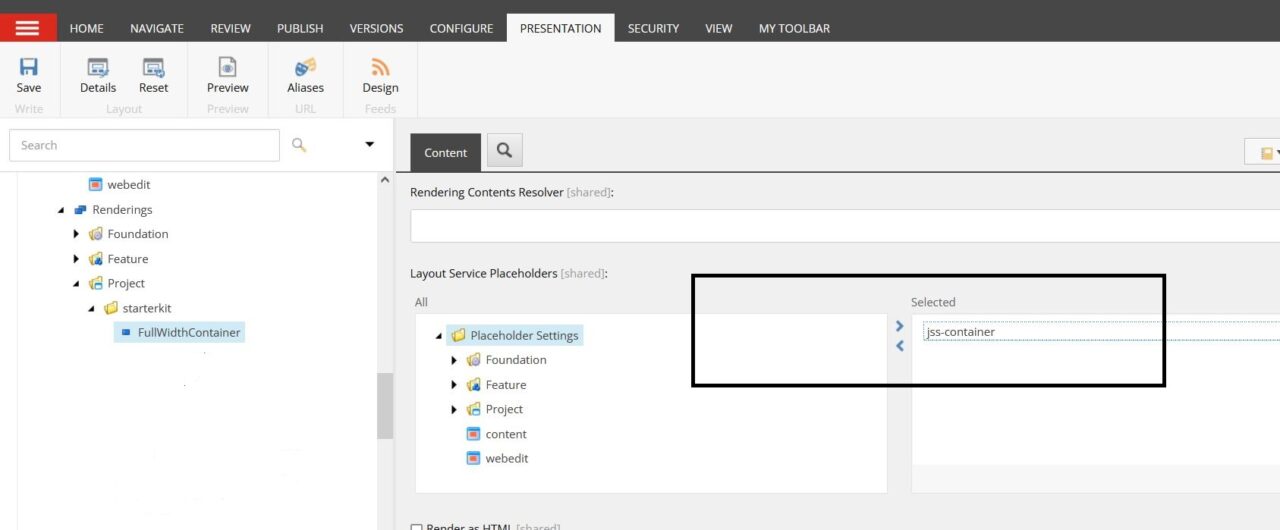
This error was bound to happen because we are missing one configuration/setting that has been introduced with Sitecore JSS. We have to add all the newly created nested placeholders in a field called “Layout Service Placeholders” in the respective Sitecore rendering.
To resolve this issue, make sure to select the new placeholder item in “Layout Service Placeholders” MultiList field of JSON rendering item which contains the placeholder code.

Once placeholder is added to layout service placeholder field, it will render on the page and will allow to add other components to it.

Following the same steps, you can add multiple placeholders to a component which is imperative when creating a nested structure.
__PRESENT
__PRESENT
__PRESENT
__PRESENT
__PRESENT
__PRESENT
__PRESENT
__PRESENT

