Introduction:
Playwright Test was developed primarily to meet the requirements of end-to-end testing. Chromium, WebKit, and Firefox are just a few of the contemporary rendering engines Playwright supports. Test with native mobile emulation of Google Chrome for Android and Mobile Safari on Windows, Linux, and macOS locally or on CI, headed or headless.
In this Blog, we will learn about different built-in reporters in playwright.
Note: In this Blog, we use the default example test created by playwright during Installation. You can refer to my previous blog to Setup Playwright and view the example test.
The Beginner’s Guide to Playwright Setup
Playwright Reporting:
An integrated reporting mechanism makes Playwright unique in its field. Based on your needs and use case, playwright reporting facilitates you huge flexibility in how you can generate reports in various patterns.
You may either add a script to the configuration file or use the –reporter command line option to generate these reports.
npx playwright test --reporter=line
To generate reports from Cl, you can either use Playwright reporting or define the reporters programmatically in the configuration file, i.e., playwright.config.js.
// Filename: playwright.config.js
const config = {
    reporter: 'line',
};
module.exports = config;
Multiple Reporters:
Multiple reporters may be used simultaneously. For instance, you can use “list” for attractive terminal output and “json” to obtain a comprehensive json file containing the test results.
// Filename: playwright.config.js

const config = {
  reporter: [
    ['list'],
    ['json', {  outputFile: 'test-results.json' }]
  ],
};
module.exports = config;
Reporters on Cl:
You can also create several reports on CI using this form of Playwright reporting.
The default report on CI is “dot”, one of the reports that won’t clutter the log or console with too much output.
// Filename: playwright.config.js
const config = {
    // Concise 'dot' for CI, default 'list' when running locally
    reporter: process.env.CI ? 'dot' : 'list',
};
module.exports = config;
Built-In Reporters:
Following are the playwright built-in reporters:
- List Reporter
- Line Reporter
- Dot Reporter
- HTML Reporter
- JSON Reporter
- JUnit Reporter
We’ll now take a closer look at Playwright Reporting’s built-in reporters.
List Reporter:
For each test executed, a line will be printed, and the results will be displayed in the console or terminal.
Command Line
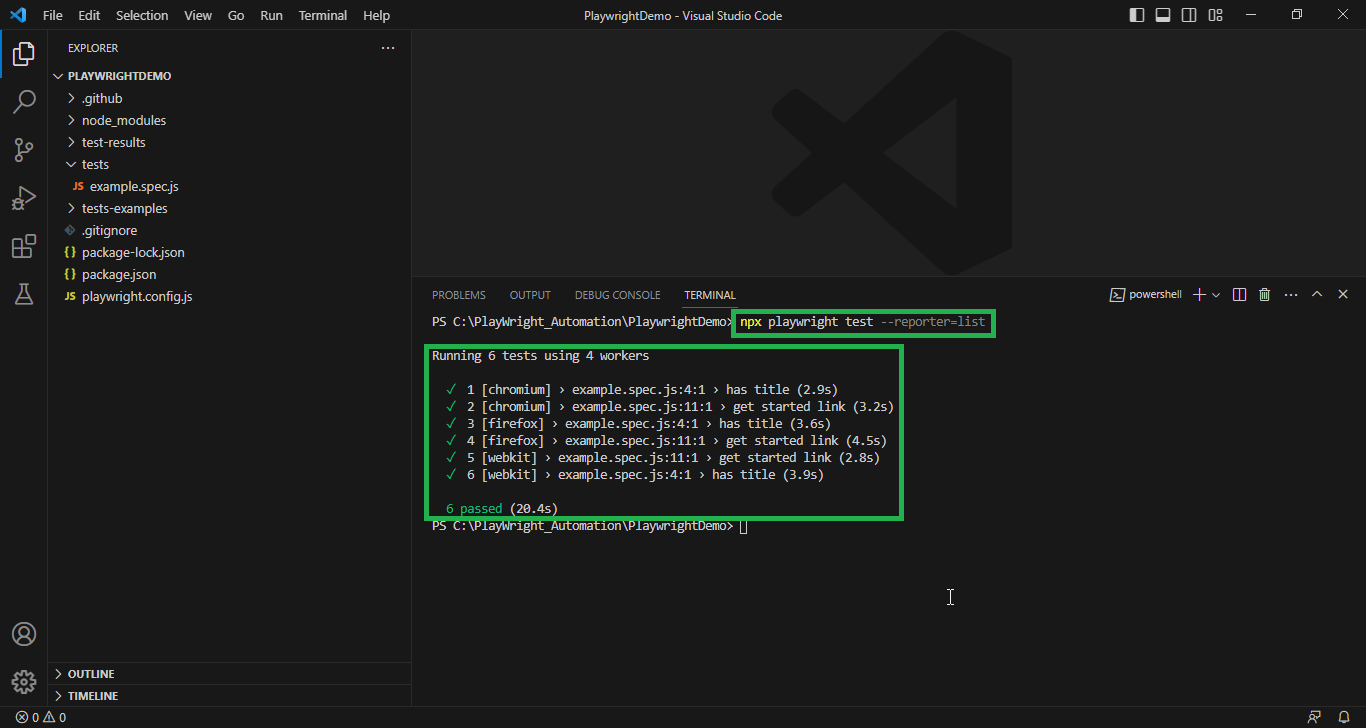
Let’s run the test to see the results as there are already 2 example tests in the example.spec.js file.
npx playwright test --reporter=list
Six tests have been executed, and the console displays a list of them.
Playwright Config
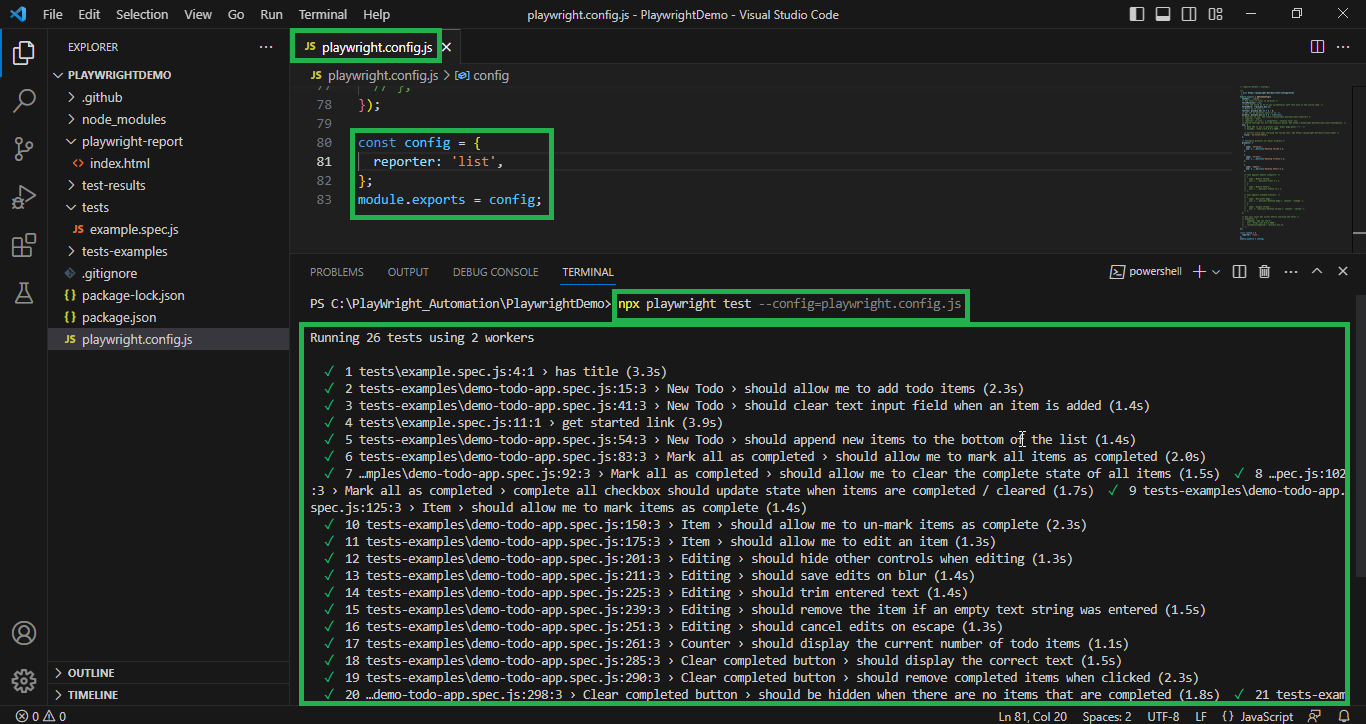
Instead of providing reporter on the command line, we can mention it under reporter in the playwright.config.js file.
// Filename: playwright.config.js

const config = {
    reporter: 'list',
};
module.exports = config;
Use the configuration file by running the subsequent command.
npx playwright test --config=playwright.config.js
Line Reporter:
A line reporter is a concise reporting format that shows information in a single line, showing the most recent tests that have been completed, and only gives error messages when they arise.
Console logs can become messy when you have many tests running at once if too much data is printed for each test. Playwright reporting is done in this case using a Line reporter.
It is reported inline even if a failure occurs in the middle of the test run.
Command Line
npx playwright test --reporter=line
Playwright Config
// Filename: playwright.config.js

const config = {
    reporter: 'line',
};
module.exports = config;
Use the configuration file by running the subsequent command.
npx playwright test --config=playwright.config.js
Dot Reporter:
The simplest kind of reporting, known as a “dot reporter,” shows tests that have been passed with a “.” and those that have failed with an “F”. It is helpful when you don’t want a lot of information to be reported on output and is the default reporter on CI.
Command Line
npx playwright test --reporter=dot
Playwright Config
// Filename: playwright.config.js

const config = {
    reporter: 'dot',
};
module.exports = config;
Use the configuration file by running the subsequent command.
npx playwright test --config=playwright.config.js
HTML Reporter:
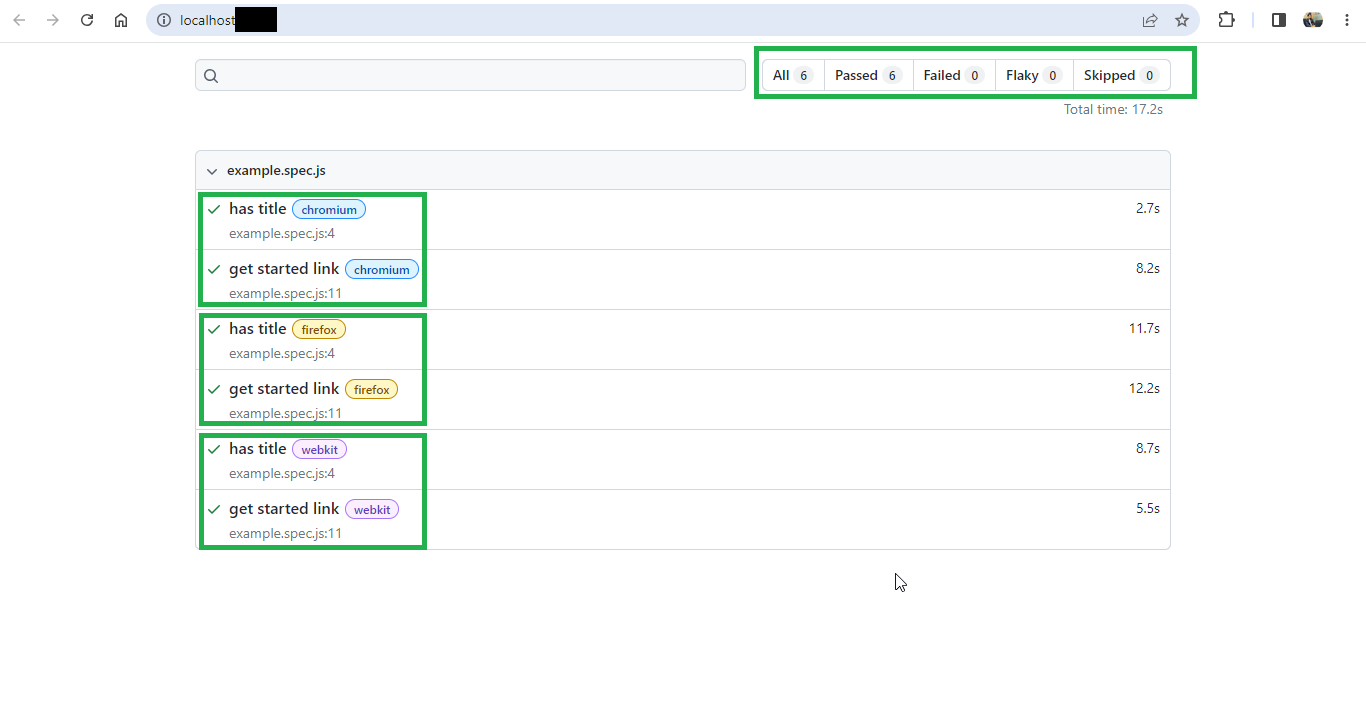
After developing your test automation framework, you should actively search for a reporting solution that you can quickly integrate with it. Playwright reporting offers an HTML reporter that generates a standalone folder, which holds the test report and allows you to utilize it as a web page. It provides the overall test suite results as well as results for each individual test.
Command Line
npx playwright test --reporter=html
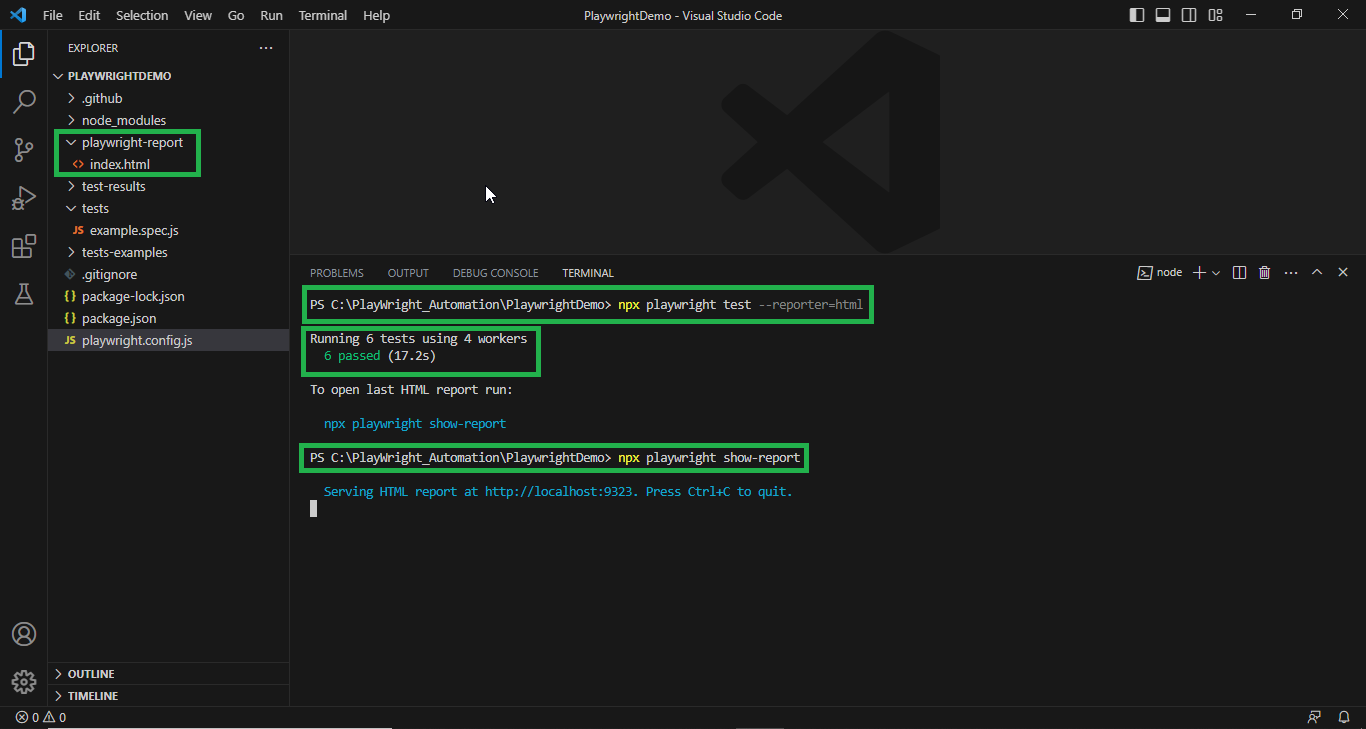
You can quickly access the most recent test run report by:
npx playwright show-report
Json Reporter:
JSON reporter generates an object containing all information about the test run.
Command Line
npx playwright test --reporter=json
When you run this command, it will display the JSON output in the terminal.
Playwright Config
// Filename: playwright.config.js

const config = {
    reporter: [['json', {
        outputFile: 'test-results.json',
    }]],
};
module.exports = config;
Use the configuration file by running the subsequent command.
npx playwright test --config=playwright.config.js
Junit Reporter:
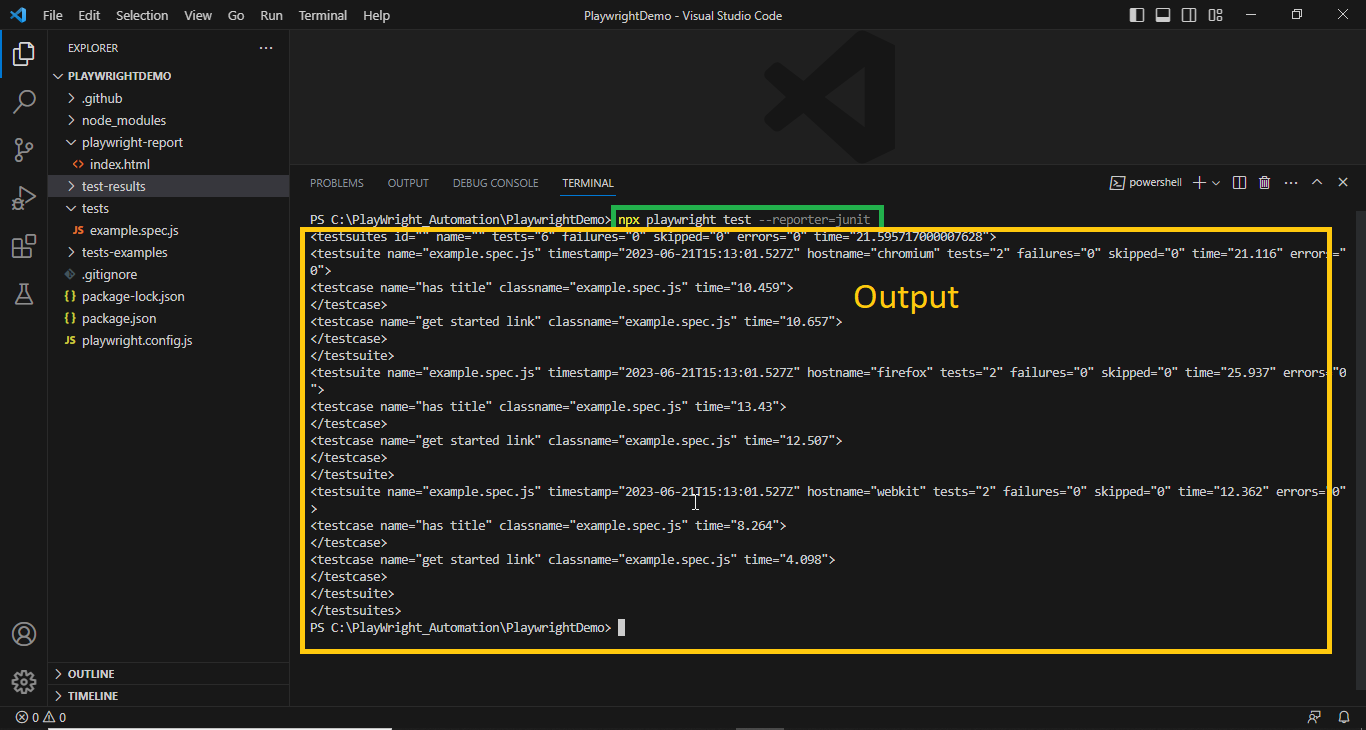
Playwright JUnit reporter generates an xml report in the JUnit style.
Command Line
npx playwright test --reporter=junit
When you run this command, it will display the Junit style xml output in the terminal.
Playwright Config
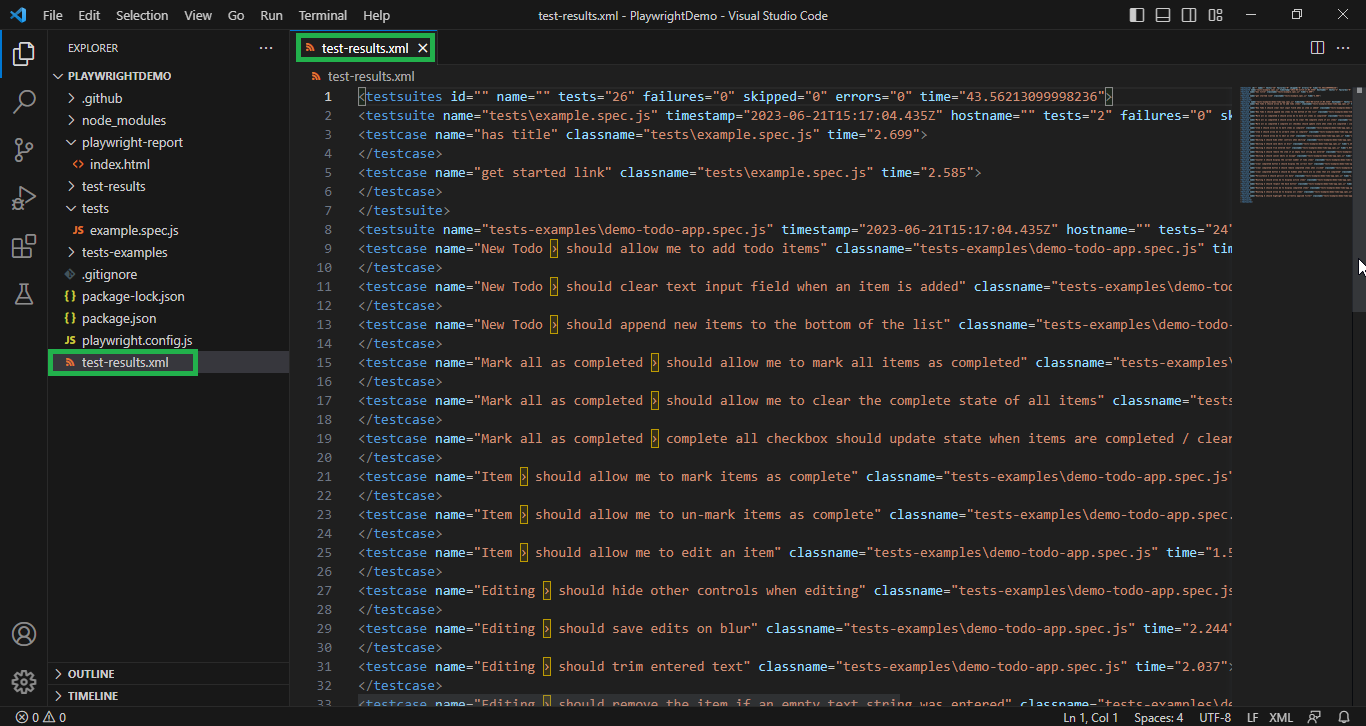
By specifying the output file, you can write the XML to a file.
// Filename: playwright.config.js

const config = {
    reporter: [['junit', {
        outputFile: 'test-results.xml',
    }]],
};
module.exports = config;
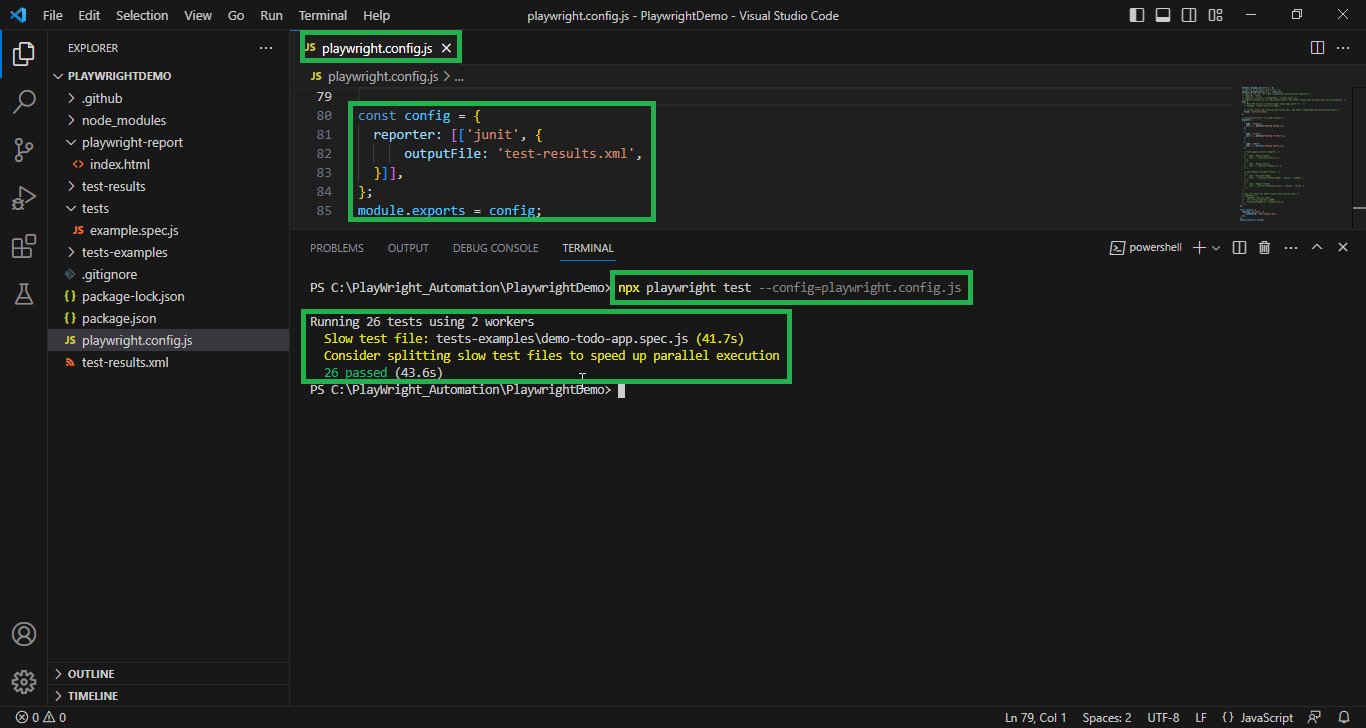
Use the configuration file by running the subsequent command.
npx playwright test --config=playwright.config.js
Conclusion:
In this article, you learned different Built-In Reporters in Playwright, and how to execute each one of them from Command-Line and through Configuration (config) file. I hope you enjoyed reading this post and found it to be useful.


