Approval policies in Oracle Enterprise Data Management Cloud Services (EDMCS) enable approvers to review requests and approve or reject their contents. You configure the request by specifying who can approve the request and how many approvals are needed. You can define these policies on an EDMCS application or on each individual dimension within.
In most cases, EPM application dimensions have multiple hierarchies of which some are “Shared” hierarchies that get their updates from the Primary Hierarchy of that dimension. These Shared Hierarchy updates often times do not need approvals as these are the same updates that have already been approved for the Primary hierarchy.
In such cases, Policy “Filters” can be used to restrict what “Actions” and “Node conditions” should trigger the Approval workflows for a given Application’s dimension.
In this article, the process to create a “Filter” on an Approval Policy for a dimension to restrict approval triggers to only certain changes to a specified “primary” hierarchy are discussed.
This article assumes that you are an EDMCS application Administrator or corresponding applications Owner, the EDMCS application is already configured and set up, dimensions are already created, and the Approval Policy for the Account dimension has been defined.
Below is a step-by-step process of defining a Filter on a dimension’s Approval Policy.
- On the EDMCS home page, click Applications card.

- Click on the Application name to open it. Open the Application for which Approval Policies are to be updated.

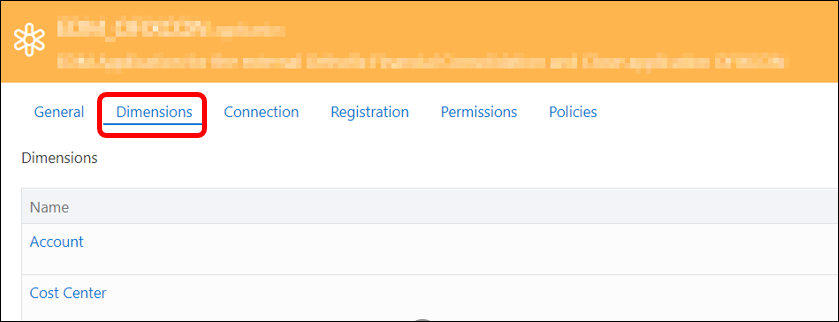
- Click on the Dimensions tab and click the dimension for which the Approval Policy needs to be updated.

- Click on Policies

- Click on the Approval Policy that has already been created.

- Click on Filters

- Click Edit to add a Filter.

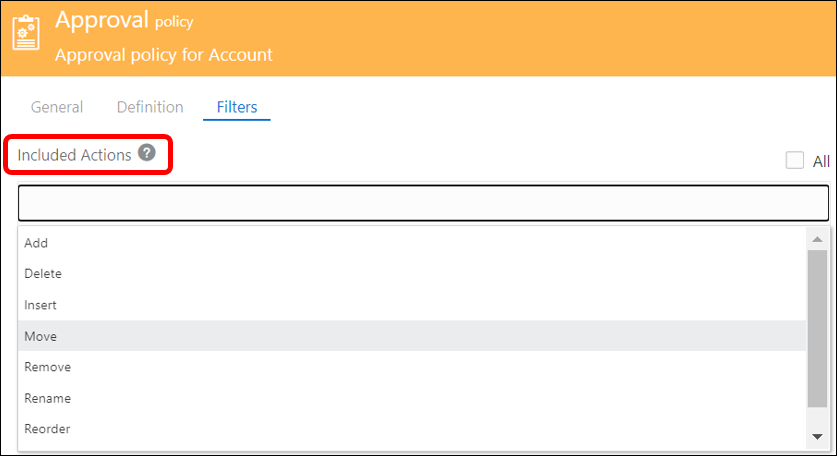
- In the Included Actions section, select All to include all actions on a node for an Approval workflow to be triggered.

- To specify certain actions, clear All and choose the desired actions from the drop-down.

- Since we want to create a Filter on the updates to the primary hierarchies of the Account dimension, select the actions relevant to a primary hierarchy such as “Add”, “Rename”, “Update” etc.

- In the Node Condition section, click on dx in the Expression field to open the Expression builder used create node condition expressions.

- Create an expression like the one shown below using the Statements, Objects and Operators available in the ‘Expression Builder’.

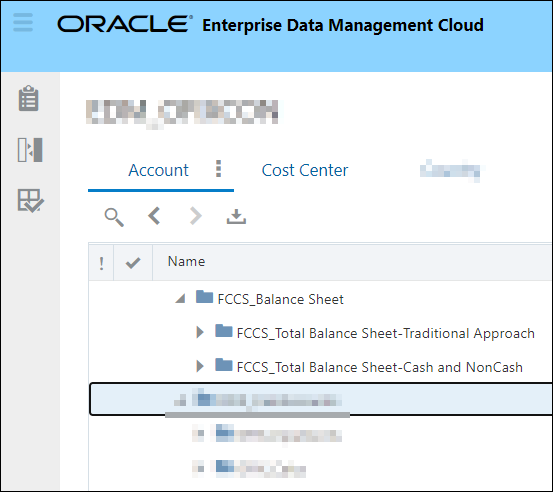
In the above example, a condition has been created to filter approval workflows on nodes whose ancestor is either ‘FCCS_Total Balance Sheet-Traditional Approach’ or ‘FCCS_Total Balance Sheet-Cash and NonCash’. The node expression returns ‘True’ if the condition is met, ‘False’ if the condition is not satisfied.
- Click Apply. The expression builder is closed and the node type inspector is displayed.

- Click Save to save the ‘Included Actions’ selections and the Node Condition expression. Then click Close to return to the Applications page.


- Click on the Default View for the application that was modified.

- In the Account viewpoint, create a New Request and add, update, rename, or move a node within the primary hierarchies ‘FCCS_Total Balance Sheet-Traditional Approach’ or ‘FCCS_Total Balance Sheet-Cash and NonCash’. Submit the Request.

- The request is submitted to the Approvers as defined in the Approval policy.

- Return to the same View and create another request in the Account viewpoint, this time to update a node in one of the Shared or Alternate hierarchies (outside the primary hierarchies).

- This request will be submitted and committed skipping all approval workflows.

- By using the Approval Policy filters this way, you can control which updates should go through the approval process.
