Click here to read an updated post explaining the folder structure setup using GIFs.
Before you begin reading, keep in mind that this tutorial is designed for beginners. As such, it covers every step without skipping parts that might be obvious to some. This tutorial is made possible thanks to Josh Kostal, who taught me majority of what is covered in this post.
The reason you have to undergo such a tedious process to create the initial folder structure is because folders created in the File Explorer will not be mirrored inside the Visual Studio. We also have to manually reconfigure the new path to the .csproj file after moving the application over to the new folder.
Overview
- Create an ASP.NET Web Application (.NET Framework).
- Create the folder structure in the File Explorer (01 – Presentation, 02 – Application, 03 – Domain, and 04 – Database).
- Transfer the application created in 1) to the ’01 – Presentation’ folder.
- Reconfigure the path for .csproj file.
- Go into Visual Studio and create the Solution Folders that align with the folder structure in the File Explorer.
- Drag the original project into the ’01 – Presentation’ solution folder inside the Visual Studio.
Details
Creating the Folder Structure
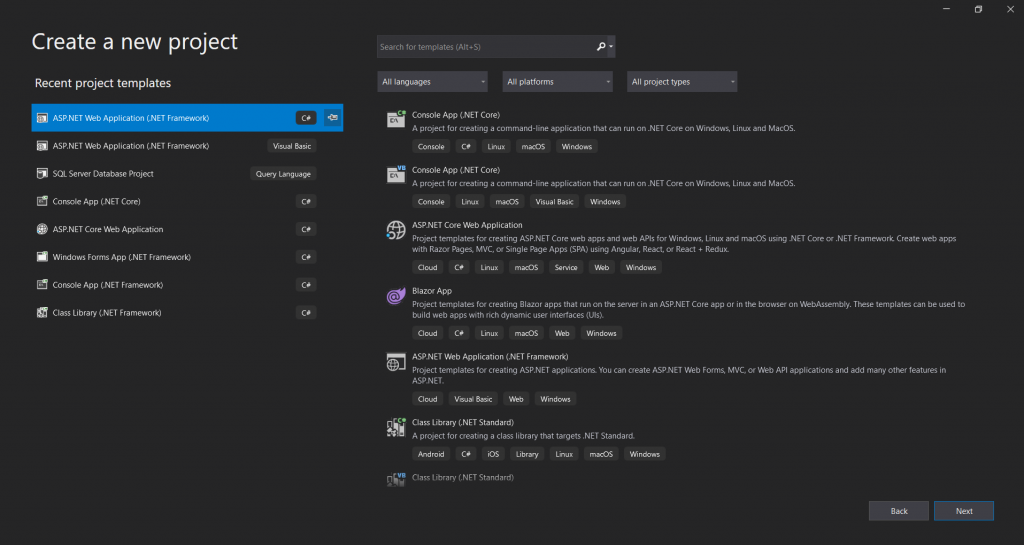
1) Create a new ASP.NET Web Application (.NET Framework) using the MVC template. I will name the application ‘Demo_01’ in this example.
2) Once you create the project, go to where the project is located in the File Explorer. Inside the folder that contains the .sln file, create folders that will each hold the ‘Presentation’, ‘Application’, ‘Domain’, and ‘Database’ component.
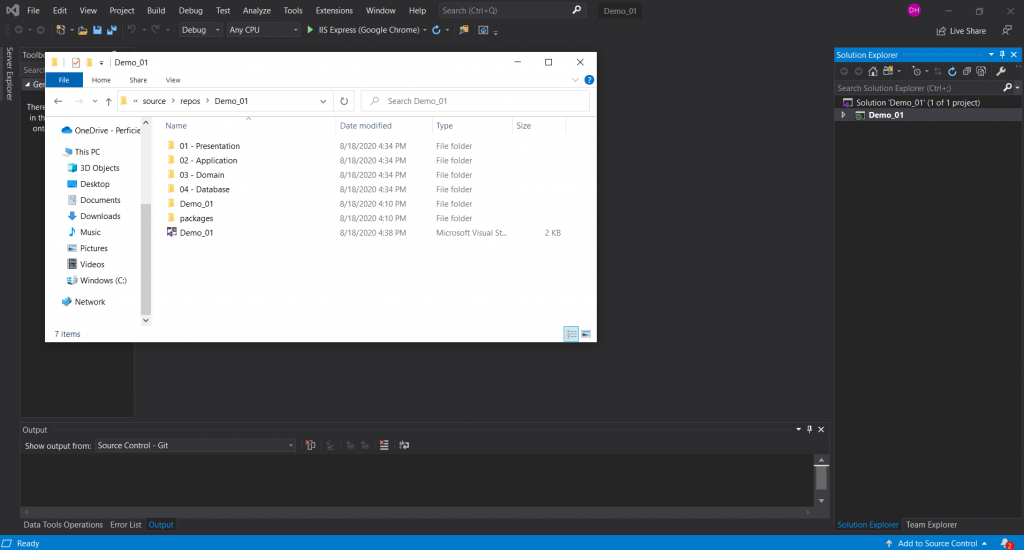
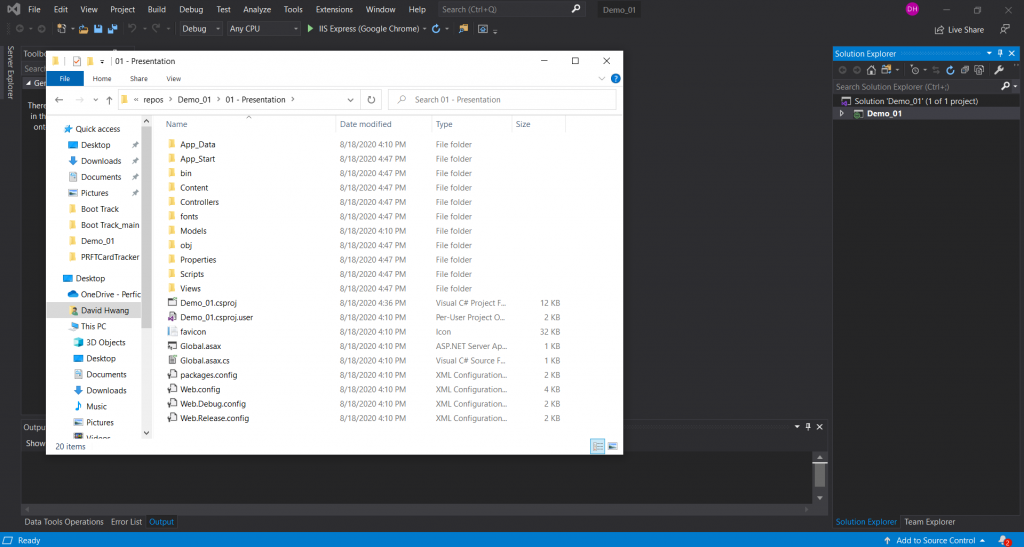
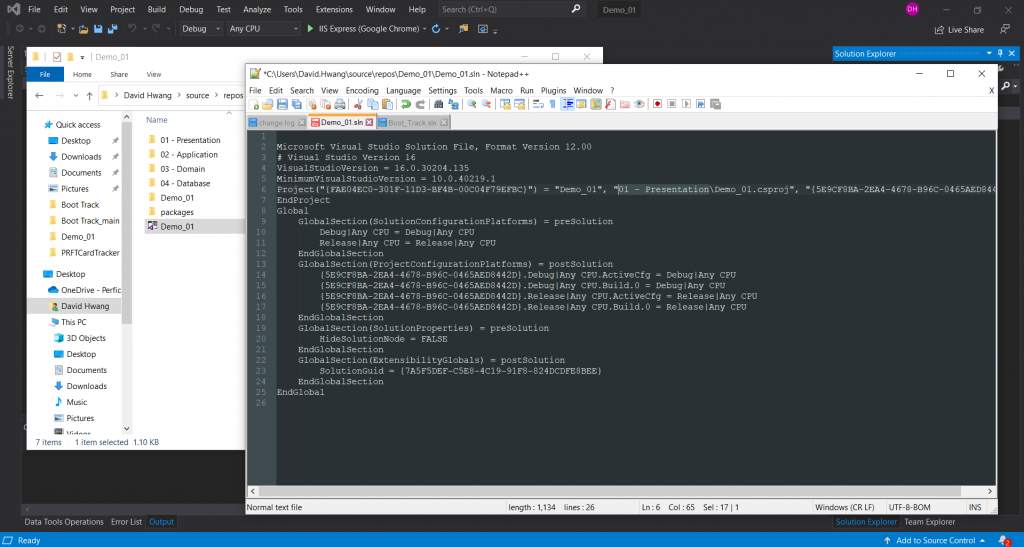
3) Drag all the items in the application folder (source > repos > Demo_01 > Demo_01 in this example) into the “01 – Presentation” folder. The image below demonstrates all the items that were dragged and dropped (or copied and pasted) into the new folder.
4) Open .sln file with a Notepad++ (Notepad works too).
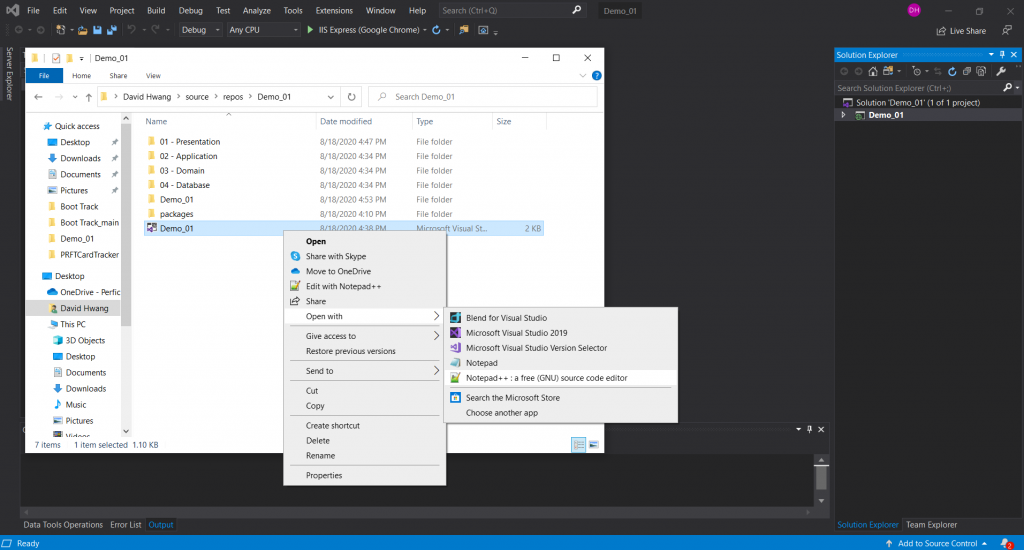
5) Edit the path for .csproj file (now that you have moved the .csproj file from the original application folder to the “01 – Presentation” folder). You can change where it is highlighted in the image below.
However, when you open up the .sln file, you are going to realize how the folders you created in the File Explorer are not reflected within Visual Studio. You will have to create solution folders separately inside Visual Studio.
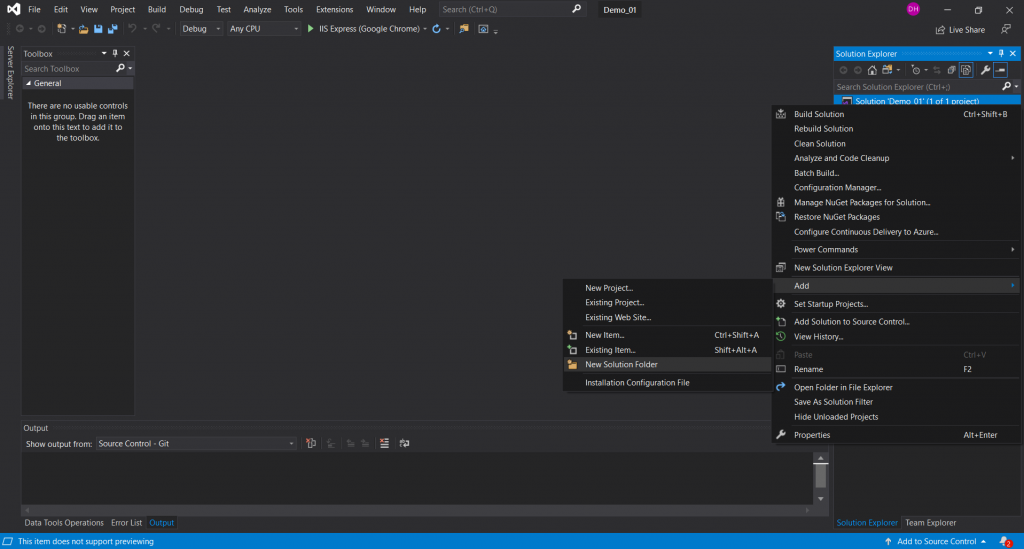
6) Right click the solution file and add a New Solution Folder (Note how it is NOT a regular New Folder).
7) Drag the project into the “01 – Presentation” folder and create other solution folders accordingly.
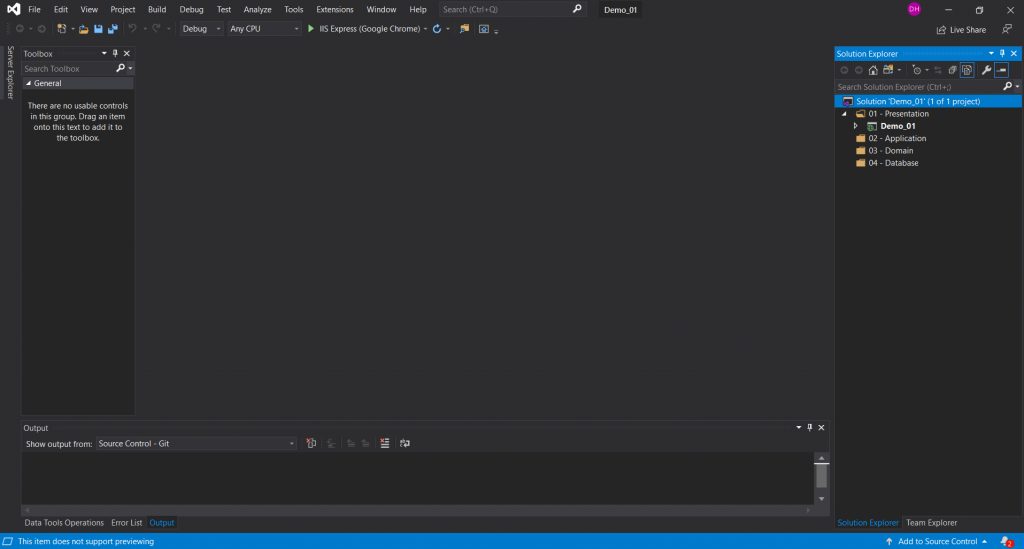
Now that we have set up the folder structure, click here to learn how you can add a SQL Server Database Project to the application here.

