Integrating Spring boot with Thymeleaf
Level of expertise required to implement: Experienced in Spring MVC and maven.
Concept:
This blog will show you how to develop a simple Spring Boot application along with the Thymeleaf java library as a template engine to display data on front end.
What is Spring Boot?
Spring Boot is a Standalone application which reduces several tedious development steps and boilerplate code and configuration. It helps us to create a web application as a standalone JAR file with zero XML configuration and embedded web server. It also bundles the application with all the necessary dependencies.
What is Thymeleaf?
Thymeleaf is a Java library. It is an XML/XHTML/HTML5 template engine that is able to apply a set of transformations to template files in order to display data and/or text produced by your applications.
Lets create a simple web application using Spring Boot, embedded Tomcat, Thymeleaf template engine and JPA.
Technologies used:
- Spring Boot 1.4.2.RELEASE
- Thymeleaf 2.1.5.RELEASE
- Tomcat Embed 8.5.6
- Maven 3
- Java 8
- JPA
- bootstrap css
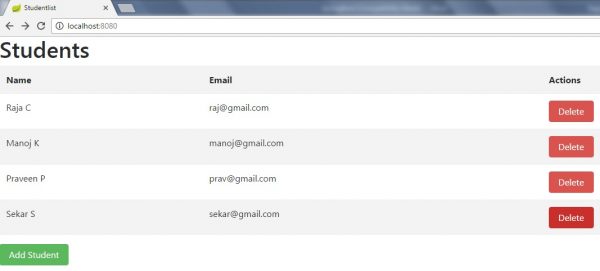
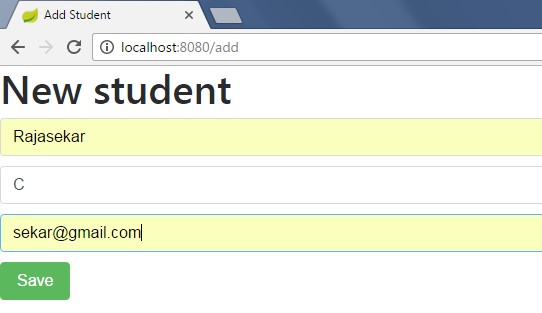
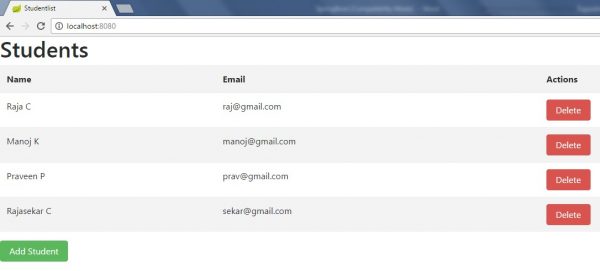
In the below example, we are creating a Spring Boot application which automatically loads all the student information when we hit http://localhost:8080 and it provides an option for adding and removing a students information.
Steps involved in creating the Spring Boot Application:
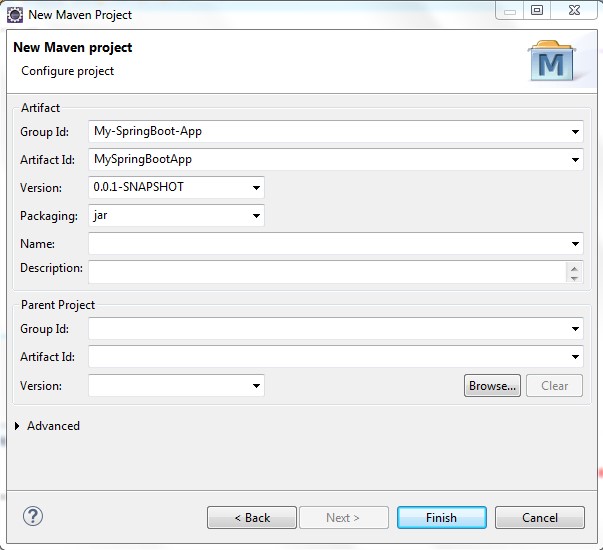
- Create a new maven project in Eclipse with the below details.
- Download “bootstrap.min.css” and paste the file under the folder “src/main/resources/static”
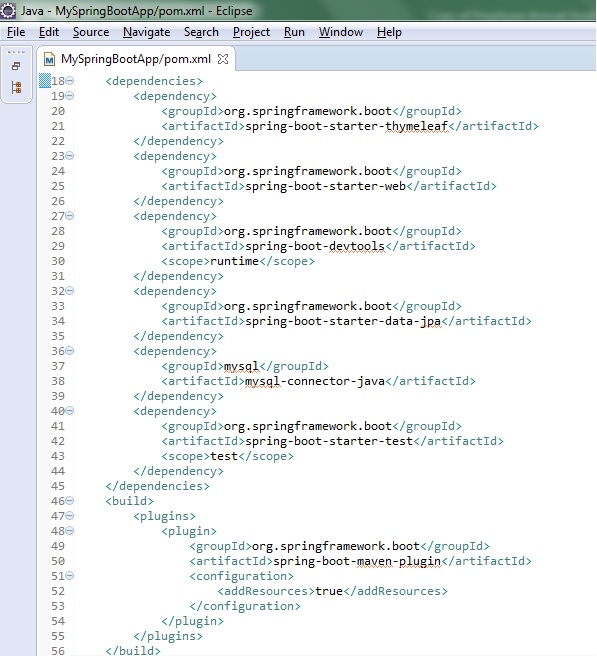
- Configure the “pom.xml” file with below dependencies.
- Create a templates folder under “src/main/resources”. Create a Thymeleaf view to show the student list “index.html” file under the templates folder.
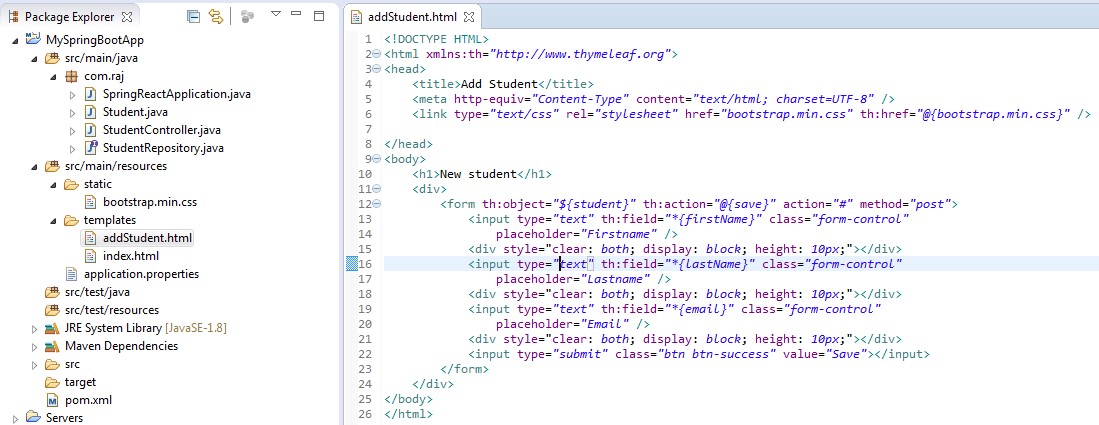
- Create another Thymeleaf view to add a new student information “addStudent.html” file under templates.
- Configure the “application.properties” file with the datasource details as below
- Define the standard java bean in “Student.java” file with the getter and setter methods.
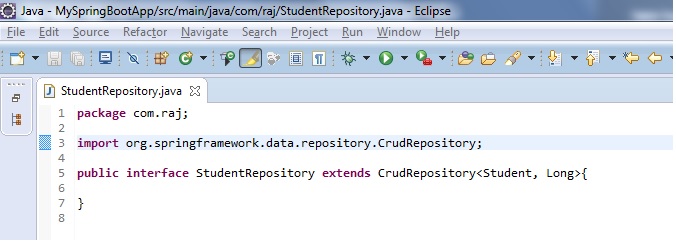
- CrudRepository provides methods for the CRUD operations. Create an interface “StudentRepository.java” by extending the CrudRepository interface.
- Create the “StudentController” class which interacts with the repository for CRUD operations.
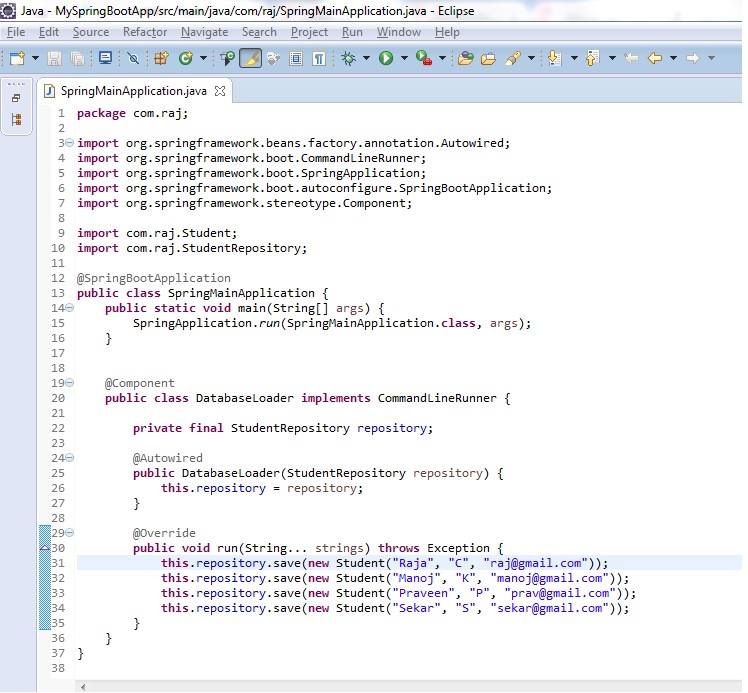
- Finally create the SpringMainApplication class using annotation(@SpringBootApplication).
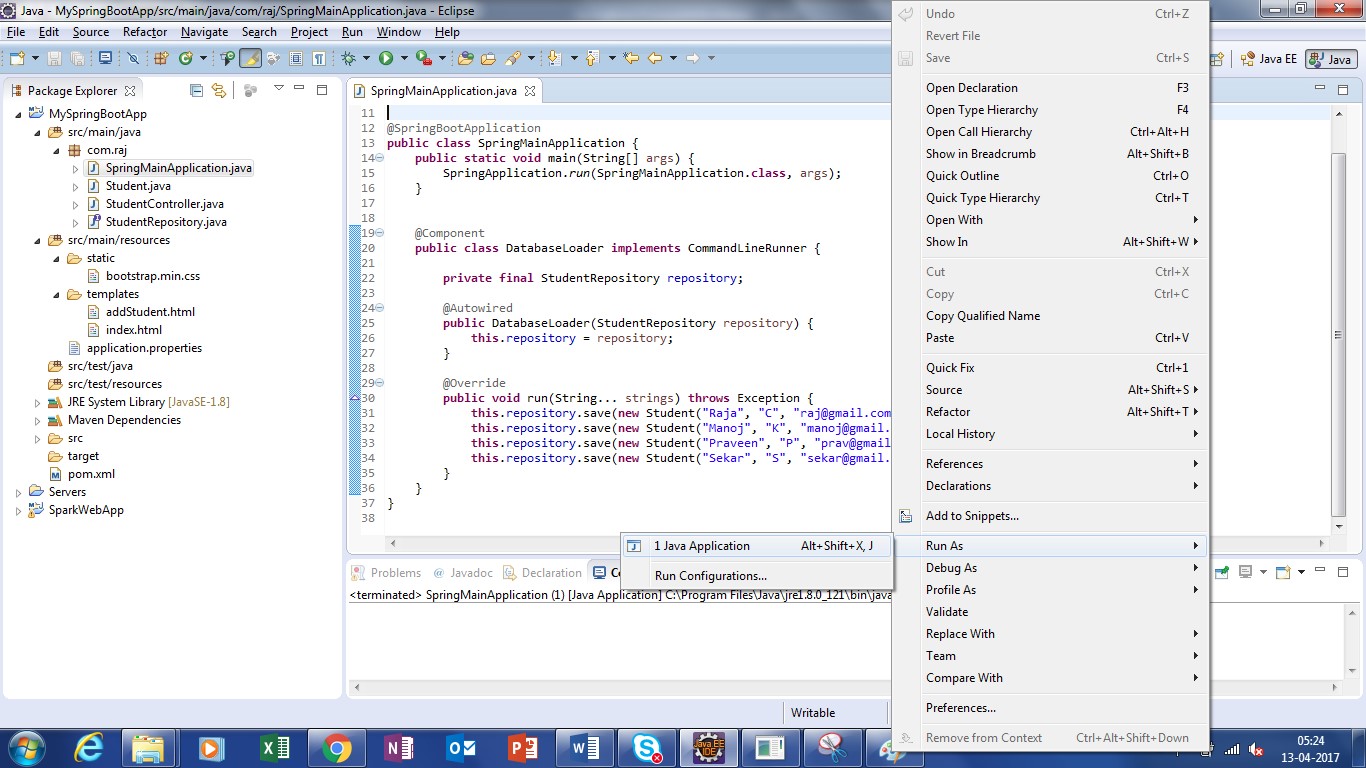
- To execute the “MySpringBootApp” application, run the SpringMainApplication class like a normal java application.
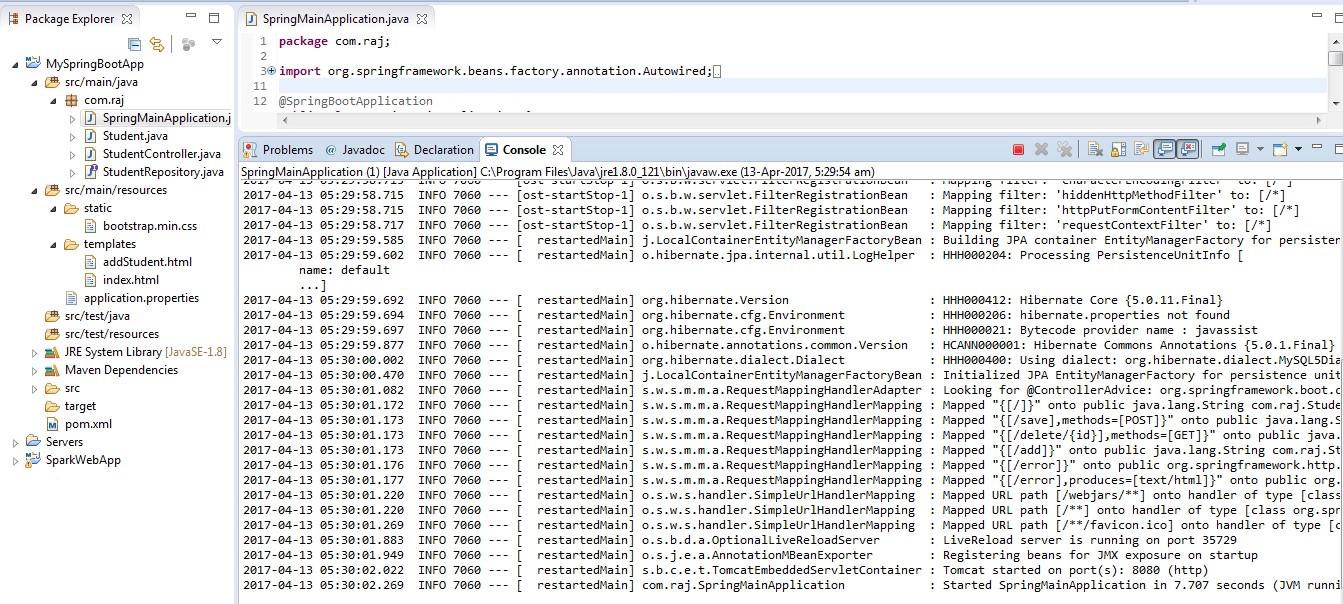
On successful compilation, we can see from the below image that it starts the embedded tomcat server at port 8080. One more advantage is that every time changes are made to the class, the embedded tomcat server will automatically restart if configure pom.xml spring boot plugin with “<configuration> <addResources>true</addResources> </configuration>”.
That’s it. We have successfully created a spring boot application.
To clarify the examples: “Springboot-starter-web” dependency by default will pull all the commonly used libraries when we develop the Spring MVC applications such as spring-webmvc, jackson-json, validation-api and tomcat. The “spring-boot-starter-data-jpa” dependency pulls all JPA and hibernate related libraries. Also, “spring-boot-starter-web” gets all commonly used beans DispatcherServlet, ResourceHandlers, MessageSource etc. spring-boot-starter-Thymeleaf configures ThymeleafViewResolver automatically
Screenshots:







Thank you so much 🙂