
Introduction
SwaggerHub is an integrated API Development platform, built for teams, that brings the core capabilities of the Swagger framework to design, build, document and deploy APIs.
Description
SwaggerHub provides a UI based API development platform, which can be used by both Business Analysts and Developers. The analyst can design the REST API’s strictly from a business perspective and using the Mock Services, validate the request and responses.
The developers can then download the Server/Code in the language of choice (Java in this case), develop the code and deploy it either as a standalone Spring Boot application or on a Web/Application server.
Pre-requisites
- Java JDK 1.8(preferred)
- Eclipse STS – Version: 3.2.0.RELEASE
- Tomcat 8.5.16(optional)
- SwaggerHub Account
- Postman or SOAPUI for testing
Setup
Before designing the API’s , one must first create a SwaggerHub account. That can be easily done by using the url – https://app.swaggerhub.com/signup?channel=direct.
After the user has registered on the site, he or she can begin development.
Swagger Tools
Swagger Hub provides a rich UI framework for the design of the API. Swagger Hub provides three tools for design, mock testing and development of the API’s
- Swagger Editor
- Swagger CodeGen
- Swagger UI
Swagger Editor – Design, describe, and document your API on the first open source editor fully dedicated to Swagger-based APIs. The Swagger Editor is great for quickly getting started with the Swagger specification. It’s clean, efficient, and armed with a number of features to help you design and document your RESTful interfaces, straight out of the box.
Swagger CodeGen – Build APIs quicker and improve consumption of the Swagger-defined APIs in popular language . Swagger Codegen can simplify your build process by generating server stubs and client SDKs from your Swagger specification.
Swagger UI – Swagger UI allows anyone, be it your development team or your end consumers — to visualize and interact with the API’s resources without having any of the implementation logic in place. It is automatically generated from the Swagger specification, with the visual documentation making it easy for back end implementation and client side consumption.
Swagger API
We will use an existing API namely, Petstore for our development. Login to https://app.swaggerhub.com/home .
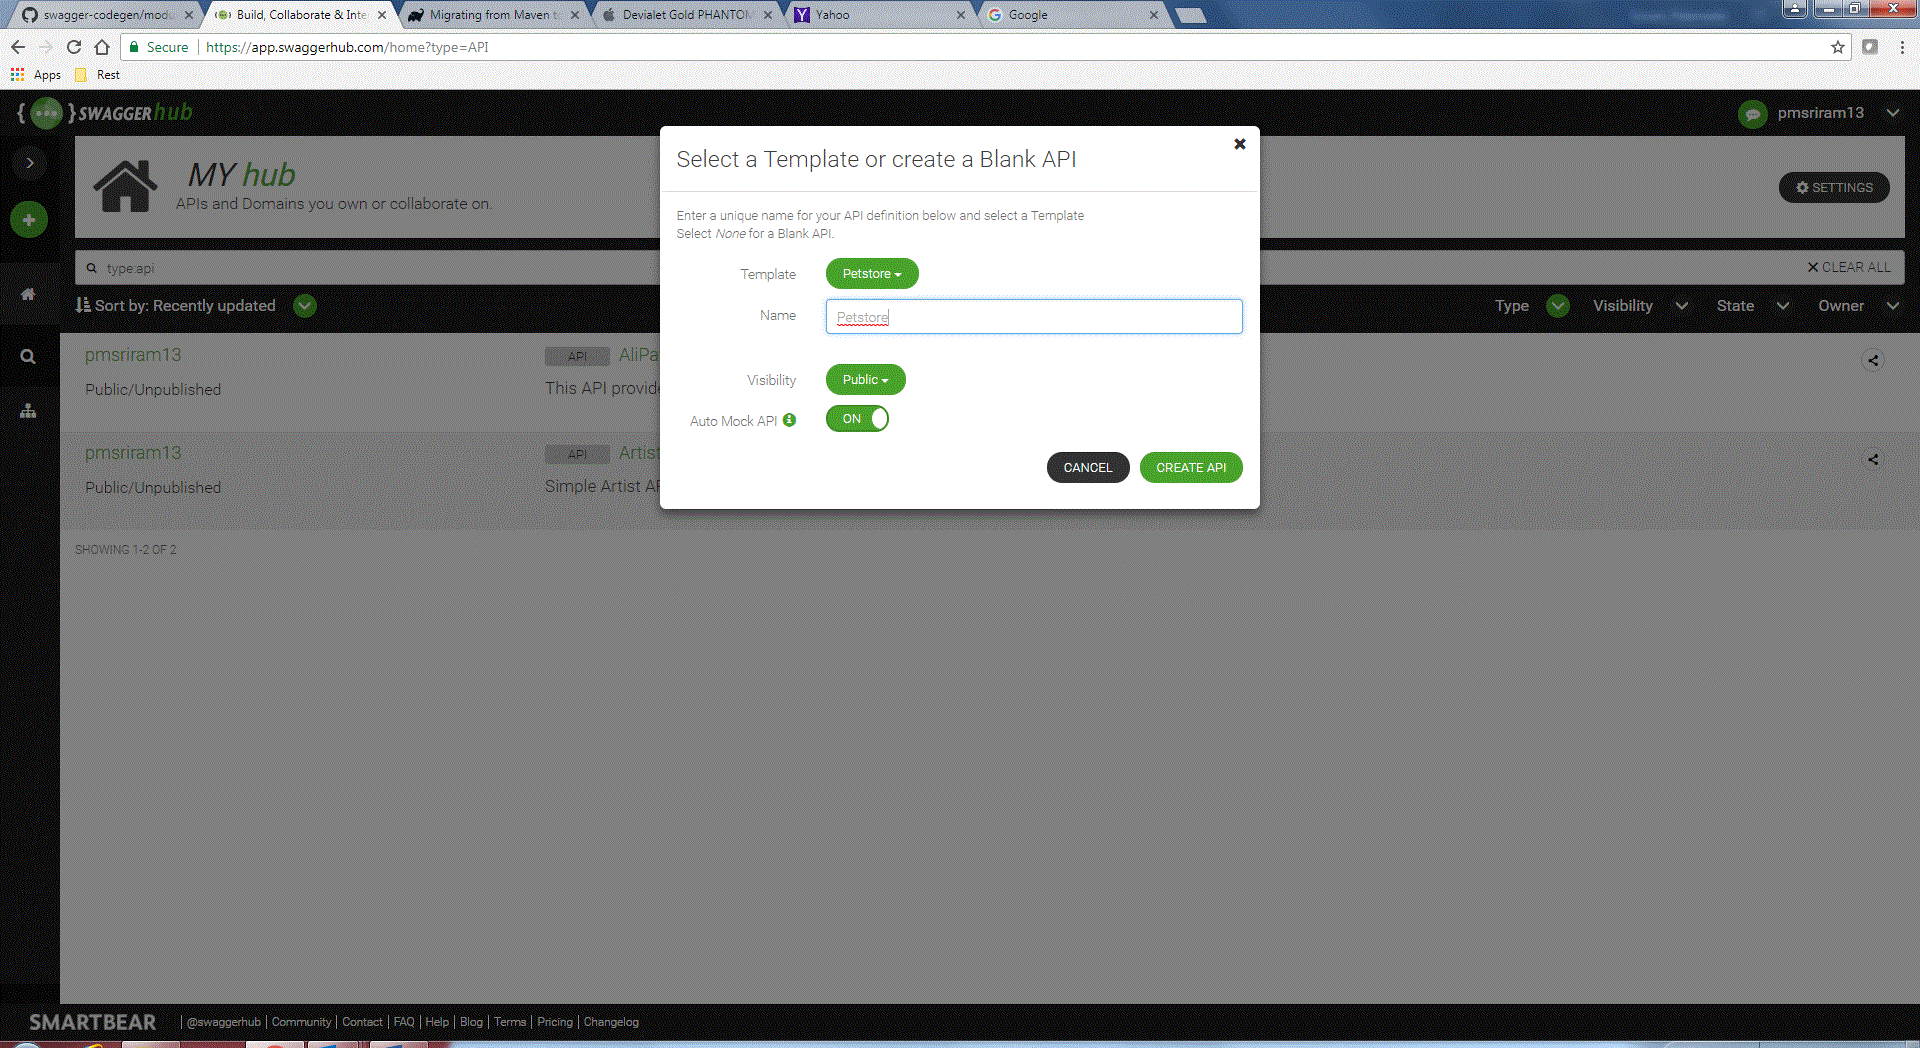
Import the sample Petstore API by selecting from the Template List.
Give it a suitable name and keep the Auto Mock API ON.
Server Code Generation
After the API been imported in SwaggerHub, the next step is to generate the Server code. By providing the developer the option to generate almost ready to use Server code, development time is greatly reduced especially if there are a large number of Entities and operations.
We will use the default settings for the Server Code generation for this blog:
Note: Please refer to Additional Resources for Project specific settings for code generation
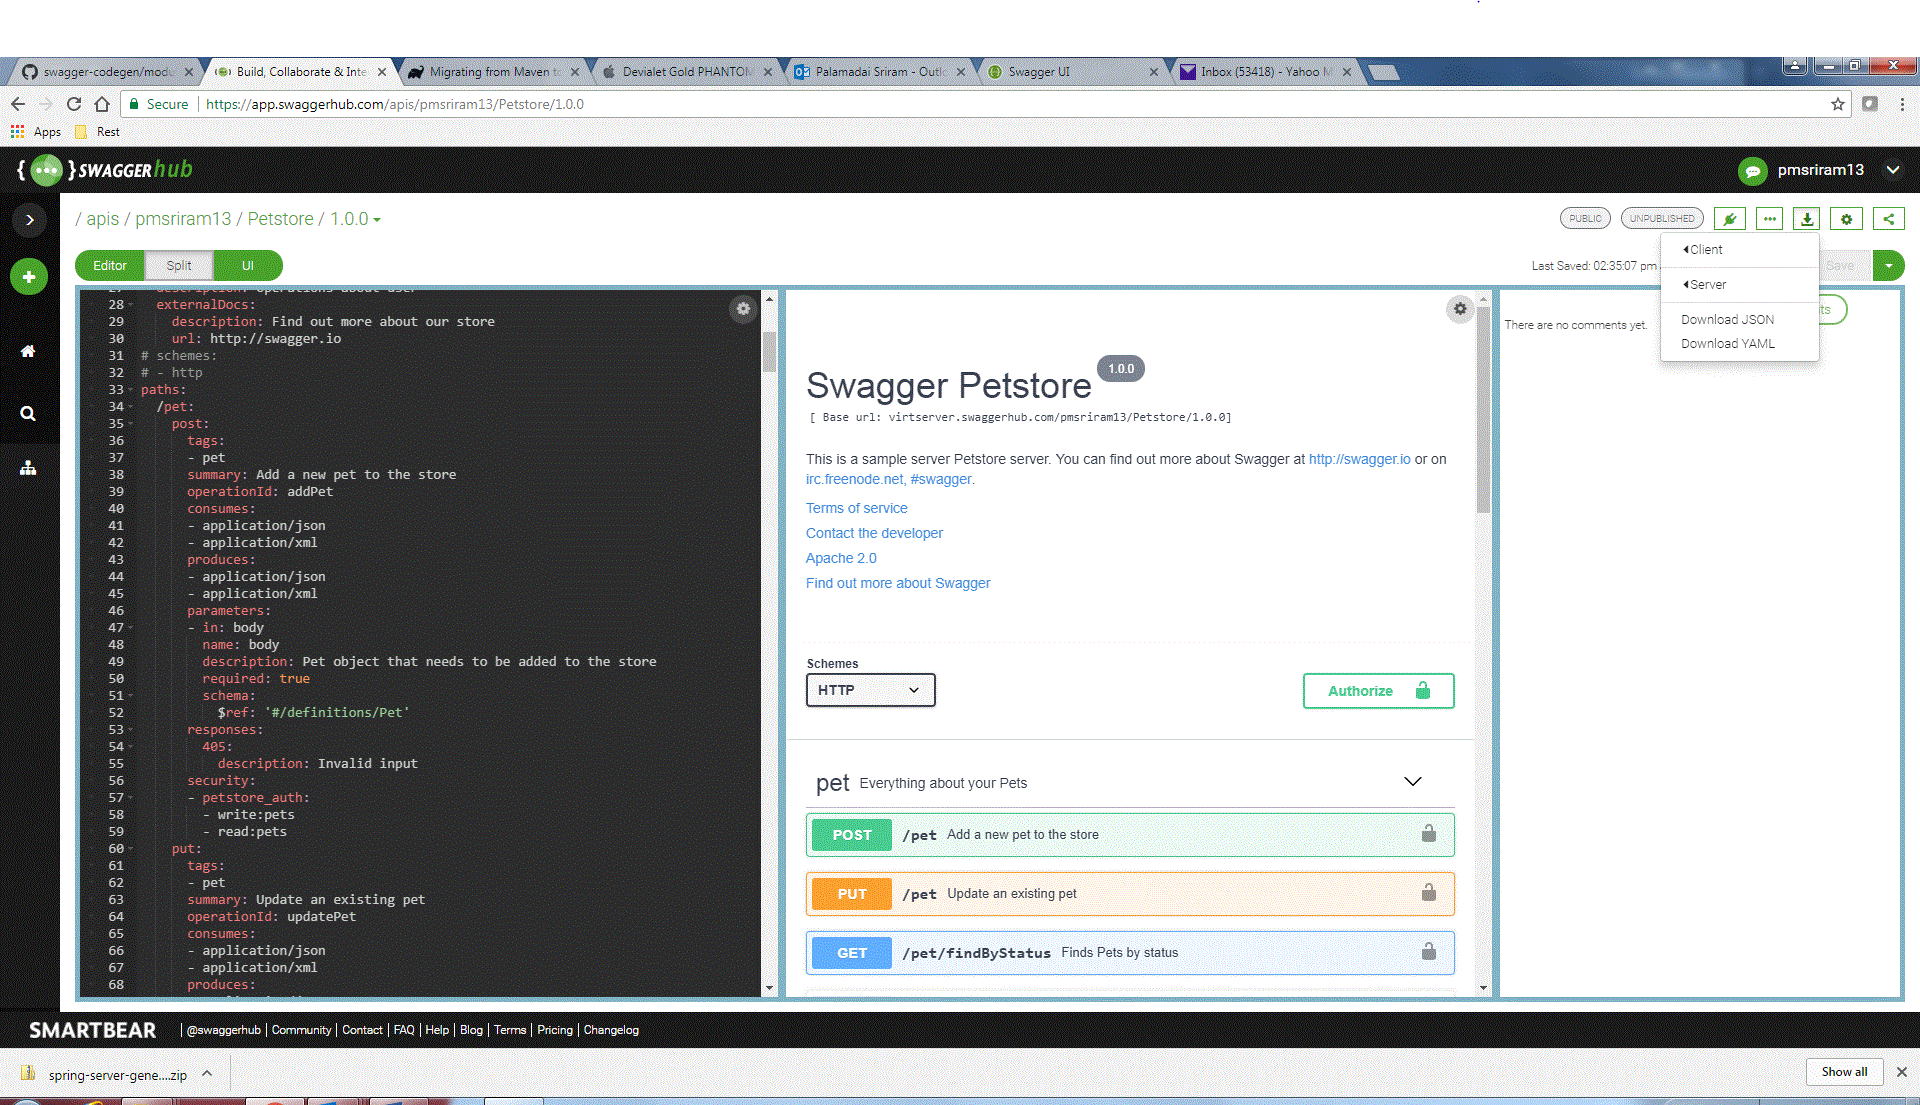
The code is downloaded in the user’s downloads folder.
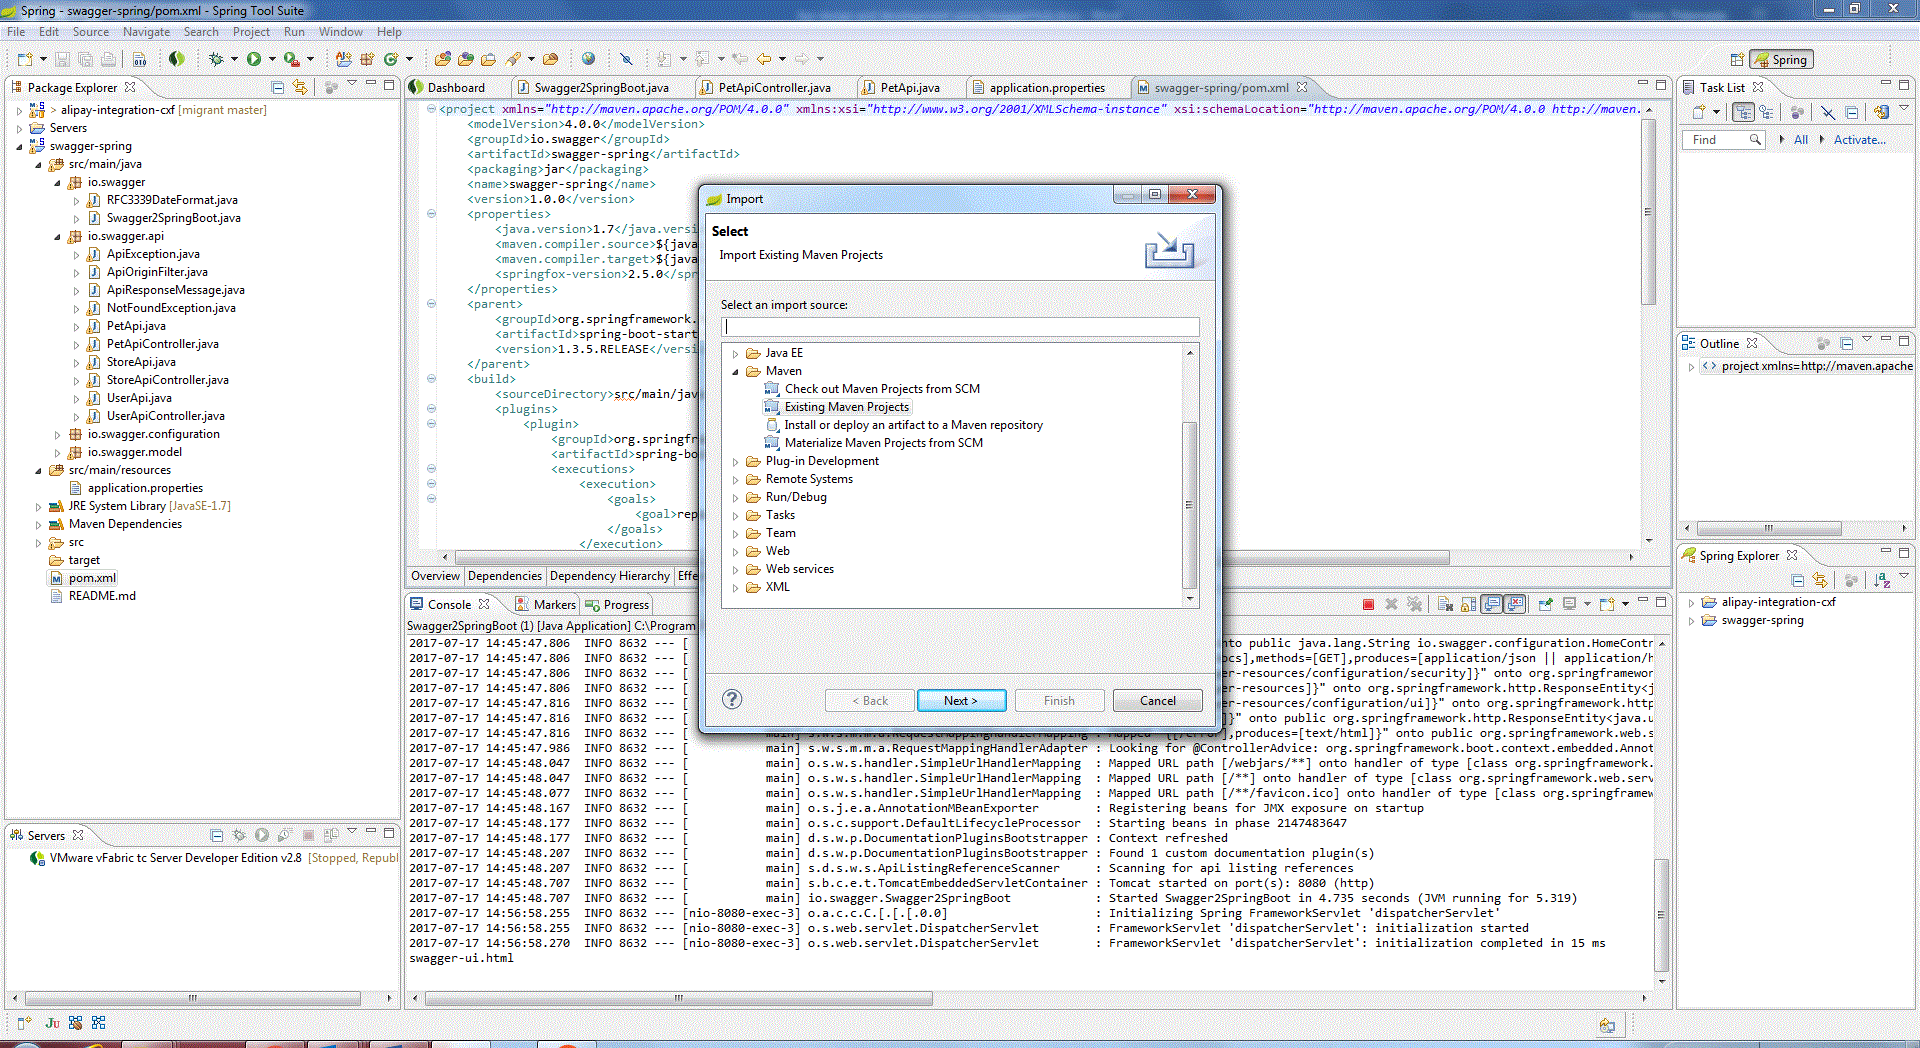
- Unzip it in a suitable folder. There will be a pom.xml, which is exported as Maven Project in Eclipse STS.
- Import as shown below:

- There are two ways to run the application.
- Run the Swagger2SpringBoot java class from STS. The embedded Tomcat will start at port 8080.
- Alternatively, run mvn install to create the swagger-spring-1.0.0.jar.


Then, execute the java -jar command as follows:
java -jar target/swagger-spring-1.0.0.jar.
The embedded Tomcat Server will start at port 8080.
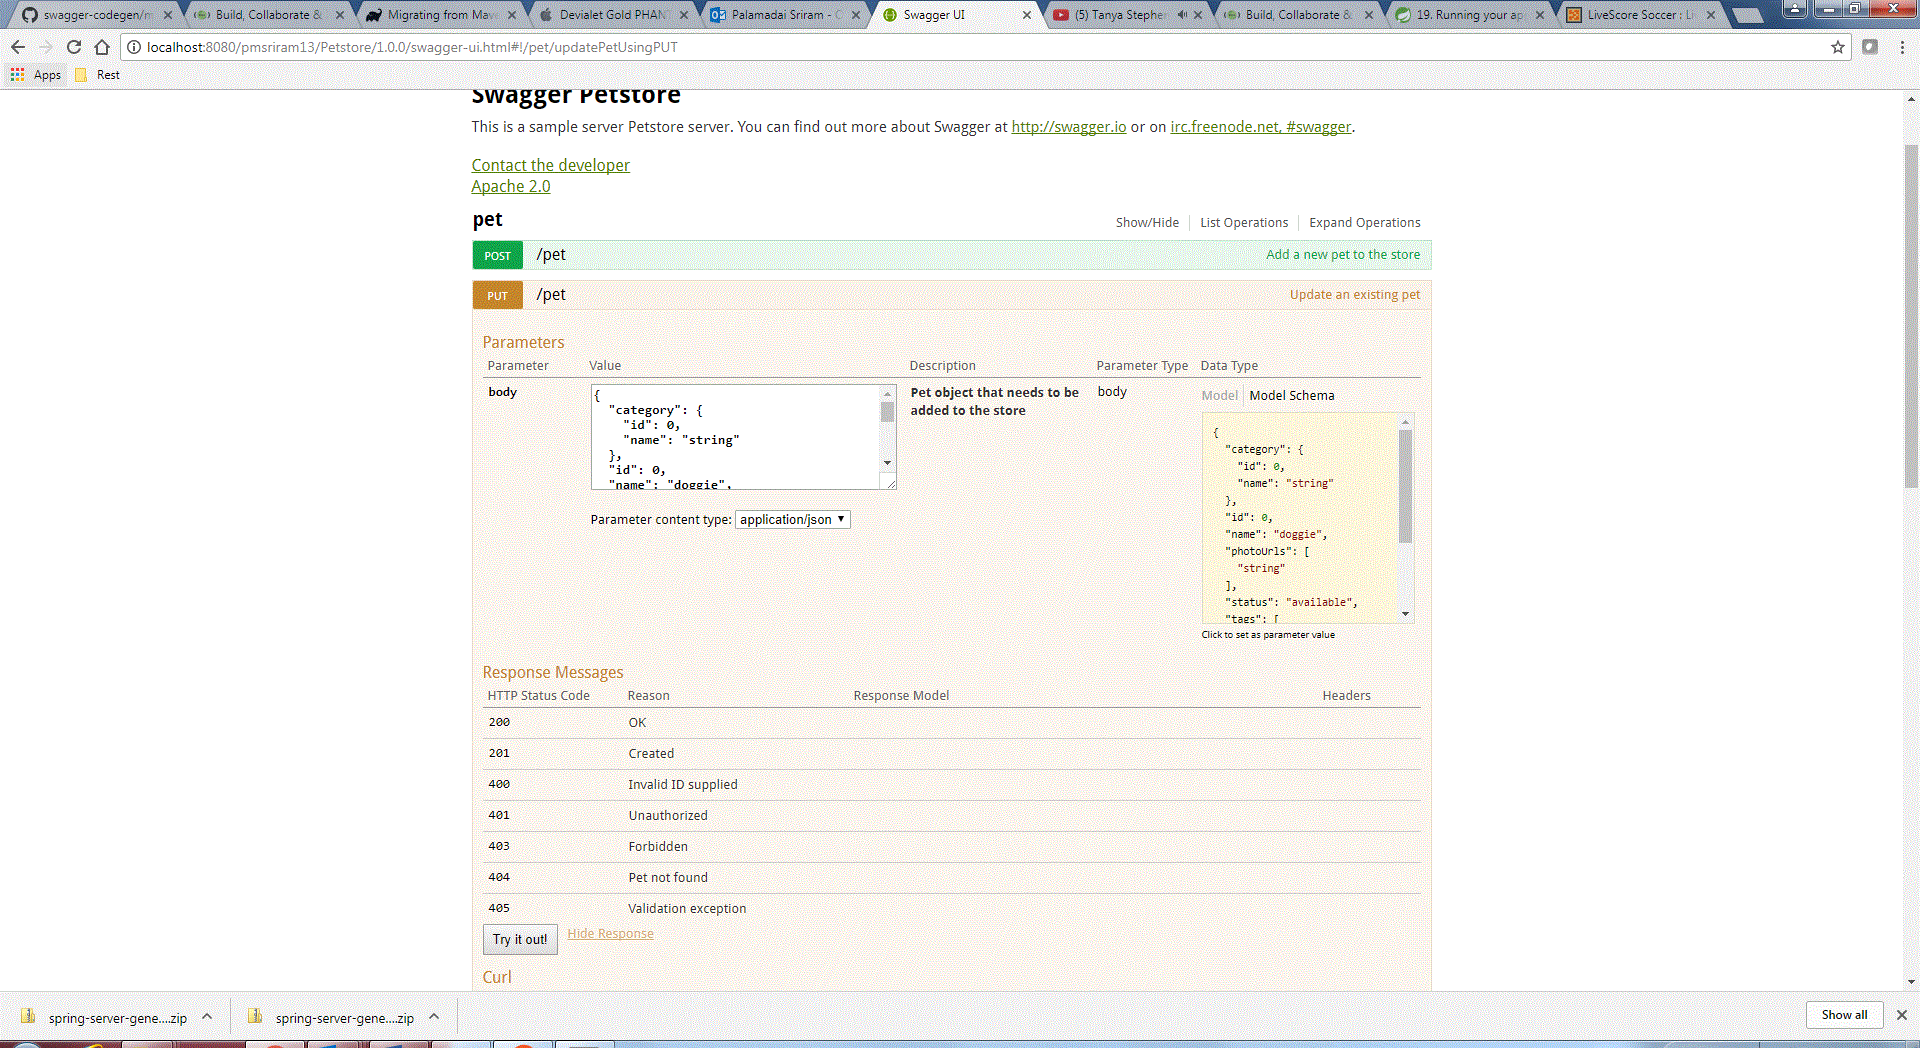
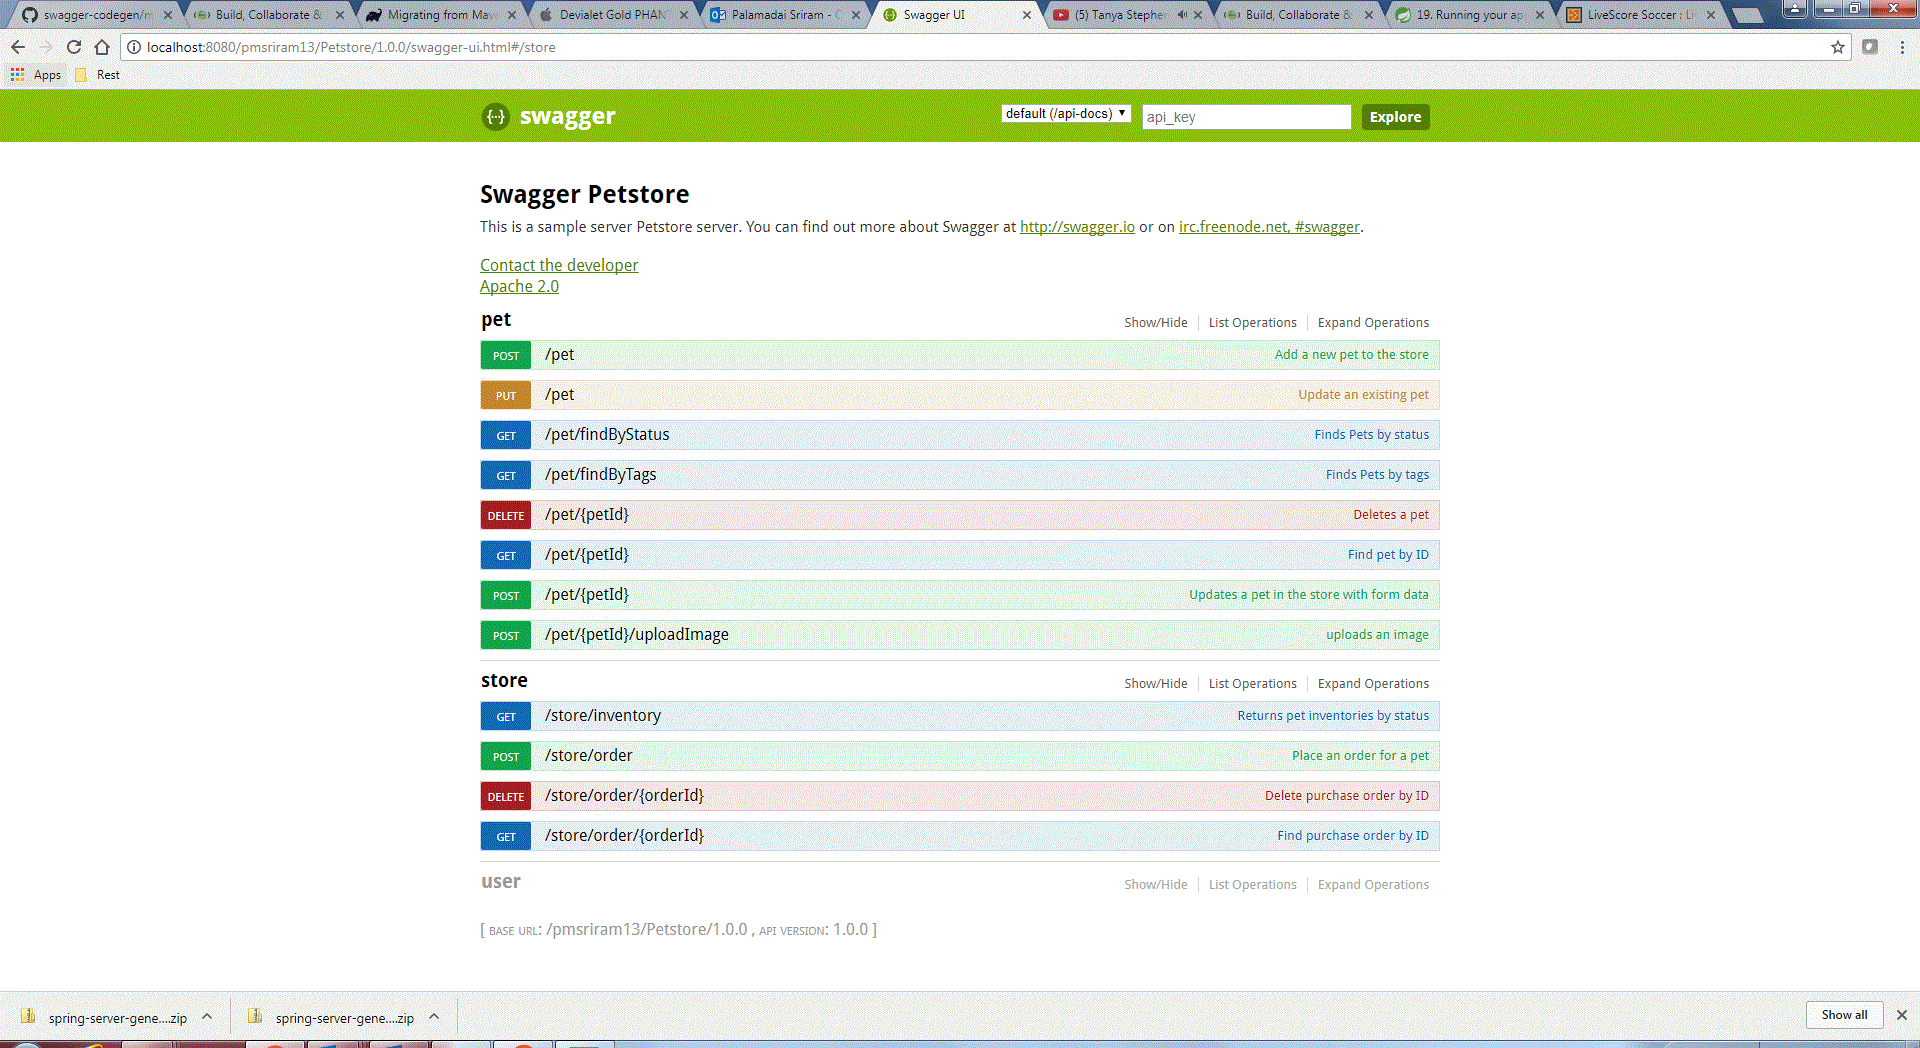
- The Swagger docs are available at http://localhost:8080/context. The context is created based on the User Name/Application Name/Version. This is defined in the application.properties file as shown below:

This is the default value for the contextPath. This can be changed and accessed on a server re-start.
- Inspect the Swagger UI from the URL mentioned above. The Swagger UI gives the User the ability to test the methods using mock data.
Server Code development
SwaggerHub generates the Server code stubs for every REST operation. The developer can fill in the logic for each of the expected responses(200, 401, 404, 500 etc). It’s advisable to use the javax.ws.rs.core.Response class to create the response with the expected object.
For e.g.
return Response.ok(object).build;
Tomcat Deployment (optional)
In most cases, the Spring Boot application is deployed on an application/web server as war file. Please make the changes for Tomcat –
- To convert the application from a .jar to a .war, change the package in the pom.xml to war as follows
<modelVersion>4.0.0</modelVersion>
<groupId>com.perficient.blogs</groupId>
<artifactId>perficient–blogs-swagger-petstore</artifactId>
packaging>war</packaging>
<name>perficient–blogs-swagger-petstore</name>
<version>1.0.0</version>
- Change the Spring Boot Starter Parent version to 1.5.4.RELEASE in the pom.xml file
<parent>
<groupId>org.springframework.boot</groupId>
<artifactId>spring-boot-starter-parent</artifactId>
<version>1.5.4.RELEASE</version>
<relativePath/> <!– lookup parent from repository –>
</parent>
- Create a new Class to replace the default Swagger2SpringBoot class in the same package.
- Run the mvn package from the source directory of the project to create the war.
- Start Tomcat 8.5 or 9.0.0.M17(either one would work)
- Login to the http://localhost:8080/manager/html using User Name/Password. To set up User Name and Password to access the manager page, please see Additional Settings
- Deploy the war by navigating to the target folder or wherever the war is built.
- Upon deployment, the SwaggerUI can be accessed at http://localhost:8080/perficient-blogs-swagger-petstore-1.0.0/swagger-ui.html
Additional Settings
- CodeGen Custom Settings – Earlier, we had used the default settings in the CodeGen option to generate the Server code using Spring. Typically, each project will have its own settings. The document below contains some typical settings used in a project. :
Tomcat User Settings – To deploy the applications using the Tomcat Manager, a user has to be added to the tomcat-users.xml file under the conf folder of the deployed Tomcat Server.
Add the following code the tomcat-users.xml file
<role rolename=”manager-gui”/>
<role rolename=”manager-status”/>
<user username=”xxxxxx” password=”xxxxxx” roles=”manager-gui,manager-status”/>
Restart the server, click the Manager App link and enter the User Name/Password.
Upon doing so, the user can deploy the war file from the build location.
Testing
Postman or SOAP UI can be used for testing the deployed REST API’s. Java or client written in a compatible language can also be used to test.
References
- https://app.swaggerhub.com/help/tutorials/index
- https://docs.spring.io/spring-boot/docs/current/reference/htmlsingle/
Conclusion
Using SwaggerHub, the process to design an API, developing server and client, and deployment becomes simpler, takes less time and is truly a collaboration between business and development.
The wide range of programming languages to generate both Server and Client code makes SwaggerHub a compelling choice for API development.
Thanks for the sharing your knowledge .It is very useful.