
In modern Salesforce development, simply writing code is not enough – you need a workflow that supports collaboration, quality checks & control, and safe deployment from one org to another. When pushing code or development changes from the lower environment to the higher environment, a mechanism is needed, which we call the Pull Request (PR). It is a vital part of this workflow. It is a mechanism for reviewing, approving, testing, and merging changes into the shared codebase (i.e., GitHub Repository) and, finally, into the Salesforce environment.
In this article, we will cover how to manage/create PRs when working with Visual Studio Code (VS Code) in a Salesforce context.
Will walk through:
- Clone the Repository from GitHub
- Setting up the Feature Branch in VS Code
- Creating a PR in GitHub (including automated checks like CodeQL, Apex test runs)
- Assign reviewers to Review, Approve, and Merge the PR
- Why PR workflow matters and best practices
1. Clone the Repository from GitHub
To clone the GitHub repo to your local machine, simply open the terminal in VS Code and run the command:
Git clone https://github.com/your-org/your-repo.git (url of your repo)
Else, in VS Code, you can see the option to clone a git repo.
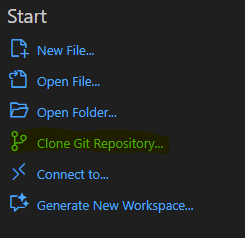
This process will clone the repo from GitHub to your local.
2. Setting up with the Feature Branch in VS Code
Once you have your GitHub repo set up (for your Salesforce project metadata, SFDX, etc.), the next step is to make changes in a safe, isolated branch. Here is how:
Step 1. Pull the latest from the main branch
Make sure your local workspace is up to date:
git checkout <mainbranch>*
git pull <mainbranch>*
*Branch Name could be anything, mostly it is a sub-branch from the main, for instance, here considered the main branch.
Step 2. Create your feature branch
From VS Code or the terminal:

git checkout -b <feature-branch-name>
There is an alternate way to create feature branch, instead of executing command simply navigate to lower left corner wherein you’ll have you branch name say ‘main’ click on it and create new feature branch.
![]()
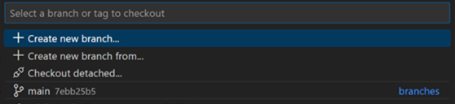
This way, a feature branch can be created and, additionally, follow the naming conventions. For example, feature/, bugfix/, hotfix/etc., to help understand the purpose.
Step 3. Retrieve or prepare metadata in your branch
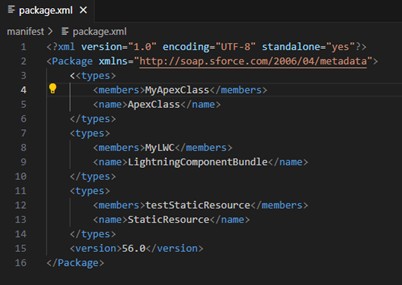
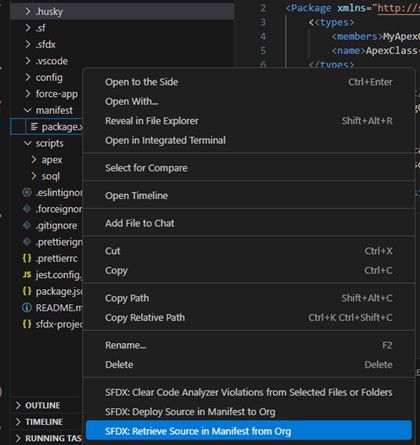
If you have made changes in your dev org (or sandbox), you might retrieve metadata first if you want to deploy/push those changes to higher orgs. To do this, create the package.xml file and retrieve the metadata to your local (assuming the org is already authorized). Once retrieved to the local the changes will be populated under the tab “Source Control” in VS Code, verify the change by opening the corresponding files and stage all the files one by one if changes found good.
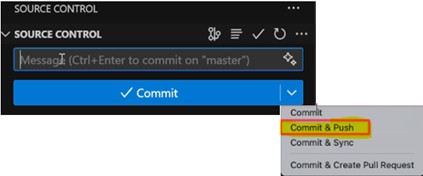
Step 4. Commit your changes
In VS Code’s Source Control panel:
- Stage your changes (you can use + icon or git add .)
- Write a meaningful commit message. (or use git commit -m “Your Message”)
- Commit and push: (or can use git push origin <your-branch-name>)
- Publish the Branch (if not done at the time of feature branch creation).
You now have a branch with your changes pushed to GitHub, ready for a PR.
3. Creating a Pull Request in GitHub
Once your feature branch is pushed to GitHub, you can create a PR. This is where quality checks will start, including CodeQL, Apex Scan, etc.
Step 1. Open GitHub and create a PR
On GitHub, go to your repository → Under tab Pull requests → Select Compare & Pull Request / New pull request.
- Base branch: main (or your target branch, say myBranch)
- Compare branch: the branch that you have pushed.
- The message will pre-populate whatever you have added at the time you commit & push the feature branch.
Step 2. Automated checks triggered (applicable if GitHub Actions are set up)
The moment you create a PR, GitHub Actions set off. The typical checks in a Salesforce context include:
- Code scanning (e.g., CodeQL) for security and static analysis
- Apex unit test runs
- Linting or formatting checks on LWC/JavaScript
- Metadata validation (deploying to sandbox)
These checks provide automated quality validation before review by a reviewer.
Step 3. Monitor the checks (applicable if GitHub Actions are set up)
On the PR page, you’ll see the ‘Checks’ tab, or even under ‘Conversation’, you can see it under GitHub Actions.
If tests fail or find any security issues, the PR cannot be merged; instead, you should fix the problems in your branch and push the changes/fixes again. The checks will run again automatically.
4. Assign reviewer(s) to Review, Approve, and Merge the PR
Step 1. Assign reviewers
In GitHub PR, select one or more reviewers to review the changes pushed by the developer via a feature branch. To review the changes, the reviewer can navigate to the ‘Files Changed’ tab, wherein all the changed files will be available.
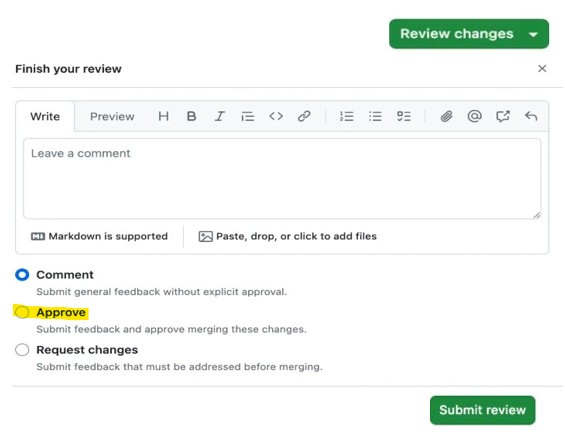
Step 2. Approval
Once all the changes have been reviewed by the reviewer(s), they click on the Review Changes button & approve the PR.
Step 3. Merge the PR
After approval by the reviewer, the ‘Merge Pull Request’ option will be enabled, and the PR can be merged to the target branch. At the same time, the merge action will trigger the CI/CD (Continuous Integration / Continuous Deployment) pipeline (it is applicable if the CI/CD pipeline is set up) to deploy code or metadata to the target Salesforce environment.
Step 4. Post-merge validation
After the merge, check the Actions tab in GitHub to verify the workflow run triggered by the merge. This action will check for metadata and dependencies, if any, before updating the target org with the latest changes available in the feature branch. Confirm deployment logs show success means changes were successfully deployed to the targeted org.
5. Why PR Workflow Matters & Best Practices
Why it matters
- As every change is tracked in Git, it ensures version control of Salesforce metadata.
- On PR creation, it automatically enables quality checks, catching issues before they reach higher environments.
- Facilitates code reviews, improving code quality, etc.
- Track the changes done, who, what, and when they were changed.
- Makes deployments reliable and consistent.
Best practices
- Write clear commit messages and PR descriptions.
- Use Feature branch naming conventions (feature/, bugfix/, etc) to have a clear understanding of the commit.
- Ensure automated checks include Apex and CodeQL scans.
- Keep checks, such as before merging, that it passes quality checks, that the review is done by the reviewer, etc.
6. Conclusion
This article focuses on creating PRs to deploy changes made in the lower Environment to the Higher Environment in the Salesforce ecosystem using VS Code.