
Introduction
In today’s digital-first business landscape, streamlining document workflows is essential for operational efficiency and compliance. DocuSign, a global leader in electronic signatures, offers secure and legally binding digital signing capabilities. When integrated with Appian, a powerful low-code automation platform, organizations can automate approval processes, reduce manual effort, and enhance document governance.
This guide walks you through the process of integrating DocuSign as a Connected System within Appian, enabling seamless eSignature workflows across your enterprise applications.
Why DocuSign?
DocuSign empowers organizations to manage agreements digitally with features that ensure security, compliance, and scalability.
Key Capabilities:
- Legally Binding eSignatures compliant with ESIGN Act (U.S.), eIDAS (EU), and ISO 27001.
- Workflow Automation for multi-step approval processes.
- Audit Trails for full visibility into document activity.
- Reusable Templates for standardized agreements.
- Enterprise-Grade Security with encryption and access controls.
- Pre-built Integrations with platforms like CRM, ERP, and BPM—including Appian.
Integration Overview
Appian’s native support for DocuSign as a Connected System simplifies integration, allowing developers to:
- Send documents for signature
- Track document status
- Retrieve signed documents
- Manage signers and templates
Prerequisites
Before starting, ensure you have:
- Appian Environment with admin access
- DocuSign Developer or Production Account
- API Credentials: Integration Key, Client Secret, and RSA Key
Step-by-Step Integration
Step 1: Register Your App in DocuSign
- Log in to the DocuSign Developer Portal
- Navigate to Apps and Keys → Add App
- Generate:
- Integration Key
- Secret Key
- RSA Key
- Add your Appian environment’s Redirect URI:
https://<your-appian-environment>/suite/rest/authentication/callback
- Enable GET and POST methods and save changes.
Step 2: Configure OAuth in Appian
- In Appian’s Admin Console, go to Authentication → Web API Authentication
- Add DocuSign credentials under Appian OAuth 2.0 Clients
- Ensure all integration details match those from DocuSign
Step 3: Create DocuSign Connected System
- Open Appian Designer → Connected Systems
- Create a new system:
- Type: DocuSign
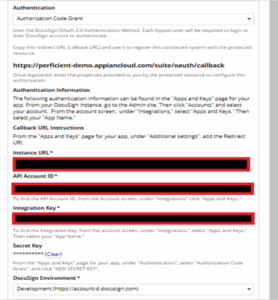
- Authentication: Authorization Code Grant
- Client ID: DocuSign Integration Key
- Client Secret: DocuSign Secret Key
- Base URL:
- Development: https://account-d.docusign.com
- Production: https://account.docusign.com
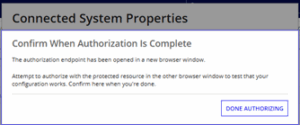
- Click Test Connection to validate setup

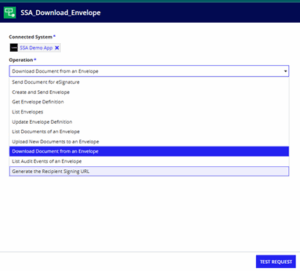
Step 4: Build Integration Logic
- Go to Integrations → New Integration
- Select the DocuSign Connected System
- Configure actions:
- Send envelope
- Check envelope status
- Retrieve signed documents
- Save and test the integration
Step 5: Embed Integration in Your Appian Application
- Add integration logic to Appian interfaces and process models
- Use forms to trigger DocuSign actions
- Monitor API usage and logs for performance and troubleshooting
Integration Opportunities
🔹 Legal Document Processing
Automate the signing of SLAs, MOUs, and compliance forms using DocuSign within Appian workflows. Ensure secure access, maintain version control, and simplify recurring agreements with reusable templates.
🔹 Finance Approvals
Digitize approvals for budgets, expenses, and disclosures. Route documents to multiple signers with conditional logic and securely store signed records for audit readiness.
🔹 Healthcare Consent Forms
Send consent forms electronically before appointments. Automatically link signed forms to patient records while ensuring HIPAA-compliant data handling.
Conclusion
Integrating DocuSign with Appian enables organizations to digitize and automate document workflows with minimal development effort. This powerful combination enhances compliance, accelerates approvals, and improves user experience across business processes.
For further details, refer to: