
Managing cloud infrastructure effectively requires consistent and meaningful tagging of resources. Manual tagging is prone to errors and difficult to scale. In this blog, I’ll show you how to use Amazon SageMaker and Python to automatically apply intelligent tags to your EC2 instances using either rule-based logic or AI-powered enhancements.
What You Will Learn
- How to use SageMaker Studio to run Python scripts for EC2 auto-tagging
- How to set up SageMaker Domains and user profiles
- How to securely grant EC2 permissions to SageMaker
- How to fetch EC2 metadata and apply intelligent tag logic
Why This Is Needed
- Manual tagging doesn’t scale across large environments
- Lack of consistent tags causes billing, visibility, and compliance issues
- AI can intelligently assign tags based on patterns in instance metadata
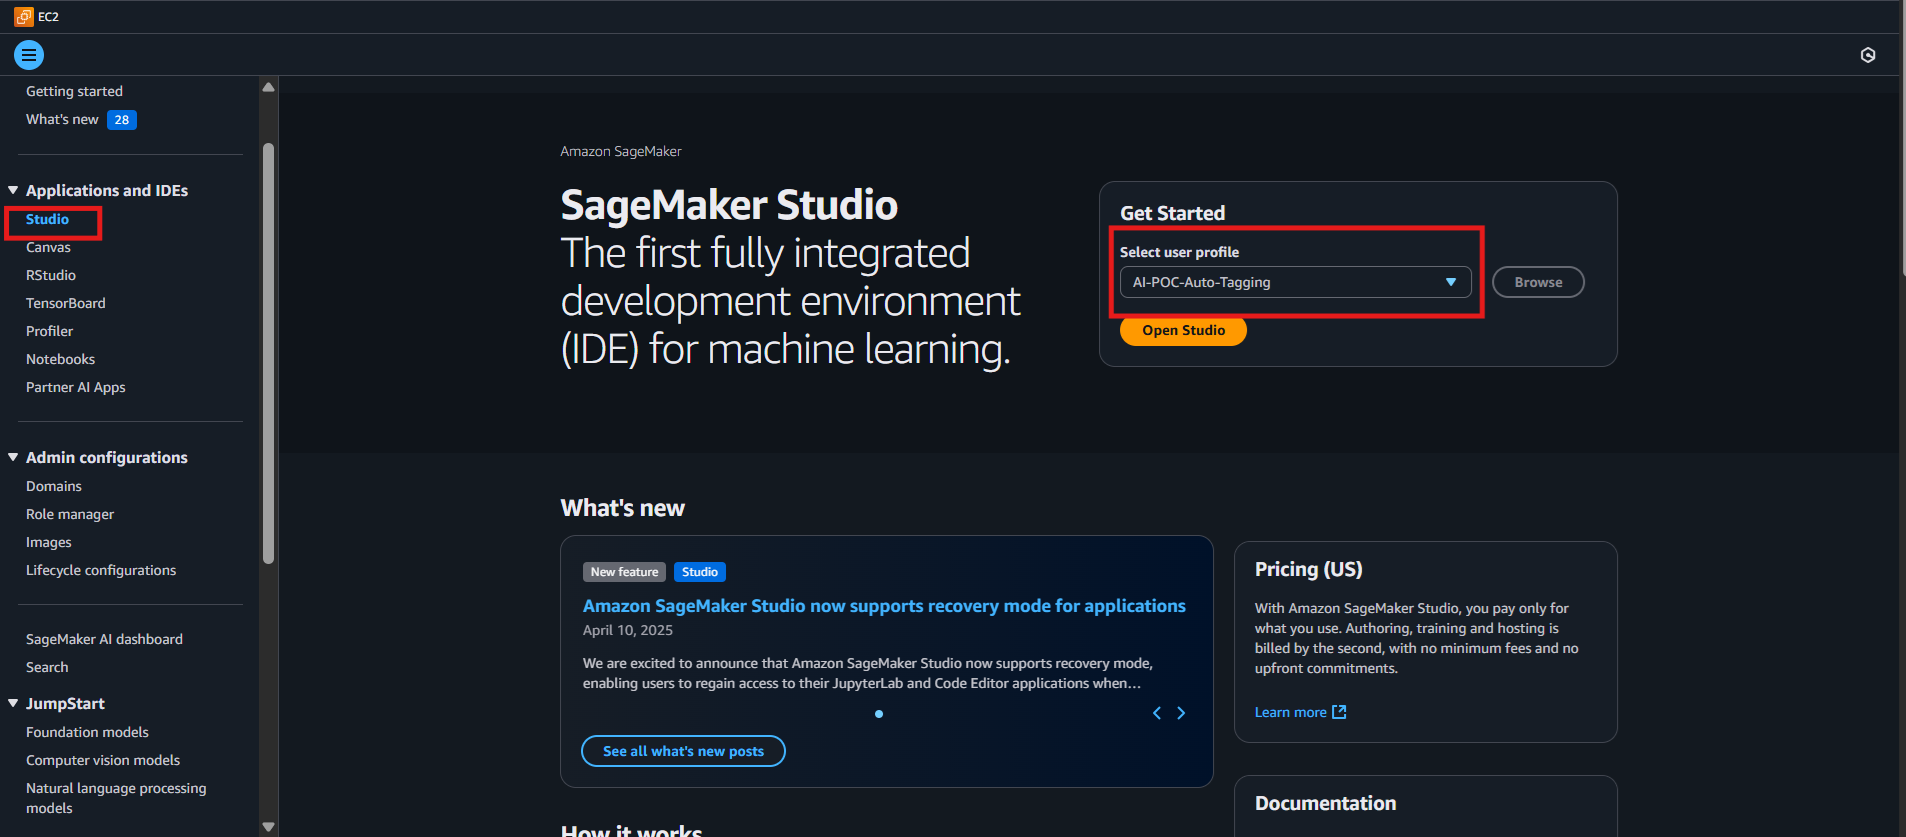
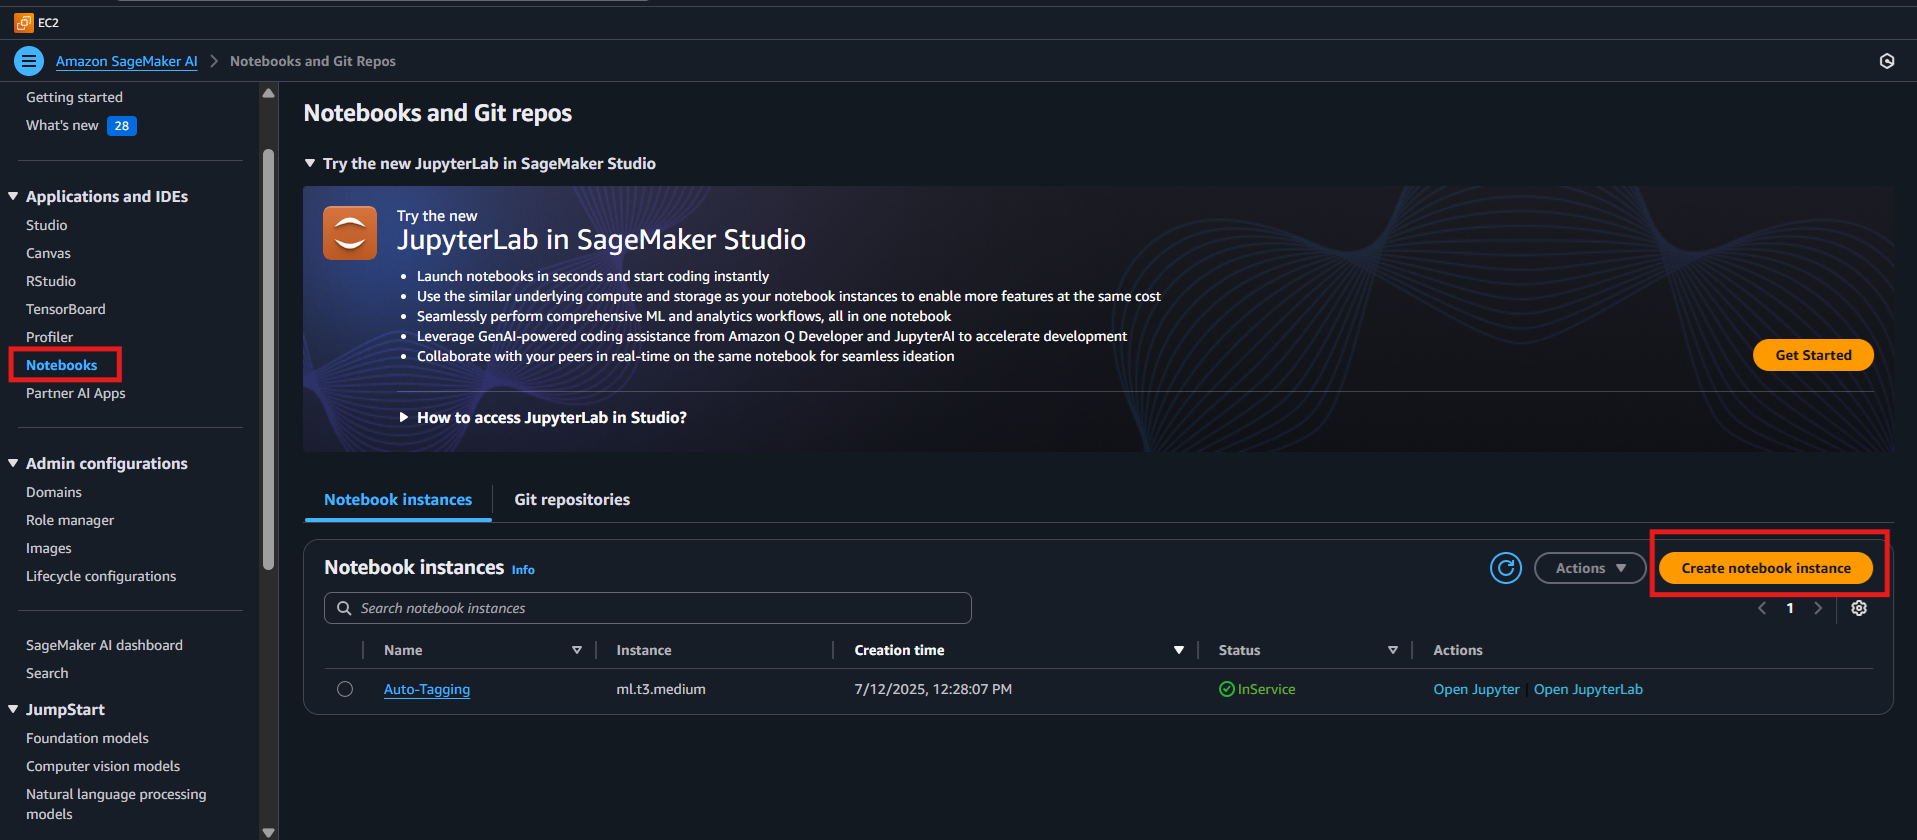
How It Works
- Launch SageMaker Studio (requires a domain and user profile)
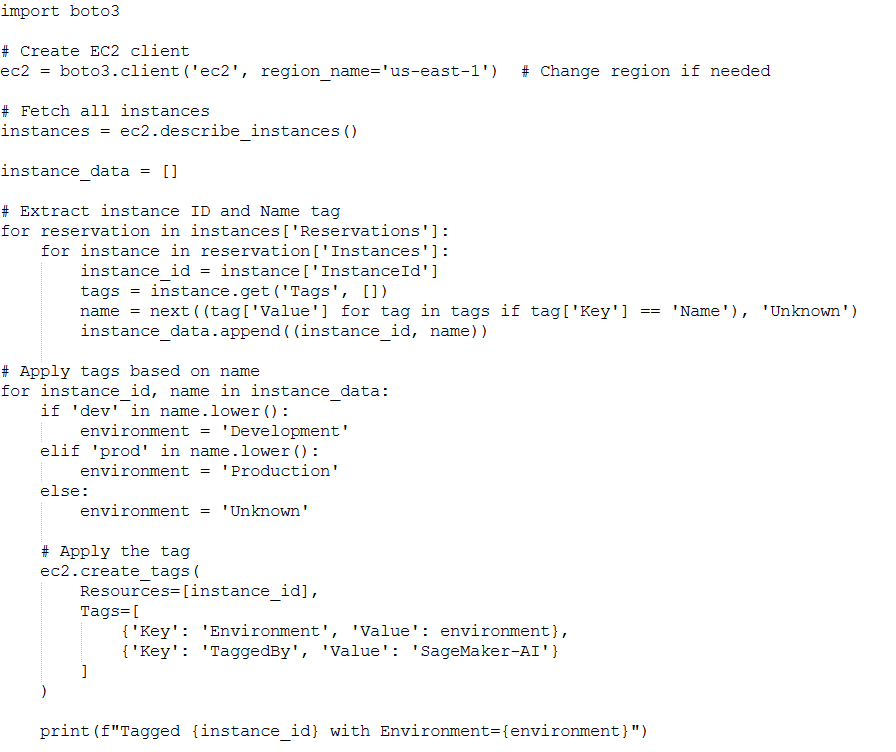
- Use a notebook to run a Python script that fetches all EC2 instances
- Apply simple rule-based or AI-enhanced logic
- Use Boto3 to update tags automatically
Pre-requisites
- AWS account
- Existing EC2 instances
- SageMaker execution role with permissions:
- ec2:DescribeInstances
- ec2:CreateTags
- Familiarity with Python and basic AWS concepts
Architecture

Step-by-Step Guide
1. Create a SageMaker Domain and User
- Go to the AWS Console → Amazon SageMaker → Domains
- Click “Create domain.”
- Use IAM authentication
- Create a user profile (e.g., ai-user)
- Choose ml.t3.medium for the Studio instance type
- Click Create and wait for provisioning

2. Add Permissions to the Execution Role
- Go to IAM Console → Roles
- Search and select the SageMaker execution role (e.g., AmazonSageMaker-ExecutionRole-*)
- Attach the AmazonEC2ReadOnlyAccess policy
- Add inline permissions for ec2:CreateTags if needed


3. Launch SageMaker Studio
- Open the SageMaker domain
- Click on your user profile → Open Studio
- In Studio, go to File → New → Notebook
- Choose the Python 3 (Data Science) kernel

Python Scripting
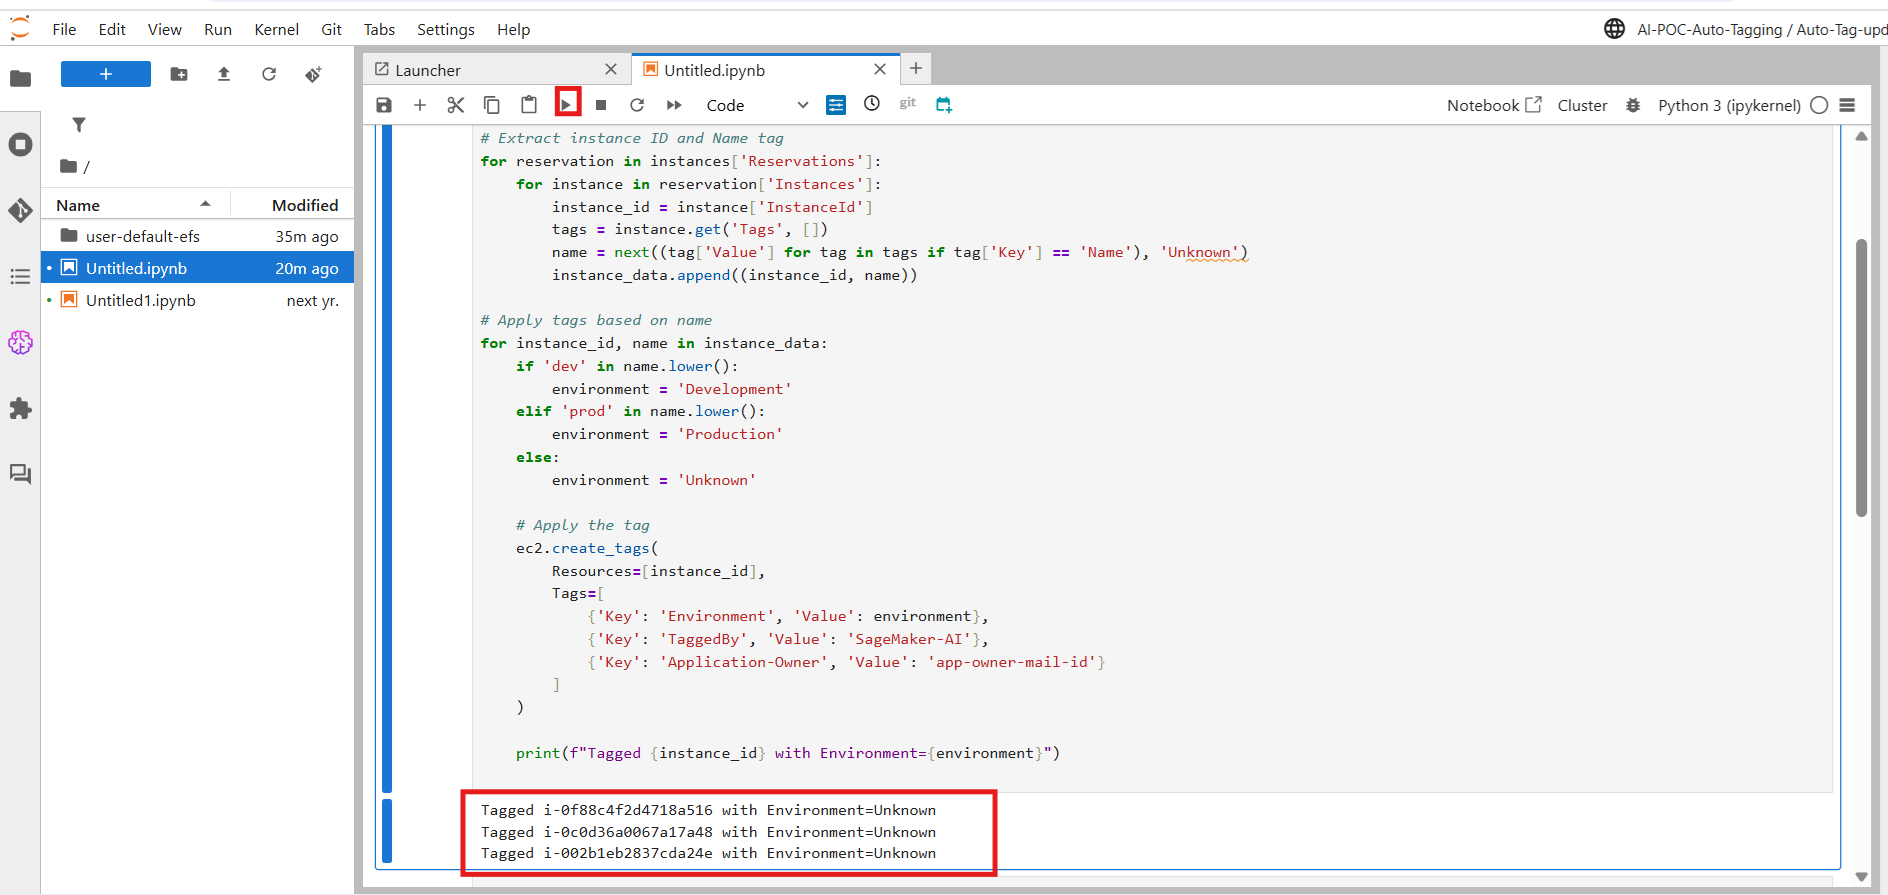
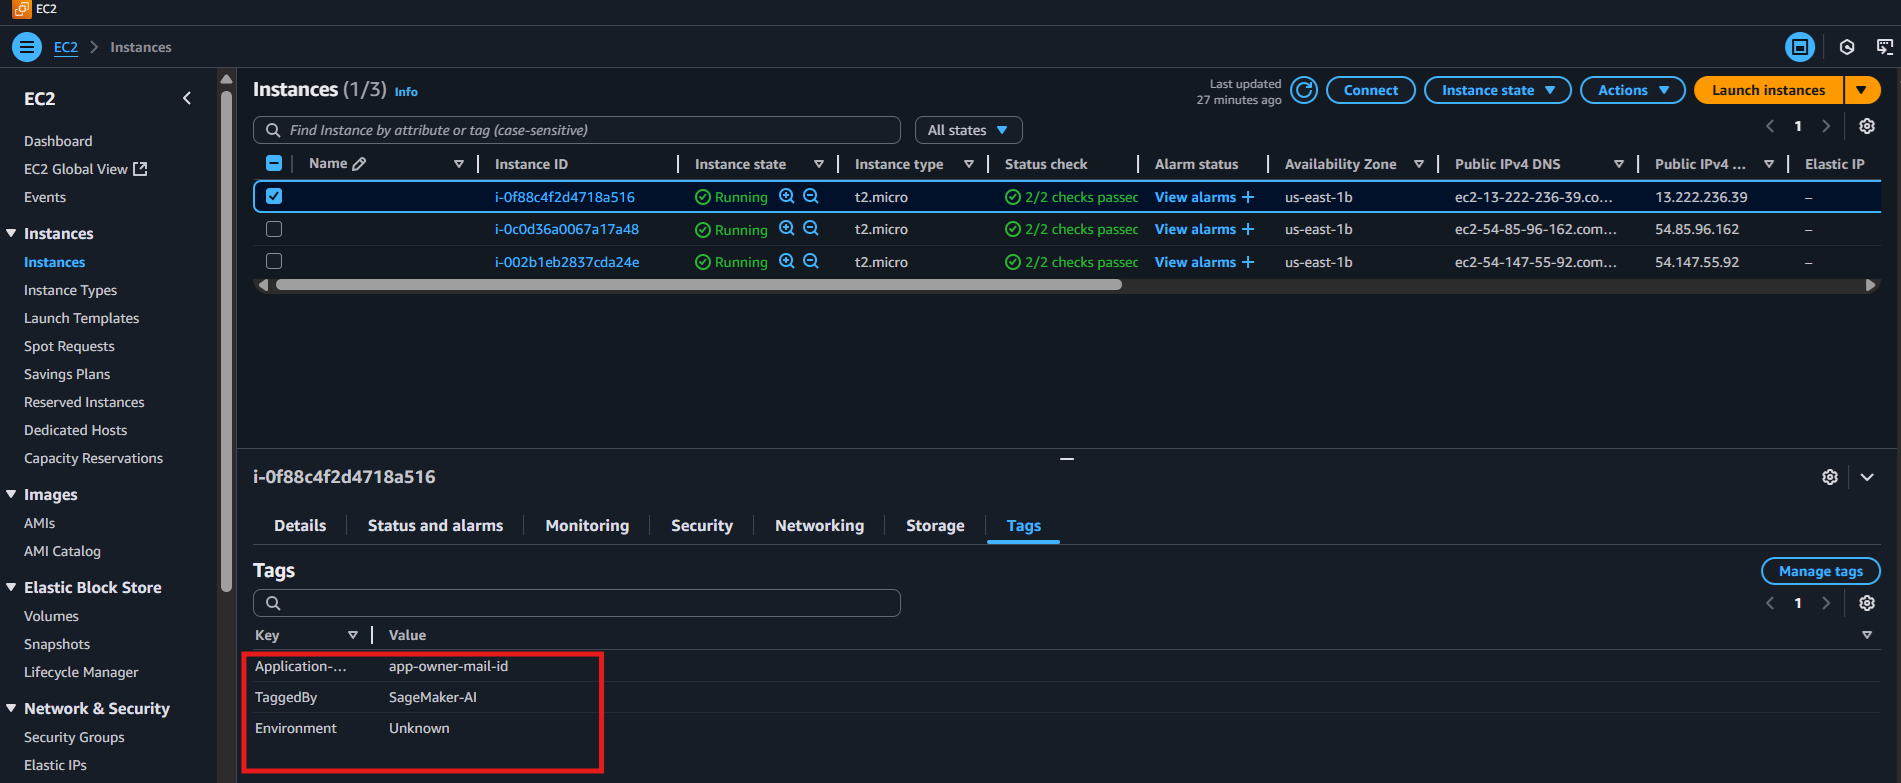
Validate the Output
- Go to EC2 Console → Instances
- Check the Tags tab
- You should see Environment and Tagged By tags
Conclusion
This process leverages the power of SageMaker and Python to auto-tag EC2 instances. It enhances consistency, reduces manual effort, and lays the foundation for ML-driven infrastructure management.
Future improvements can include utilizing Amazon Comprehend or Bedrock for more intelligent tag inference, or automating the process using Lambda and EventBridge.