If you are struggling to set up the web.config files upon hosting your web application, here is a solution to how you can configure your Web.Debug.config and Web.Release.config file so that your application runs dynamically on both the dev and prod environments.
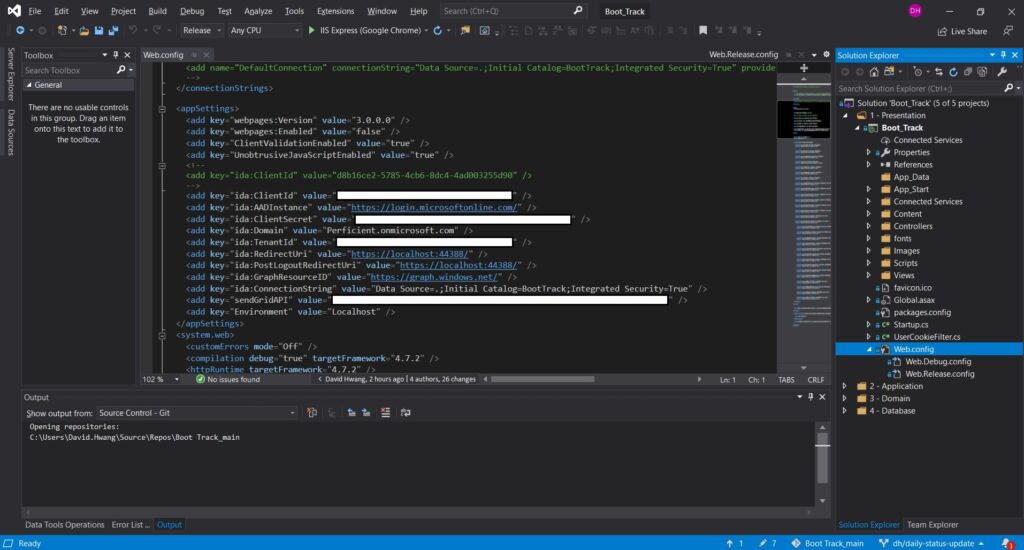
Web.Config
Leave the original web.config file as it is. Make sure you have your RedirectUri configured as well. Click here to see how you can manually set that up if your hosted site directs to your localhost upon authentication.
Web.Debug.Config
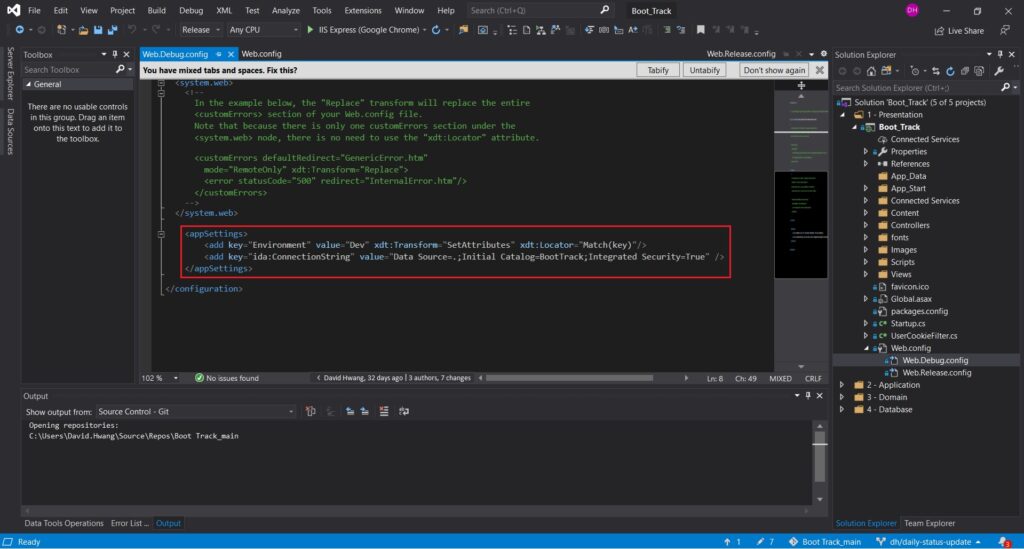
Add the keys for Environment(default) and Connection String in the Web.Debug.config file.
- xdt:Locator=”Match(key)” indicates that we want to match with the key variable.
- xdt:Transforms=”SetAttributes” allows us to set the corresponding key with the value we have assigned here. You can also “Replace”, “Insert”, or “RemoveAttributes()”. Click here for more syntax.
Web.Release.Config
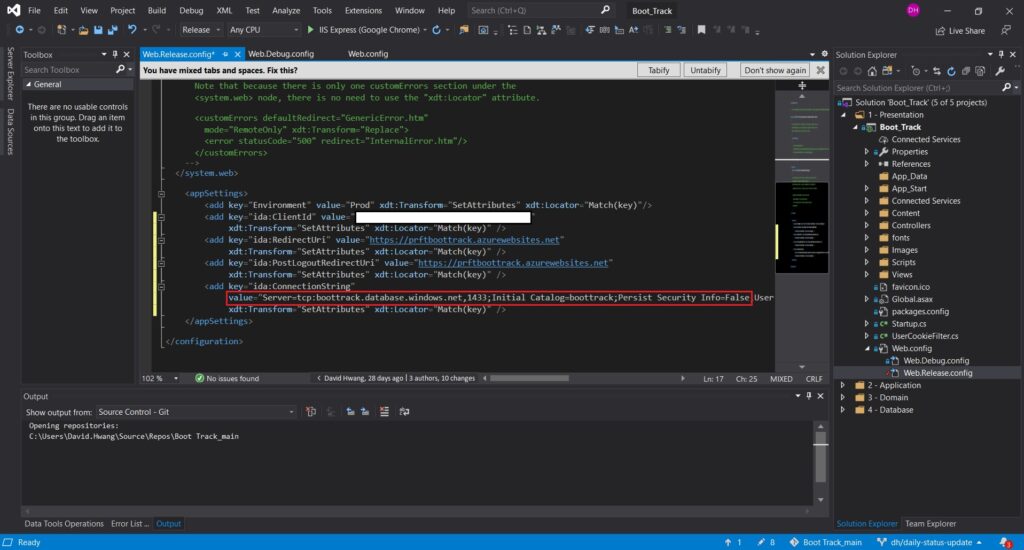
Same logic applies to the Web.Release.Config file. Here is where you manage your configurations for your hosted site. Set the attributes for your Environment (default), ClientId, RedirectUri, PostLogoutRedirectUri, and ConnectionString.
Where Do I Find my Client ID and Connection String?
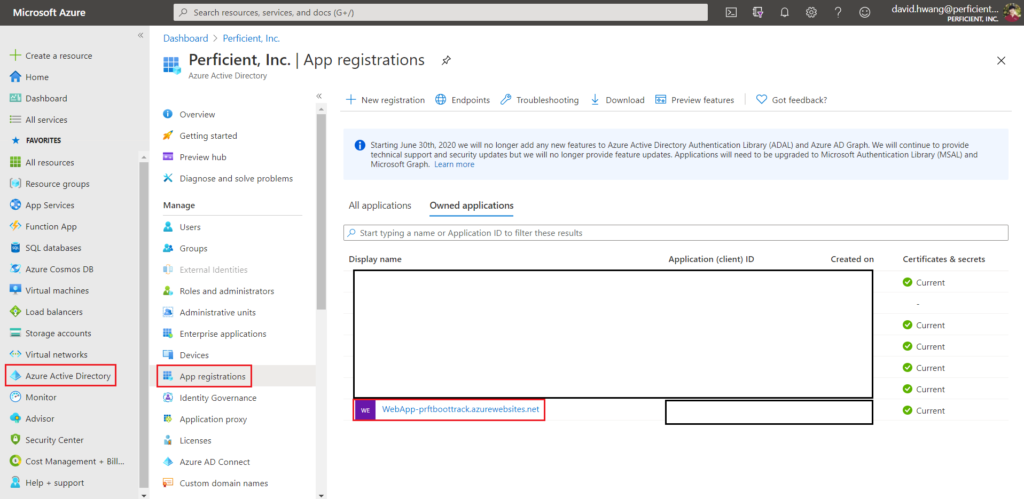
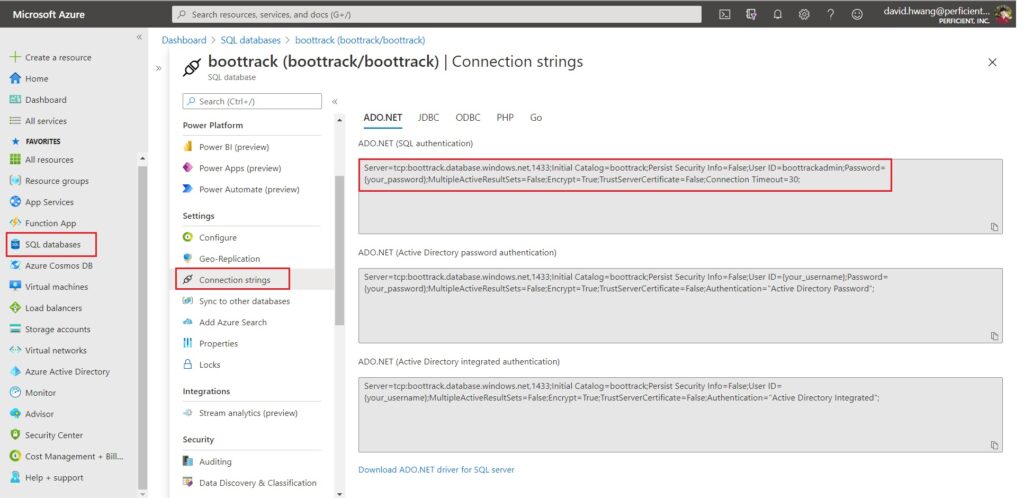
In case you are confused on where you can retrieve your ClientId or the ConnectionString for your Azure SQL, refer below.
In your Azure Portal, go to Azure Active Directory > App Registrations > Corresponding Web App to get your ClientId for the hosted web application.
SQL databases > Connection Strings > SQL Authentication
Hope that helped!

