Let’s take a look at the configuration for federated authentication in Sitecore 9.
By the way, this is Part 2 of a 3 part series examining the new federated authentication capabilities of Sitecore 9. If you missed Part 1, you can find it here:
Part 1: Overview
Enabling Federated Authentication
Before we can begin implementation, several configuration steps are required to set up Sitecore for federated authentication. The default Sitecore installation does not have federated authentication enabled by default. The easiest way to enable federated authentication is use a patch config file that Sitecore conveniently provides as part of the installation located at App_Config/Include/Examples/Sitecore.Owin.Authentication.Enabler.config.example. You’ll want to make a copy of that file and place it in App_Config/Include or a subfolder of that location and remove the .example extension. The contents of that file is shown below:
This file does 2 main things – first, it sets the setting called FederatedAuthentication.Enabled to the value of true (it’s false by default) and second, it registers new OWIN AuthenticationManager, TicketManager, and PreviewManager implementations using dependency injection. This replaces the existing implementations with ones that support OWIN middleware. That’s the magic of dependency injection.
Configuring an Identity Provider
Registering an Identity Provider
To implement an identity provider in Sitecore, you’ll need 2 main pieces. First, you’ll need to register the identity provider with Sitecore and configure various settings that go along with it. You can do this with a configuration patch file. I’ve shown the configuration I’m using for the Facebook identity provider below.
This patch file first registers an identity provider with Sitecore using the configuration/sitecore/federatedAuthenitcation/identityProviders node. This is also where the magic happens to create the button on the Sitecore login page for each identity provider. The text of the button is specified in the <caption> node within the <identityProvider> node.


You’ll also specify the domain of the user when logging in with this identity provider. This allows you to potentially create separate Sitecore domains for different identity providers.

Specifying Identity Metadata Transformations
Inside the <transformations hint="list:AddTransformation"> tag, you can take claims that are being passed in from the external identity provider and map them to a normalized set of claims that can be shared across multiple identity providers. For example, one identity provider may provide a claim for role using a certain URI but another identity provider might be using a non-standard identifier. This allows you to map the incoming claims to a common identifer which can be used to map user properties (more on that below).
Configuring Identity Provider Usage
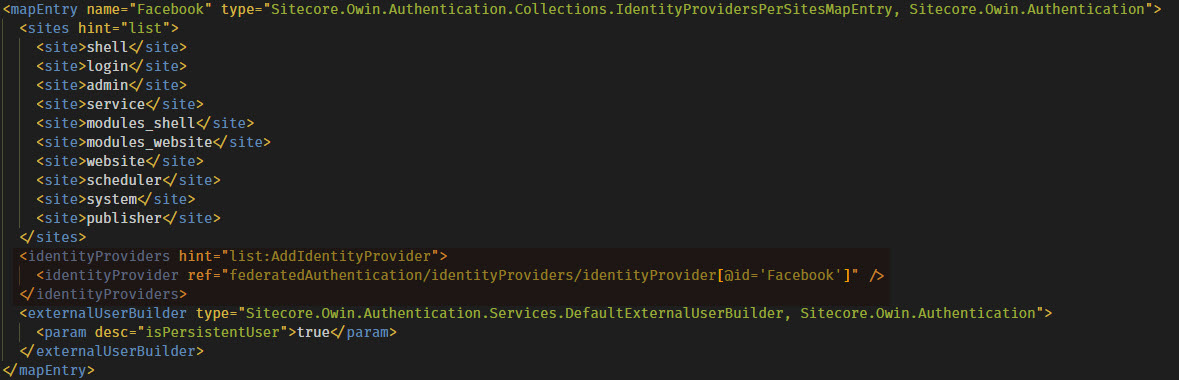
The patch file also specifies some configuration for the identity provider in the <identityProvidersPerSites> node. For each identity provider, a new <mapEntry> node can be created to specify which Sitecore sites are allowed to use the identity provider for authentication purposes. This can be useful for specifying separate identity providers for Sitecore admin and site end-user authentication as well as separate identity providers in a multisite scenario.
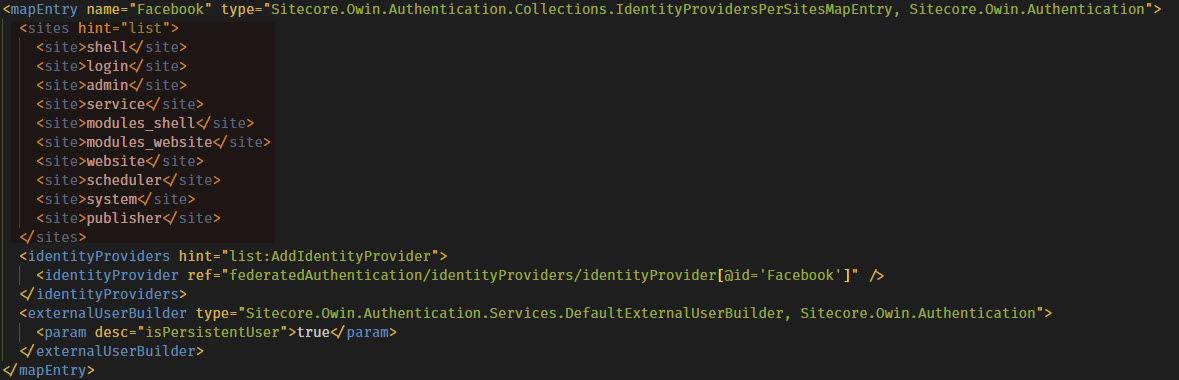
The mapping is then tied to the identity provider that you defined earlier…
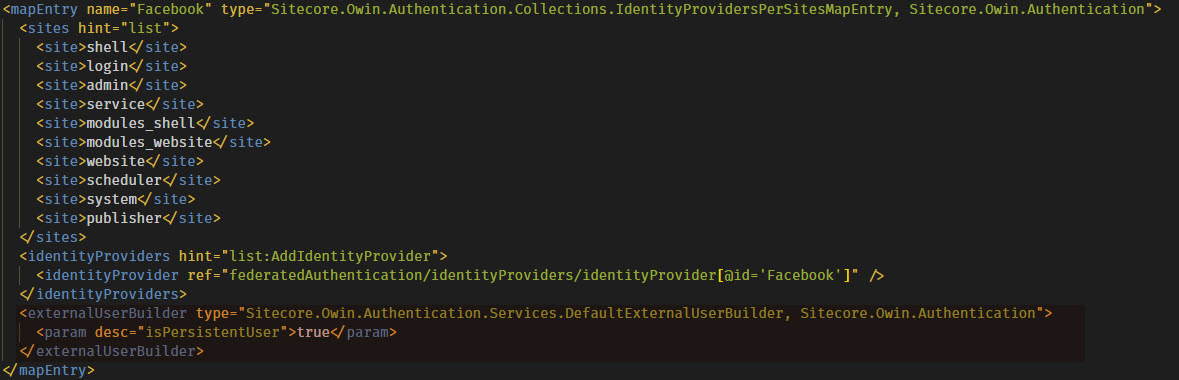
…then some configuration regarding the user itself. Sitecore provides an abstract class called ExternalUserBuilder that can be inherited from and set up the user on the Sitecore side of the world based on claims or whatever metadata that is coming in from your identity provider. There is an implementation called DefaultExternalUserBuilder that provides a property to set whether or not the user to be used in Sitecore is a virtual or a persistent user.
Mapping User Properties
The <propertyInitializer> node provides a list of maps from claims to user properties. This is where you can take your normalized set of claims and translate them to user properties in Sitecore. The <source> tag defines the claim to be matched – the name property identifies the claim and the value properties identifies what the value needs to match in order to set the property. The claims are assigned as properties of Sitecore.Security.UserProfile for the user logging in. These properties are specified by the <target> tag. If the property is an actual property of the UserProfile class such as IsAdministrator or Email, the value will be set for that property. If what’s specified in the name property of the <target> tag isn’t a property on the UserProfile class, it adds the name/value pair into a property called CustomProperties which can be used as needed. This allows access to values of incoming claims on a Sitecore user.
Thanks, very good and helpful article but where is part 3
The article is really helpful, is part 3 available now?
Hi,
On click of login button it’s asking for username/password. I didn’t find part 3 so can you please help me to with next steps?
Part 3 is now up. You can find it here: https://blogs.perficient.com/sitecore/2018/06/06/federated-authentication-in-sitecore-9-part-3-implementation-of-saml2p/