
One of the biggest pain points of Salesforce Community templates we heard from our clients was that they didn’t want it to look like a “template” community. With the Winter ’17 release came custom themes, allowing admins and developers to create a custom branded community all while still being able to leverage Salesforce’s standard and custom components.
In this post I’m going to walk you through building and applying a theme to your community. I understand themes can be a little overwhelming to the uninitiated, but once you understand them, and get some experience under your belt, you’ll begin to see the power and control they offer.
What is a Salesforce Community Custom Theme?
Custom themes are simply a type of Lightning component, offering all the abilities of a native component, in addition to being able to control the “template” of your community. You can still surface attributes for further customization, apply styles specific to the theme, and even apply custom logic, if required.
Creating a Custom Theme
You will need some HTML/CSS knowledge in order to create a theme, as it is a type of Lightning component. There is plenty of documentation out there on creating themes, so I’ll leave the technical side to the pros.

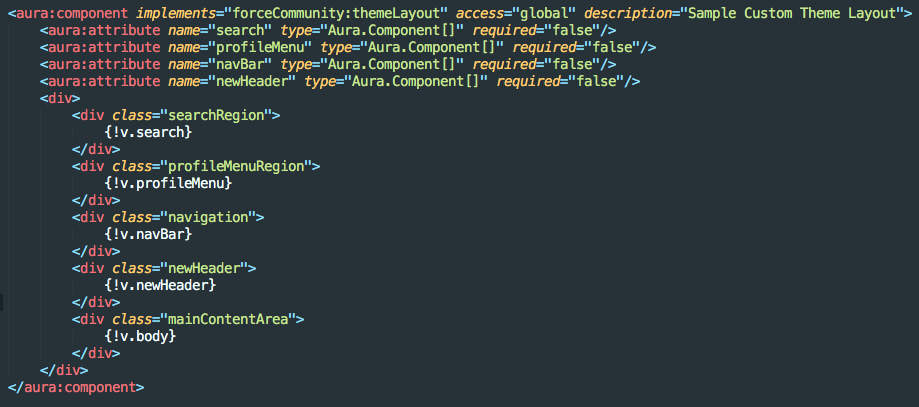
What I really want you to know about creating a theme, is that even though it is custom, you don’t have to build any of the standard header components from scratch, such as the navigation or user profile drop-down. Simply using standard variables in your theme (see HTML below) for components such as search, profile menu, and navigation, all render these areas with the standard components in their place automatically. This way you can still take advantage of the admin-friendly attributes of these standard components in the Community Builder.
Adding Attributes to Your Custom Theme
To me, the most powerful part of themes are the attributes. This means less individual theme components and more flexibility for your community admin to choose what combinations of attributes on a theme they’d like for any new pages created through the Community Builder. The use cases are really endless:
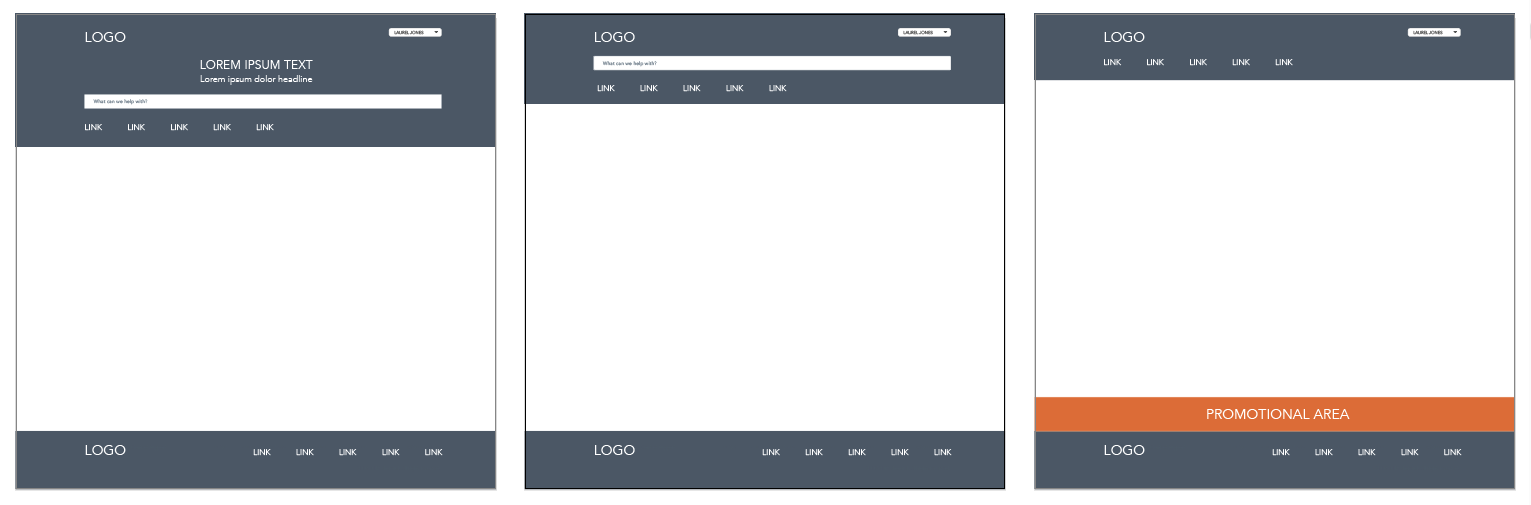
- You want a different header background image for different areas of your website
- You want different height banners on pages depending on their level in the page navigation (ie, top level gets larger image, sub-levels get smaller)
- You want to hide or show the search bar depending on the page you’re on
- You want to show a particular alert bar on all but a few of your pages
So, if you wanted the ability to have all the above cases in your Salesforce community, you would only need one theme with four attributes. In this case, you could create 24 different page combinations from one theme. Pretty powerful, huh?!
If you’re familiar at all with Lightning components, you know that you can add attributes that are editable fields in the Community Builder that you can use to customize the component (ie, a custom button with attributes for the button label, button URL, button color, etc.). You can do the same with themes – through picklists, checkboxes, text/number fields, you can make small changes to one theme to make it seem like you built many!
Applying the Theme to the Community
Once your theme is created and your attributes are in place, you’ll need to apply it to your community as a Theme Layout Type, essentially one combination of attributes to apply to a page.
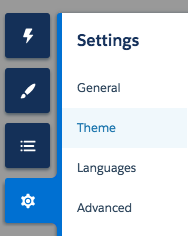
- In your community Builder, click on the settings tab on the left, then select Theme.
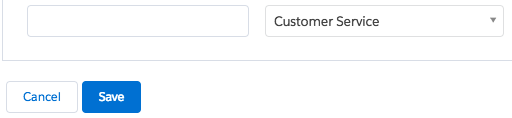
- Click on the New Theme Layout Type button, name your theme type, and select the theme from the drop-down (this will be the name of your theme component), and click Save.
- Create as many Theme Layout Types as you have combinations of attributes. It’s okay if you don’t think of them all at the moment you’re doing this – you can always come back and add more.
- Now go to the page(s) to which you want to apply your theme.
- Select the
 or the
  to open up the page properties and scroll down to the Layout section. Select the Theme Layout Type you want to apply to that page from the drop-down and the page will automatically render with the new layout.


It starts to get even more interesting when you add custom page layouts to custom themes, and export them as Salesforce Lightning Bolt solutions – go try it for yourself and be amazed!
We have experience in building custom themes for our clients and would love to hear about your use cases and how you think custom themes might help you create a better community experience.