This is the third post in this series. In the last two posts (here and here), we implemented a custom token for the logged in user which filters incoming content in the search index based on the user’s profile attributes, and then creating display templates to render custom result URLs. Today we will dive into
extending this concept to the search results hover panel.
Scenario
An internal portal accessed by employees and contractors in three dozen locations comprising of countries and/or regions. Authoring takes place in a separate content site and content is rendered on the publishing site. All content is targeted with three important profile attributes –
a. Location (comprises of country and it’s region)
b. Role
c. Business Unit
Each piece of content/link takes the user to the publishing site keeping authoring unexposed to the end user. What this means for search results is
1. The results should be targeted based on user profile properties (mentioned above)
2. Customizing search results URL to point to publishing site
3. Customizing hover preview to display publishing pages (instead of the authoring site content pages)
4. Customizing Control template to implement custom paging
The focus of today’s article will be #3. When SharePoint 2013 came out, the focus was primarily on making sure each result is quick and easy to find and read, while still displaying as much relevant information as possible to the end user.
When the user wants to learn more about a result, they hover their cursor over that result to see the hover panel dialog box. The hover panel contains rich metadata that enables users to investigate a result more thoroughly, without having to click through and load the document. Hover Panel is broken into three sections
a. Header
b. Body
c. Footer Actions
The files which provide these sections are *HoverPanel.js , *HoverPanel.html, and then html and JS file for each of the following: *HoverPanel_Body, *HoverPanel_Actions, *HoverPanel_Header. These files could be found in the /search center site Master Page gallery.
In order to display the publishing site page in the hover preview we’ll need to make few changes to the OOB hover panel. Let’s start with making a copy of the “Item_DefaultHoverPanel_Actions.html”. This ensures keeping our customization separate.
Step 1
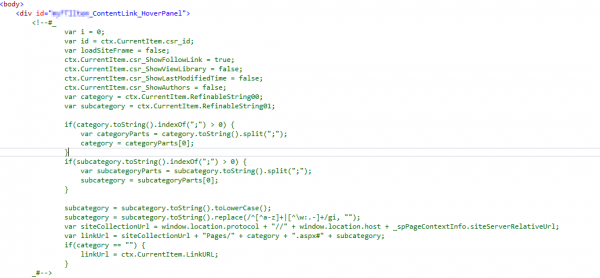
Update the managed property mapping section with our custom properties. In this case RefinableString00 and RefinableString01

Step 2
Snippet to build the linkURL. This linkURL points to the publishing site (instead of authoring)

Step 3
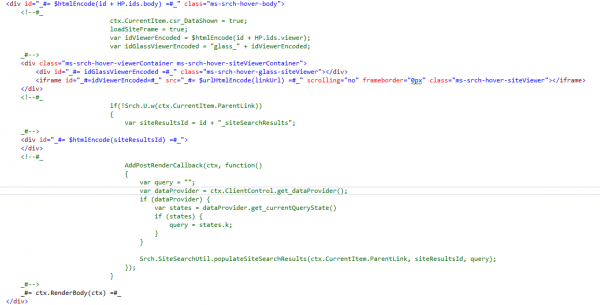
Render the hover panel header

Step 4
Render the body section

Step 5
![]()
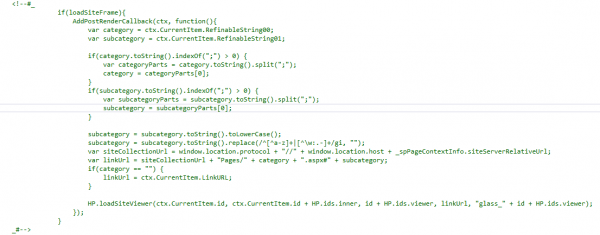
Towards the end of the above DIV block, add this snippet to enable rendering of your custom preview


Pingback: Hi there, after reading this amazing post i am too delighted to share my knowledge here with colleagues.
Pingback: Can I just say what a relief to uncover someone who really knows what they are discussing on the net. You actually know how to bring a problem to light and make it important. More people have to read this and understand this side of the story.