
- Introduction
Web developers have wanted to use audio and video on the web for quite a long time. With the standardization of HTML5 and most modern browsers starting to implement HML5, it’s been a great surprise for us.
In the past, implementing audio and video in a web application would be very tedious since we would need to import heavy third-party plugins such as Flash.
Now HTML5 audio/video provides another option for us, although it’s still not as powerful as Flash due to browser limitations. It is adequate in most cases.
This article is going to tell you how to build your own HTML5 audio player.
- Let’s start with a simple HTML5 player

As seen in the above code, it will create a player using the default style that each browser provides. This means that the player will look different in different browsers.
In Chrome:

In Firefox:

You might be thinking: “What if I wanted to style my own audio player with its own buttons and progress bar?”
Actually, HTML5 provides quite a few useful APIs to make it possible to manipulate audio elements with JavaScript. This means that we can easily style our own player.

So, first let’s get familiar with HTML5 audio tag attributes and some APIs we need to use in our demo.
- Important tag attributes and JavaScript APIs
Tag attributes:
- buffered: Returns a TimeRanges object representing the buffered parts of the audio/video.
- controls: Sets or returns whether the audio/video should display controls (like play/pause etc.)
- currentTime: Sets or returns the current playback position in the audio/video (in seconds)
- duration: Returns the length of the current audio/video (in seconds)
- src: Sets or returns the current source of the audio/video element
API events:
- canplay: Fires when the browser can start playing the audio/video
- canplaythrough: Fires when the browser can play through the audio/video without stopping for buffering
- pause: Fires when the audio/video has been paused
- play: Fires when the audio/video has been started or is no longer paused
- timeupdate: Fires when the current playback position has changed
- Start building your player

Now let’s start to customize our own audio player just like above picture shows. But before we start, let’s analyze it. Basically, this little player can be divided into the 5 following stories.
- It has a play/pause button, which is to start/pause the audio.
- If the user clicks the play button, audio will be started and it turns into a pause button.
- If the user clicks pause button, audio will be paused and it turns into a play button.
- It has a next button which is to switch to the next audio.
- It has a progress bar to track how much this audio has played.
Now let’s implement our functions based on the above user stories.
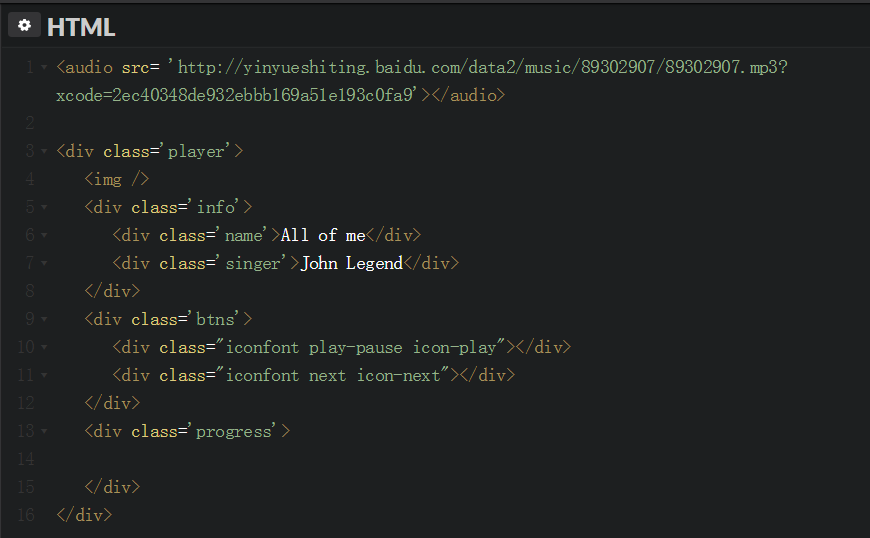
First of all, create the HTML5 markups.
Then write JS codes to make the player run!
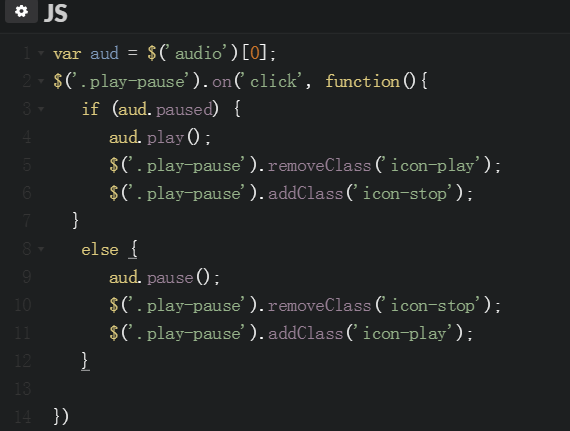
- For the first 3 stories, we can bind the below event to this play/pause button.
It utilizes the “paused” attribute, “play()” and “pause()” APIs, if the audio is paused. It then triggers play() and updates the button style, otherwise in reverse.
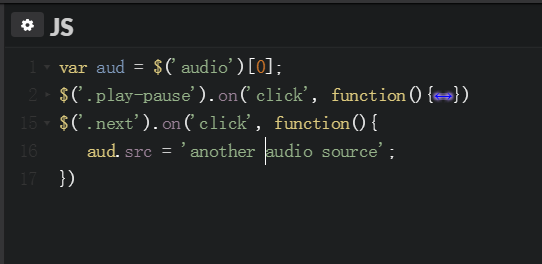
- For the 4th user story, we only need to update the source of the audio element.
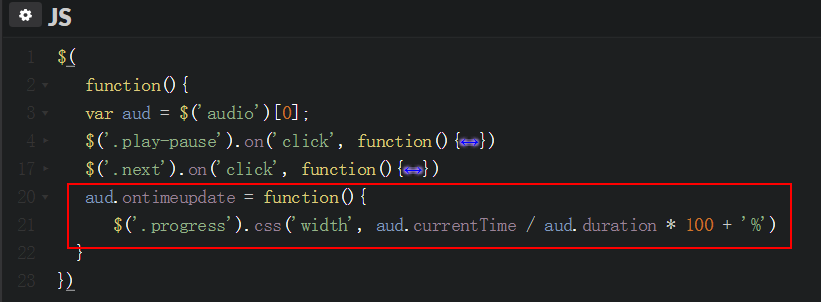
Regarding the last one, we need to grab the length of the current audio, and how much of it has played, to calculate the percentage and set the correct width of the progress bar. As we already learned, “duration” stands for audio length and “currentTime” represents how much audio has played.
Add the below codes and you will see the progress bar is running!
- Retrofit your player
Finally, you can add the styles you like to make your play prettier.
Below is the codepen link which has all the source codes on this blog. Feel free to take a look if you are interested.
https://codepen.io/wssjq198913/pen/mqZKZO
- Conclusion
I hope you’ve enjoyed learning about HTML5 audio and how you can create your own players. There are only basic controls in my player, but there’s nothing to stop you from adding more features such as volume control, play mode and even adding your own animations. I’m looking forward to seeing you create great HTML5 audio players!