
For those unfamiliar with Amazon Web Services (AWS), is a subsidiary of Amazon that provides on-demand cloud computing platforms and APIs to individuals and companies, on a metered pay-as-you-go basis. These cloud computing web services provide distributed computing processing capacity and software tools via AWS server farms.
This blog will demonstrate how to use the Data Migration Service to move data from Amazon RDS PostgreSQL to Amazon Redshift.
Let’s begin by learning about RDS PostgreSQL, so what is RDS PostgreSQL?
Known as Amazon Relational Database Service, is a collection of cloud database management services that make setting up, managing, and scaling databases simple.
What is Amazon Redshift?
Amazon Redshift is a fully managed data warehouse service in the cloud. Amazon Redshift uses SQL to analysis structured and semi-structured data across data warehouses, operational databases, and data lakes.
What is Amazon Database Migration Service?
AWS Database Migration Service is a managed migration and replication service that helps move your database and analytics workloads to AWS quickly, securely, and with minimal downtime and zero data loss.
Now, we are having a clear understanding of RDS PostgreSQL, AWS Redshift and DMS
Following are the steps to Move data from RDS PostgreSQL to Amazon Redshift using Data migration service
Here are the step-by-step details with snippets for each of these steps:
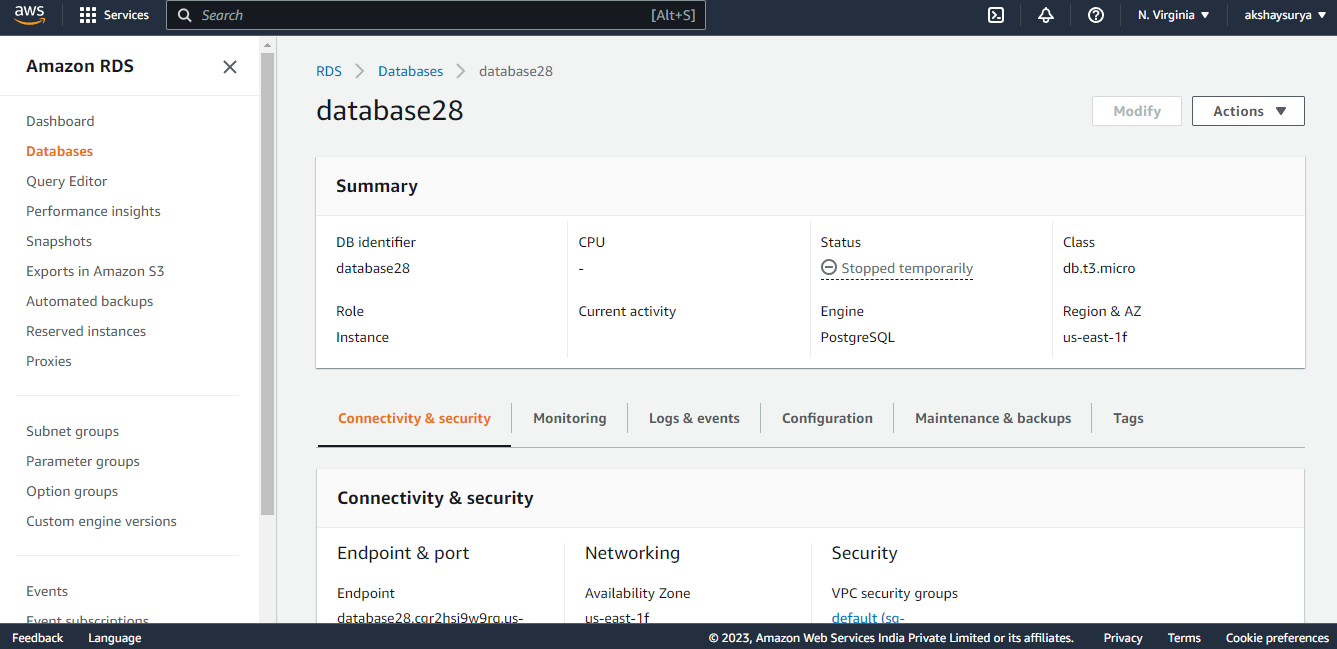
Step1: Create Sample AWS RDS PostgreSQL Database-
- Sign in to the AWS Management Console and open the Amazon RDS console.
- In the navigation pane, choose Databases.
- Choose Create database.
- In Configuration, choose PostgreSQL.
- For DB instance size, choose Dev/Test.
- For DB instance identifier, enter a name for the DB instance, or leave the default name.
- For Master username, enter a name for the master user, or leave the default name (postgres).
- To enter your master password, clear the Auto generate a password box, and then enter the same password in Master password and Confirm password.
- Choose Create database.

Avoid Contact Center Outages: Plan Your Upgrade to Amazon Connect
Learn the six most common pitfalls when upgrading your contact center, and how Amazon Connect can help you avoid them.
Step2: Create Amazon Redshift Database-
- Create Cluster-
- Sign in to the AWS Management Console and open the Amazon Redshift console.
- On the navigation menu, choose Clusters.
- Then choose Create cluster. The Create cluster page appears.
- In the Cluster configuration section, specify values for Cluster identifier (Cluster Name), Node type, and Nodes.
- In the Database configuration section, specify values for Database name, Database port (default 5439), Admin username (default ‘awsuser’), and Admin user password.
- Create an IAM role as default. Amazon Redshift automatically creates and sets the IAM role as the default for your cluster.
- In the Additional configurations section, turn off Use defaults to modify Network and security, Database configuration, Maintenance, Monitoring, and Backup settings (Optional).
- Choose Create cluster.

Once cluster is up and running, we can create own first database. This database is where we can create tables, load data, and run queries.
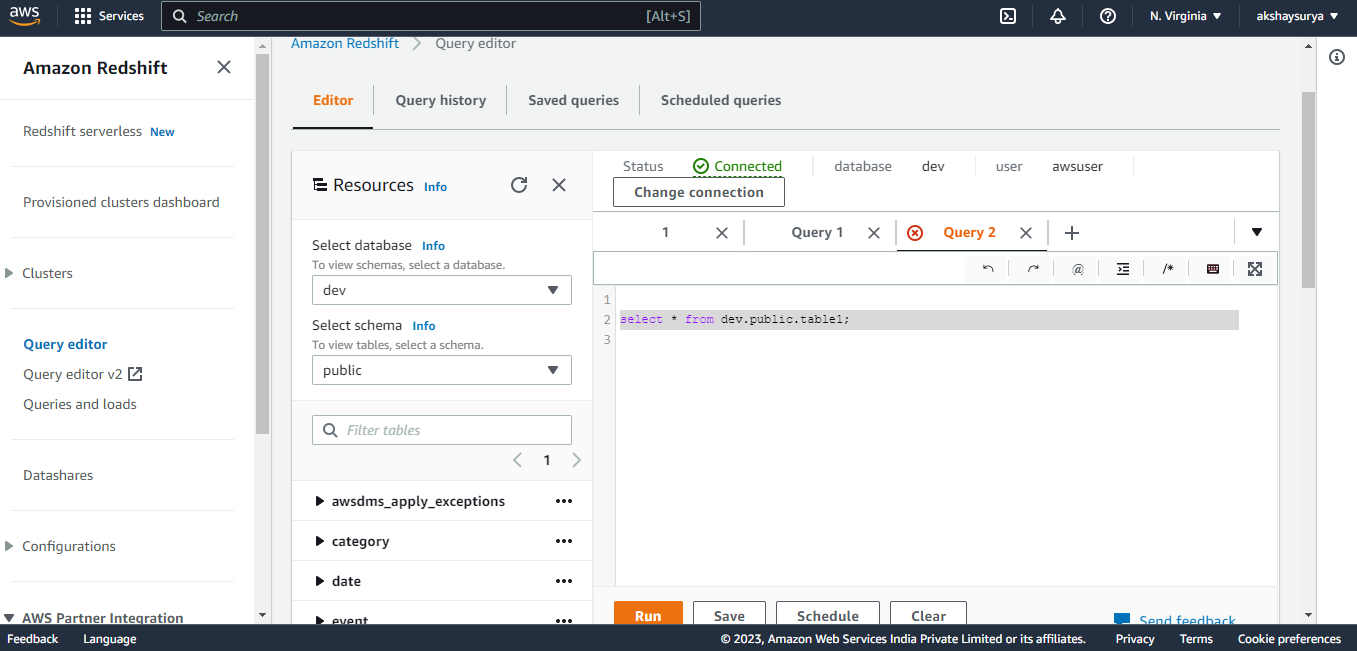
- Create Database and Table-
- From the navigation menu, click on Query editor.
- Then click on connect to database.
- Once connected with database, on left hand side we can see default database name as dev and schema name as public.
- Once connected to the database, we can see that the default database name as dev and the default schema name as public.
- In the query editor, we can perform the ‘create database’ command to create a new database.
- After creating new database, create tables to hold your data, by specifying column name and its data type information while creating the table.
- Create a basic example table.
Now, we are having Source as a RDS PostgreSQL database with raw data and Redshift as a Target with empty table.
Step3: Migrate data using Database Migration Service–
- Create Replication Instance-
- Open the AWS DMS console and choose Replication instances from the navigation pane.
- Choose Create replication instance.
- Configure the required parameters like Name, Description, Instance Class, Engine Version, Allocated Storage, VPC, Multi-AZ, publicly accessible.
- Expand the Advanced security and network configuration section, and then we can configure but optional Replication subnet group, Availability Zone, VPC security group(s), KMS root key.
- Expand the Maintenance section to manage when modification and software updates occur on the replication instance.
- Click on Create.

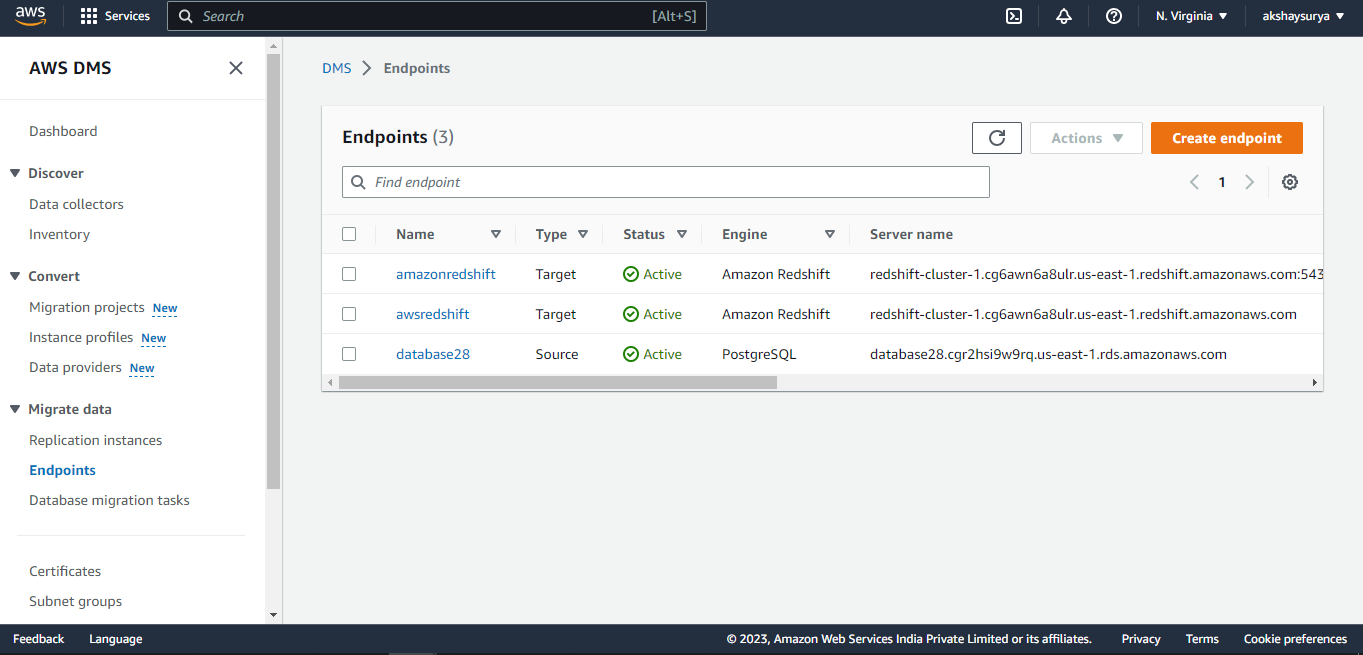
- Create Source and Target Endpoints-
- Open the AWS DMS console, and choose the AWS Region that your Amazon Redshift cluster is in.
- Choose Endpoints from the navigation pane.
- Choose Create endpoint.
- From Endpoint type, choose Target endpoint.
- Enter your Endpoint identifier and choose Redshift as your Target engine.
- Enter your Amazon Redshift endpoint for the Server name.
- Enter your Port number. (The default port for Amazon Redshift is 5439.)
- Enter your Amazon Redshift Username, Password, and Database name.
- From the Test endpoint connection section, choose the VPC that the replication instance is in and choose the Replication instance.
- Choose Run test and wait for the status to be successful.
- Click on Create endpoint.
The source endpoint must be created in the same manner as above.
- Create Database migration task-
- Open the AWS DMS console and choose Database migration tasks from the navigation pane.
- Then click on create task.
- On the Create database migration task page, specify the task options. As below:
- Task Name
- Task description
- Source endpoint
- Target endpoint
- Replication instance
- Migration type – three different migration types with AWS DMS.
- Migrate existing data- Only your current data is migrated through AWS DMS. The modifications made to source data are not recorded and applied to your target.
- Migrate existing data and replicate ongoing changes- While migrating your existing data, AWS DMS records changes. Even after bulk data has been loaded, AWS DMS continues to capture and apply changes. The source and target databases eventually become synchronized.
- Replicate data changes only- Load data in bulk using a different method. This method is generally limited to homogeneous migrations.
- Next, set the Advanced settings.
- Target table preparation mode
- Include LOB columns in replication
- Max LOB size (K)
- LOB chunk size (K)
- Custom CDC start time
- Enable logging
- Then set additional parameters.
- Specify any table mapping settings.
- Table mappings instruct AWS DMS on which tables to migrate from source to target. Table mappings are expressed in JSON, but some settings can be changed through the AWS Management Console. Transformations can be included in table mappings.
- Once finished with the configuring the task, click on Create task.
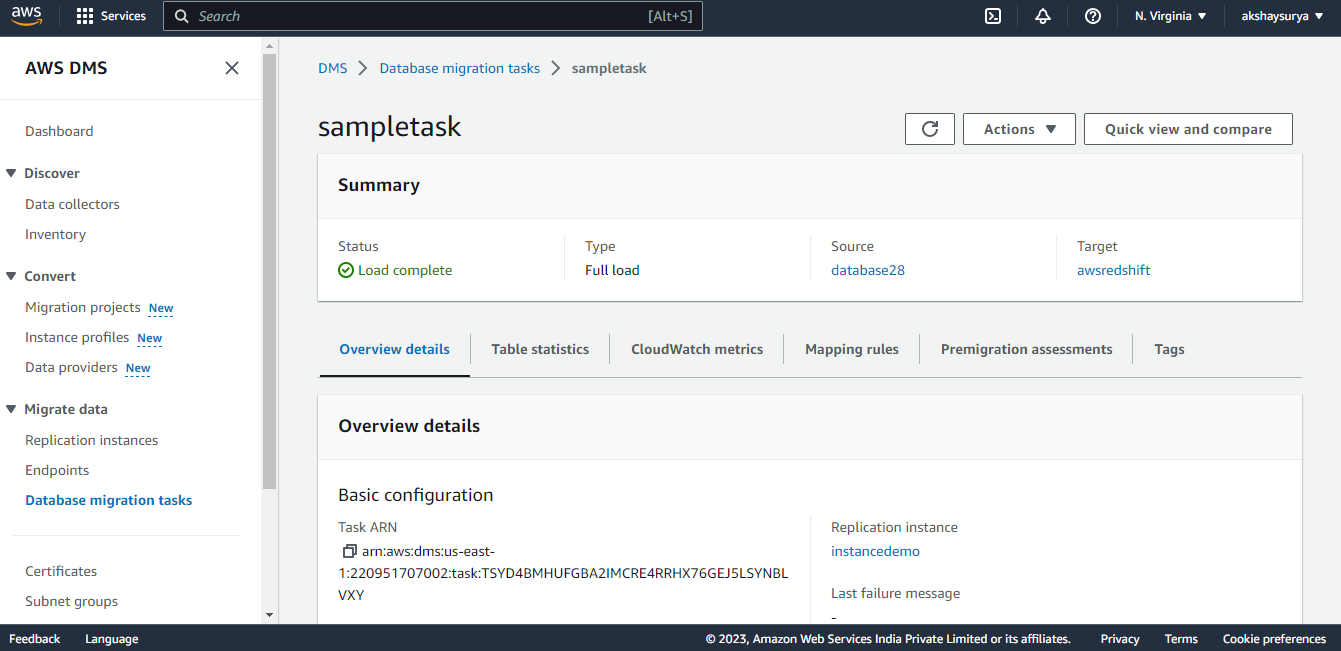
Once the migration task is ready, all we have to do is start it, and the data will be transferred from source to target.
Conclusion:
This article concludes the various AWS Services and shows us how to use the Data migration service to transfer data from Amazon RDS PostgreSQL to Amazon Redshift.
Please feel free to reach out in the comments sections if you have any questions or want to build the pipeline — I would be happy to help!
Keep Learning…!!!!!