
Azure Test Plans, a service launched with Azure DevOps, provides a browser-based test management solution for exploratory, planned manual, and user acceptance testing. Azure Test Plans also provides a browser extension for exploratory testing and gathering feedback from stakeholders
An Azure DevOps test plan is divided into three sections:
- Test Plan – The container to group all your project test suites.
- Test Suite – The container to group all your test cases.
- Test Cases – The actual test scenario i.e. execution steps to validate the requirement.
In Azure DevOps, there are three different types of test suites you can create:
- Static-Based: A static suite of test cases is a suite where the cases have been manually assigned. These are types of Test Suites that can be used to group any Test Cases. This is the default type, but the only disadvantage is that static test cases can’t be directly linked with the requirement.
- Requirement Test Suite: A requirements-based suite is one that pulls in all the Test Cases for that requirement. This means Test Suites that are directly created out of requirement and generally these Test Suites are used by QA/BAs to detect whether a user story has passed the Test Execution.
- Query Based Test Suite: These are Test Suites created on a query basis. The query can contain any filter like a test title that contains a particular word or is created after a particular date
Follow the steps below to create the Test Plan:
- Login to your Azure DevOps account.
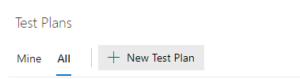
- Select your project and click on the “Test Plans.”

- Click on the “New Test Plan.”
- Enter the Test Plan name and select “Area Path” and “Iteration.”

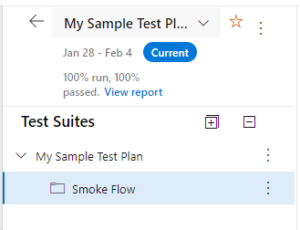
- Once the test plan is created, you’ll then create the test suite.

- In the example below, I’ve created the Static Suite to add the test case required for the “Smoke” flow (ex: Login, Logout, etc.). You can use different test suites as mentioned above depending upon your need.
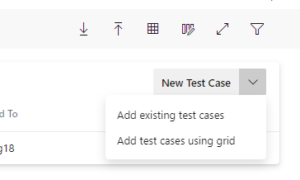
Note: You can add the existing test cases or add the new test case by clicking on the button “New Test Case” on the right corner of the screen.
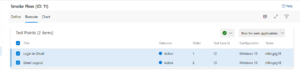
- Once all the test suites and test cases are added to the suite, you can now run all the test cases or a single test case and validate if all the steps added in the test case are working as expected or not.
Follow the steps below to run and validate the steps under the tests case:
Note: I don’t come from an automated testing background and can only speak to the Azure DevOps Test Plans as it pertains to manual testing. Therefore in this article, I have used the manual testing workflow.
Note: There are different options to run the test case as shown in the below screenshot.
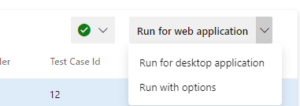
For the test case for the web application, I’ve chosen to .” You can choose the type depending on your application type.
Once you’ve clicked on “Run for web application Azure DevOps,” open a window and start showing the steps you’ve added to the test case.
Note: If you select multiple test cases, you will start the test from top to bottom.
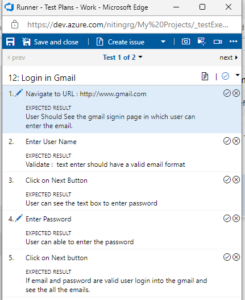
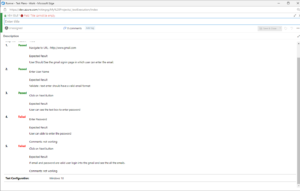
Once this screen loads, you’ll open a browser and follow the steps added in the test case.
A. Click the “right” icon if the step is working as mentioned.

B. Click on the “cross” icon if the expected result is not matched with the expected result mentioned in the test case above.

Note: When you are marking the “Cross button (X),” you can enter the comment which can be viewed when you review the result for failed test cases.

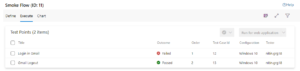
When all the test cases execute, click on “Save and Close.” It will close the test runner window. Under the test plan, you’ll be able to see the result of the Test Suite for the test.
![]()
Here are some additional tips:
- During the test run, you can perform the following actions below using the Test Runner window.
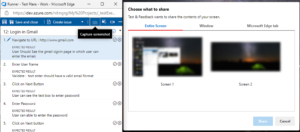
- Record the screen: It will record the activity screen and add it as an attachment to the test result in the Azure DevOps.

b. Capture screenshot: Capture the image of the entire window, screen, or selected tab.
c. Create a bug: If a step fails, you can create a bug directly using the task runner window by clicking on the “create issue” link. This will create the ticket in the Azure board and document the steps that failed.

Key Takeaways
These simple steps can be taken to create a test plan using Azure DevOps. For more information, contact our experts today.