
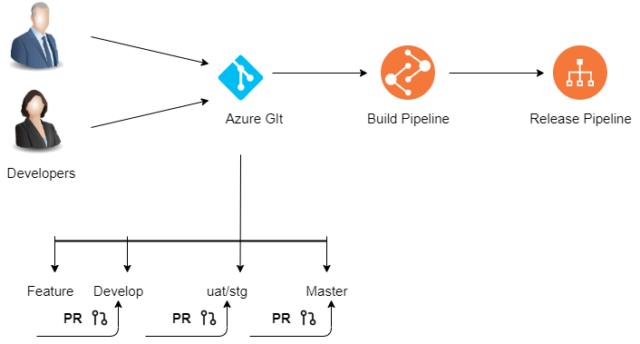
When there are several developers on the same project, you need to merge your code to a single branch. Before you do that, it’s important to ensure that the new feature you just created is built correctly. To check, you need to propose your code as a pull request. I’ll explain why doing pull requests are important and how to configure them through Azure DevOps.
What is a Pull Request?
A pull request (PR) is more than just a notification—it’s a dedicated forum for discussing the proposed feature. If there are any problems with the changes, teammates can post feedback in the pull request and even tweak the feature by pushing follow-up commits, which allows you to save your changes to the repository. All this activity is tracked directly inside of the PR.
Why You Should Do a Pull Request
To build a good project with your team, each developer needs to understand how the project is structured and what the rest of the code does.
A PR is helpful in this situation because of the following:
- It ensures your team members know parts of the code they haven’t written.
- Developers can learn from each other.
- Avoids some wrong architecture implementation.
- Improves the code as the project progresses.
- Detects potential bugs early.
How to Set Up a Pull Request in Azure
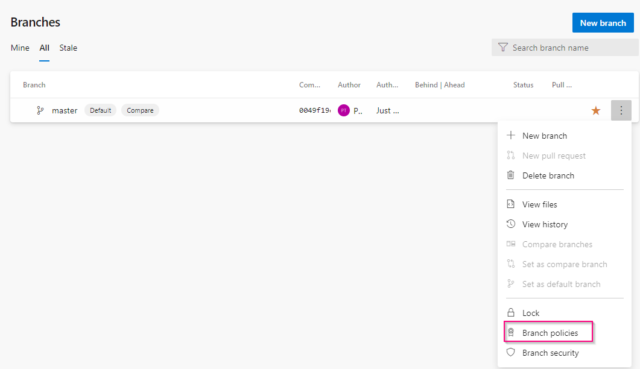
Azure DevOps has a really interesting interface for submitting a PR. Configuring the policies for a specific branch can be done easily. Go to Azure DevOps in the “Repos” section, find the “Branches” section, and then click on the 3 dots on your reference branch to set up policies.
The Reviewers
The people performing the checking, excluding the author, are called “reviewers.” First, it’s recommended to require several reviewers. A minimum of 1 reviewer is needed, but if you have 2 it’s even better. You’ll also need to disable the ability to auto-approve your work because, if you don’t do that, the PR won’t work. Remember, the goal is to give other developers the ability to check your code before it’s merged with the rest of the project.

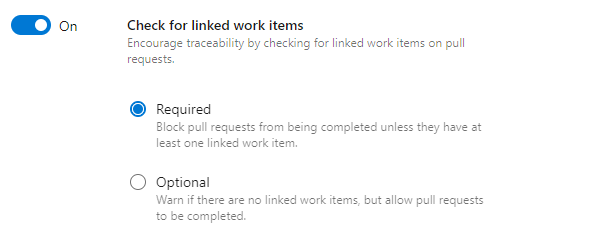
To let the reviewers, check the code and understand what was done, even more, you must ask for linked work items, as it also avoids adding some code that doesn’t match exactly the user story or the task associated.
Reviewers have the ability to “approve,” “approve with suggestions,” “wait the author,” or “reject,” which is directly visible with a little badge.
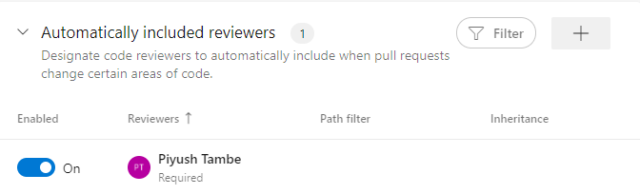
If your project needs it, you can also provide a list of reviewers which will be automatically notified when a new pull request is created, this can be interesting for the architect or technical leader of the project for instance:
The Comments
If some comments were made after reviewing a PR, it’s important to check if they have been seen by the developer before closing it. Checking the comment resolution checkbox can ensure they’ll be seen.
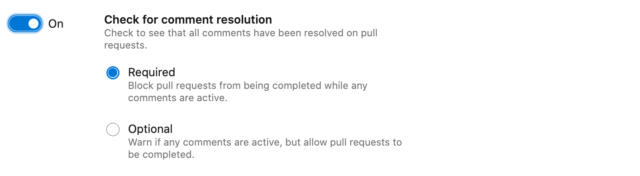
If all comments aren’t set to “resolve,” then the PR can’t be merged with the rest of the code. The comments are a good way to communicate between developers, and you can also tag someone to draw their attention to a specific point.
Build the Project
To make sure the project isn’t only built in the developer machine, it’s a good thing to add a build validation using the Azure DevOps pipelines. It’s easy if you’ve already set one up. Click on “build validation” and select the pipeline you want to run:

In this case, the pipeline’s name is “POCproject.”
Consider the following example:
An MS tailspin project is composed of a .NET, NPM, and an MS Unit Tests project. You will first build the project on a Dev server, then you must test and stage if one of these 3 steps failed. Your PR will not be able to execute, and the code will not merge. It’s a good way to avoid embedding some code that doesn’t compile with the rest of the project.

Utilize Pull Requests Anytime
That’s it! I hope you can use this knowledge to implement a perfect code review in your Azure DevOps portal. Every project is different, and there is no other way than an experiment, draw conclusions, improve, and experiment again. For more information, contact our experts today.
Very Informative and well explained !!!
Thank you for sharing How to Set Up a Pull Request in Azure DevOps.
https://www.knowlathon.com/project-management/prince2-foundation-training/
https://www.knowlathon.com/blog/what-is-the-prince2-certification-cost-in-india/
https://www.knowlathon.com/project-management/prince2-practitioner-pune/
https://www.knowlathon.com/project-management/prince2-foundation-and-practitioner-bangalore/