Microsoft announced a new employee experience platform called “Microsoft Viva” in early February 2021. According to Microsoft, this platform brings the following tools in a single place, Microsoft Teams.
- Employee engagement (Viva Connections)
- Wellbeing (Viva Insights)
- Learning (Viva Learning)
- Knowledge discovery (Viva Topics)
What is Viva Connections?
The “Viva Connections app” is the central landing page consisting of a personalized company news feed, company resources, general dashboard view, which allows you to stay engaged and informed no matter where you work. Technically, Viva Connections is built on SharePoint, which allows you to extend your SharePoint intranet content into Microsoft Teams with a modern employee experience.
The Viva Connections for desktop experience was formerly known as the Home site app.
The Viva Connections enables users to discover and search relevant content, sites, and news from across the organization right from the Team’s app bar.

Viva Connections Requirements
Viva Connections offers Global Navigation to highlight specific resources and personalized content like sites and news. Global navigation is configured in SharePoint and can be accessed by selecting the icon in the Teams app bar.
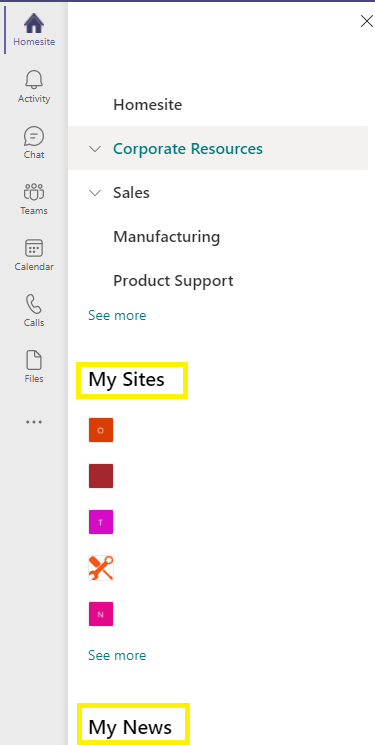
It is recommended that Global Navigation is enabled and customized in the SharePoint app bar.
Viva Connections Recommendations
- Use the SharePoint Home site as the landing experience
- Only modern SharePoint sites and pages can be viewed in Teams, and all other content will open in a browser
When is Viva Connections Available?
The Viva Connections app for Teams became generally available to all customers on March 31, 2021. The mobile experience for Viva Connections will be available in Teams in the summer of 2021.
Steps to Deploy Viva Connections
- Set up a SharePoint Home site
- Enable Global Navigation
- Create a Viva Connections app package in PowerShell
- Download and run the PowerShell script linked below to create the Viva Connections desktop package.
- Download the Viva Connections for desktop PowerShell script
- When you create a new package in PowerShell, you will be required to complete the following fields:
- URL of your tenant’s home site: Provide the tenant’s home site URL starting with “https://”. This site will become the default landing experience for Viva Connections.

![]()
![]()
![]()
-
- Name: The name of your Viva Connections desktop package, as it should appear in the Teams app bar.
![]()
-
- App short description (80 characters): A short description for your app will appear in the Teams app catalog.
![]()
-
- App long description (4000 characters): A long description for your app will appear in the Teams app catalog.
![]()
-
- Privacy policy: The privacy policy for custom Teams apps in your organization (needs to start with https://). If you do not have a separate privacy policy, press “Enter,” and the script will use Microsoft’s default SharePoint privacy policy.

![]()
-
- Terms of use: The terms of use for custom Teams apps in your organization (needs to start with https://). If you do not have separate terms of use, press “Enter,” and the script will use Microsoft’s default SharePoint terms of use.
![]()
-
- Company name: Your organization name will be visible on the app page in the Teams app catalog in the “Created By” section.
![]()
-
- Company website: Your company’s public website (needs to start with https://) linked to your company’s app name on the app page in the Teams app catalog in the “Created By” section.
![]()
-
- Icons: You are required to provide two PNG icons, which will be used to represent your Viva Connections desktop app in Teams
- 192X192 pixel colored icon for the Teams app catalog
- 32X32 pixel monochrome icon for Teams app bar.
- Icons: You are required to provide two PNG icons, which will be used to represent your Viva Connections desktop app in Teams
![]()
![]()
![]()
![]()
Learn more about Teams icon guidelines.
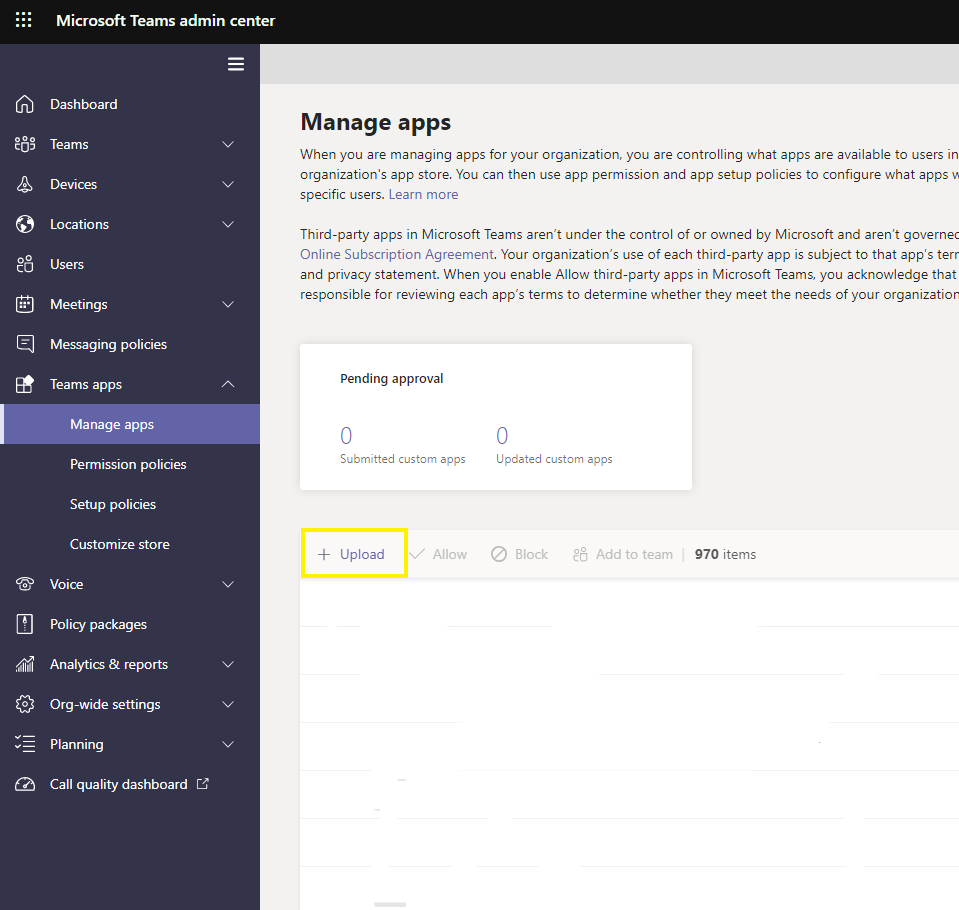
5. Upload the Viva Connections desktop package in the Teams Admin Center: Once you successfully provide the details, a Teams app manifest, which is a .zip file, will be created and saved on your device. The Teams administrator of your tenant will then need to upload this app manifest to Teams admin center > Manage apps.
![]()
![]()
Learn more about how to upload custom apps in the Teams admin center.
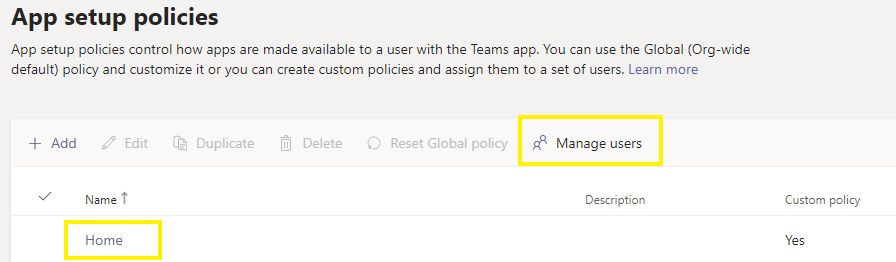
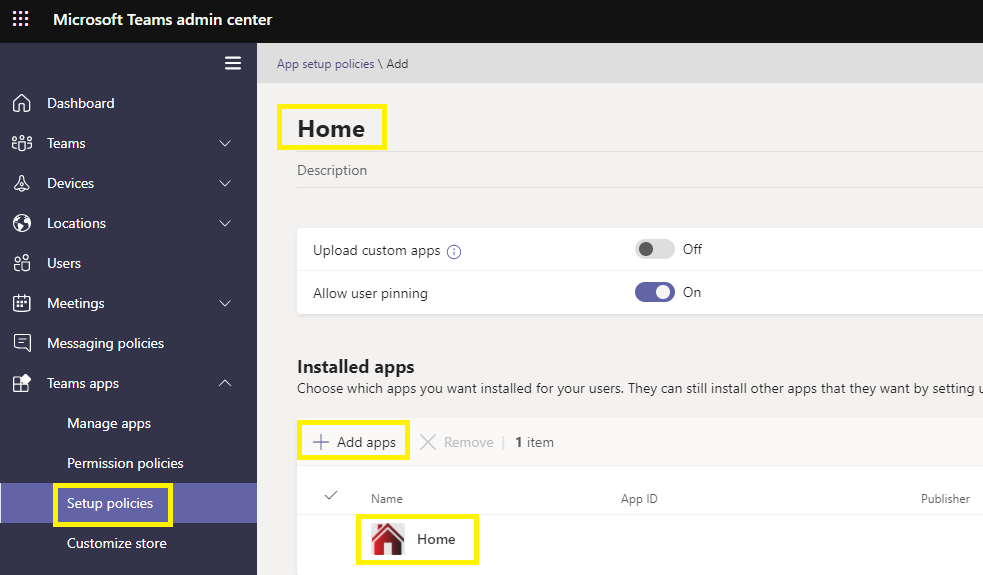
6. Manage and pin the app by default for your users: Once the Viva Connections desktop package is successfully uploaded in the Teams admin center, it can be managed like any other app.
You can configure user permissions to make this app available to the right set of users. Permitted users can then find this app in the Teams app catalog.
Pin this app by default for users in your tenant so that they can easily access their company’s intranet resources without having to discover the app in the Teams app catalog.
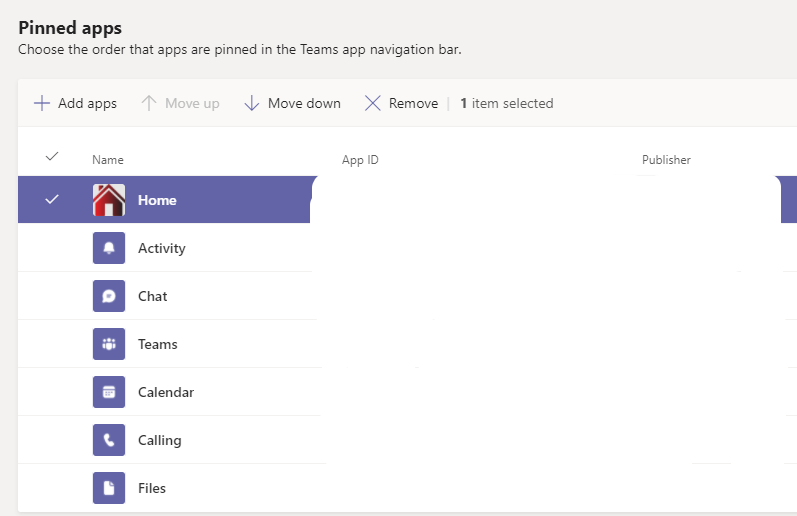
Use Teams app setup policies to pin this app by default in the Teams app bar and then apply this policy to a batch of users.
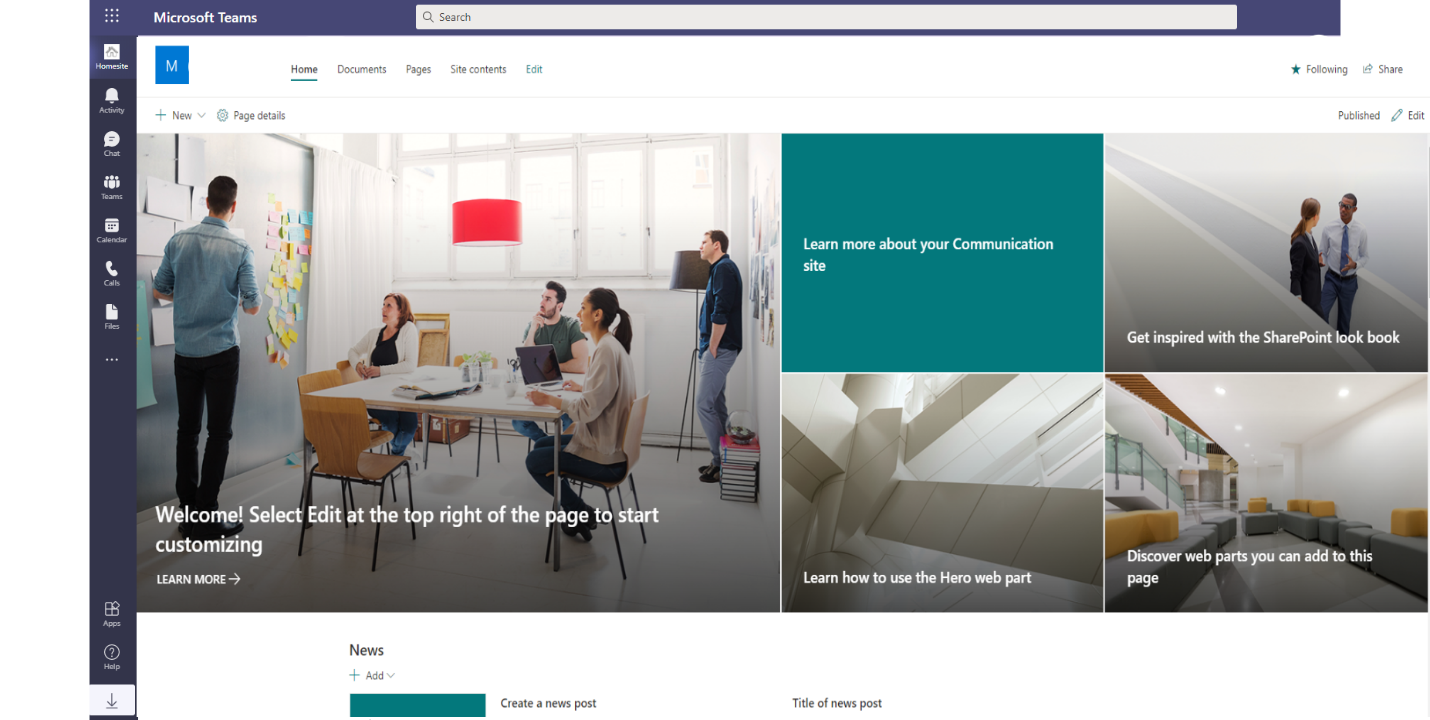
Here is how Viva Connections will look like in your Teams Desktop app.