

The Automate Everything series was written by Rebekah Williamson and Taylon Hammons
Automating the manual process for extracting forms sent through email reduces late submittals and inbox clutter. Modernize the way you process email attachments by leveraging Power Automate with Power Apps AI Builder. Using these no-code tools, you can set up a flow to automatically download forms received from email into your OneDrive. Additionally, you can extract data from the form and input it into a legacy app using a Power Apps AI Model and a Power Automate Desktop flow. For this example, we demonstrate processing a typical tax form, form 1040.
Train your AI Model
First, navigate to Power Apps AI builder to train a model that will automatically recognize and extract desired data from the 1040 form.
- Navigate to Power Apps -> AI Builder -> Select Build
- Select Form Processing -> Name your AI Builder (we named ours Form Process Demo)
- Choose the information to extract from the form by creating fields. (For example, from the 1040 form, we will identify name, social, and address.)

Next, train the model to recognize data by uploading at least 5 documents to a collection. A collection is a group of documents that share the same layout. This will help the model to recognize the fields to extract based off variations from document to document.
- Create a New Collection -> Rename to Form 1040
- Select Add Documents
- Choose 5+ filled out forms to train the model
Note: The more documents you upload the better trained the model will be!
- Tag each of the words in the document with the corresponding fields. As you do this for each document, the model will begin to automatically recognize the fields.
- Once you’ve tagged all documents, Select Train
- Publish your model so that it will be available in our Power Automate flow
Set Up Flow to Extract Forms From Email
To automate form downloads once an email arrives, set up a flow in Power Automate
- Select Create -> Automated cloud flow
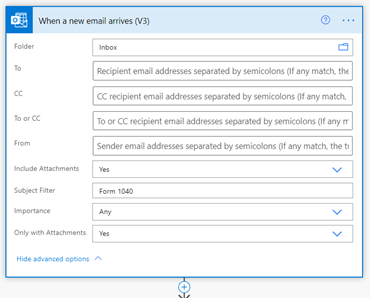
- Choose your flow’s trigger -> When a new email arrives (Office 365 Outlook)
- Select Show advanced options
- Select Yes for Include Attachments and Only with Attachments
- Add a subject filter. This will only pull emails that contain your chosen phrase (i.e. “Form 1040”) in the subject line of the email.
There are other ways you can filter which emails you want the flow to grab such as based on the recipient or the sender of the email.
Next, we will request that the attachments be uploaded to a specific one drive folder. This step is not necessary for the rest but will be a good way to store all your forms in one place.
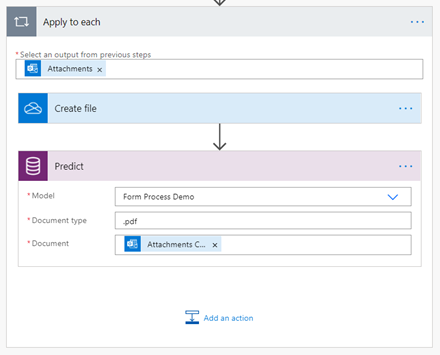
- Add an action -> Apply to Each
- Select an output from previous steps -> From the dynamic content pop up, select Attachments (Office O365 Outlook)
- Add an action -> Create File (One Drive for Business)
- Choose your folder path in your OneDrive, mine is in my root directory under a folder named Form1040
- File Name -> Attachments Name
- File Content -> Attachments Content

Next, add the AI model that we built to the flow by using a common data service action. If you do not have a premium account, you can sign up for a free trial.
- Add an action -> Predict (Common Data Service)
- Select your model -> Form Process Demo
- Choose your document type -> .pdf
- Choose your document -> Attachments Content
Robotic Process Automation: Use Desktop Flow to Input Data into Legacy App
Next, we will create a desktop flow that will automatically insert our Form 1040 data (name, social, and address) into our legacy app or form once an email arrives. For this demo, I created a simple ASP.net form to take in our data. In a Power Automate desktop flow, we will record our screen as we click through the process of inputting data. Based on our movements, a step-by-step flow will be created to mimic the process.
First, we need to get set up to run a desktop flow:
- Go to Power Automate -> Create Flow -> Desktop Flow
- Name your flow
- Select Launch App
- Select Get the App if you don’t have it already
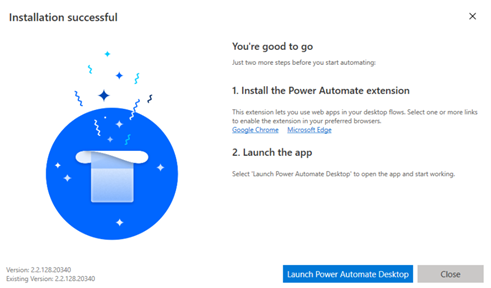
- Follow the instructions in the Power Automate Desktop setup installer to complete the installation
Once installed, install the Power Automate extension on your preferred browser.
Now that you’re all set up, return to your flow, and add a desktop flow
Note: To run a desktop flow on a device that the legacy app is running on, you will need to install an on-premises data gateway on your machine. If you do not already have one, follow this guide to install the standard gateway.
-
-
- Add an action -> Desktop Flow
- Select Run a flow built with power automate desktop
- Name your flow -> Select Launch App
- From the pop up, select Open Power Automate Desktop
-
5. Add your input variables, Name, Address, Social
Now, we’re ready to record our Desktop Flow!
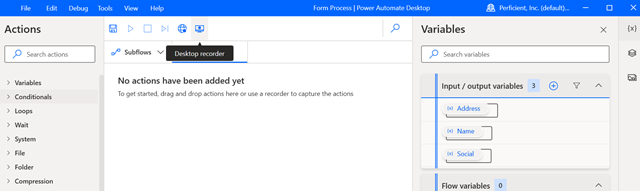
- In the upper menu select the Desktop Recorder icon.
- Select Start Recording
- Fill out your form as desired and watch as the Desktop Recorder records your actions
- Click Finish
As a result, we’ve recorded the Desktop Flow, return to the app to make changes to the flow.
- Select the ellipses next to a step
- Select edit
- Delete text you typed under Text to fill-in
- Select the {x} to insert the corresponding input variable (Address, name, social)
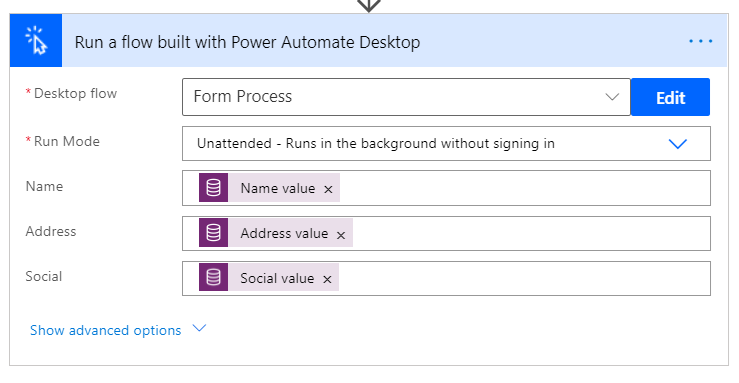
To finalize the flow, return to your Power Automate Flow
- Select your Desktop Flow (Form Process)
- Choose your Run Mode
- For the variables, select your data values that will be extracted in the AI model (Name Value, Address Value, Social Value)
Congrats! Your Power Automate flow will now extract your tax form from your email, save it to OneDrive, and input your desired data (Name, Address, and Social) into your legacy app or form. For more ways to automate and digitize your business processes, check out the rest of the blogs in our series, Automate Everything.