
As mentioned in part one, the four types of data integrations are delimited file, fixed file, data management, and data connector. In this blog, I will explain how to set up a direct connect that will pull data into OneStream from an external data source without the need for a file.
This article assumes that your cube and dimensions are already configured and set up in OneStream, your external data source is Oracle EBS, you have familiarity with business rules (VB.NET), and you have read part one as we will be going through a similar process to set up our EBS direct connect.
The high-level steps we need to perform are:
- Save database connection string on the OneStream Application Server.
- Restart IIS
- Test connection
- Create Connector business rule
- Create Data Source
- Create Transformation Rules
- Create Workflow Profile
- Load Data
OneStream XF Server Configuration
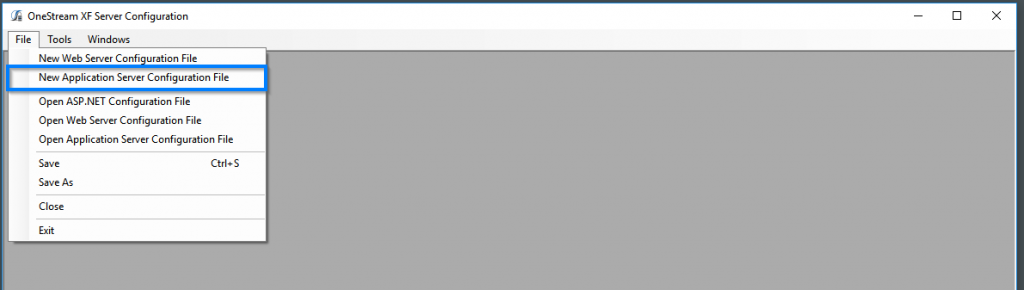
Navigate to the OneStream XF Server Configuration application on your on-premise instance (or work with OneStream Cloud Support to effect these changes on your Azure instance).
Select file> New Application Server Configuration File
 |
In the Application Server Configuration Settings, locate File Share Root Folder. Here you will add the path of your OneStreamShare\FileShare folder.
 |
Navigate to the Databases section.
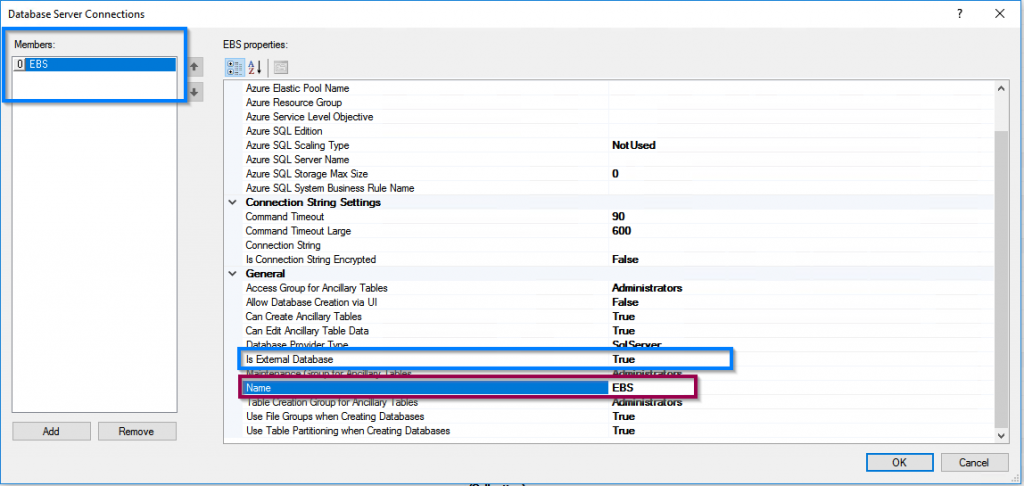
Select the three ellipses on the far right of Database Server Connections (Collection).
 |
Add a new member. In General, settings, provide the member a name and select True for Is External Database. Once the name has been entered, you will see it change under Members.
 |
Next, select the Database Provider Type that applies to your application.
 |
Scroll to the Connection String setting and enter the connection string you will be using to connect to the EBS database.
 |
The figure below shows examples of connection strings depending on the server. Your connection string should be similar to the formats provided.

Save the .XML file to the OneStreamShare\FileShare location. |
IIS (Internet Information Services Manager)
Once the.XML file has been saved, the server needs to be restarted to see your changes in OneStream.
Click the appropriate server under connections on the left side.
Click Restart under Manage Server on the right side.
 |
Testing Your Connection
Now that the connection has been set up, it’s helpful to test the connection and see if it works from within OneStream.
Login to the OneStream application.
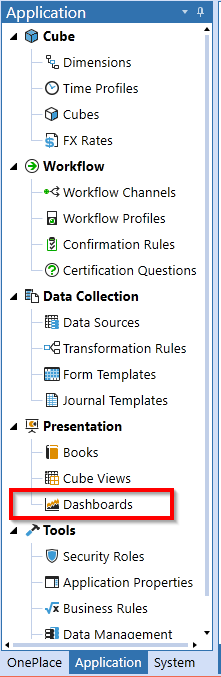
Navigate to the Application tab > Dashboards.
 |
Create a new Dashboard Maintenance Unit.
 |
Provide your Dashboard Unit with a Name.
 |
Select the newly created Dashboard Unit and click Create a Data Adapter.
 |
Enter the following information:
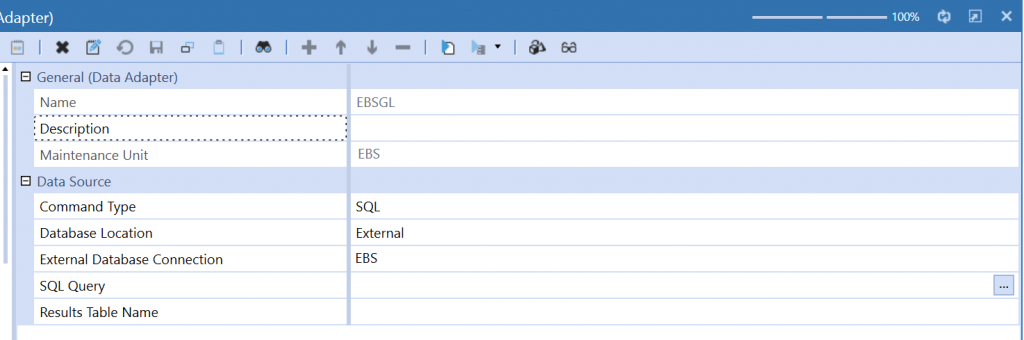 |
Note: The external database connection will be the name that was given in the App Server Config File.
Next to SQL Query, click on the ellipses. Here, you can enter a sample query to test if your connection is working. (Check with your database administrator if you need a sample query to run against your database). The figure below shows the standard structure of a SQL Query.
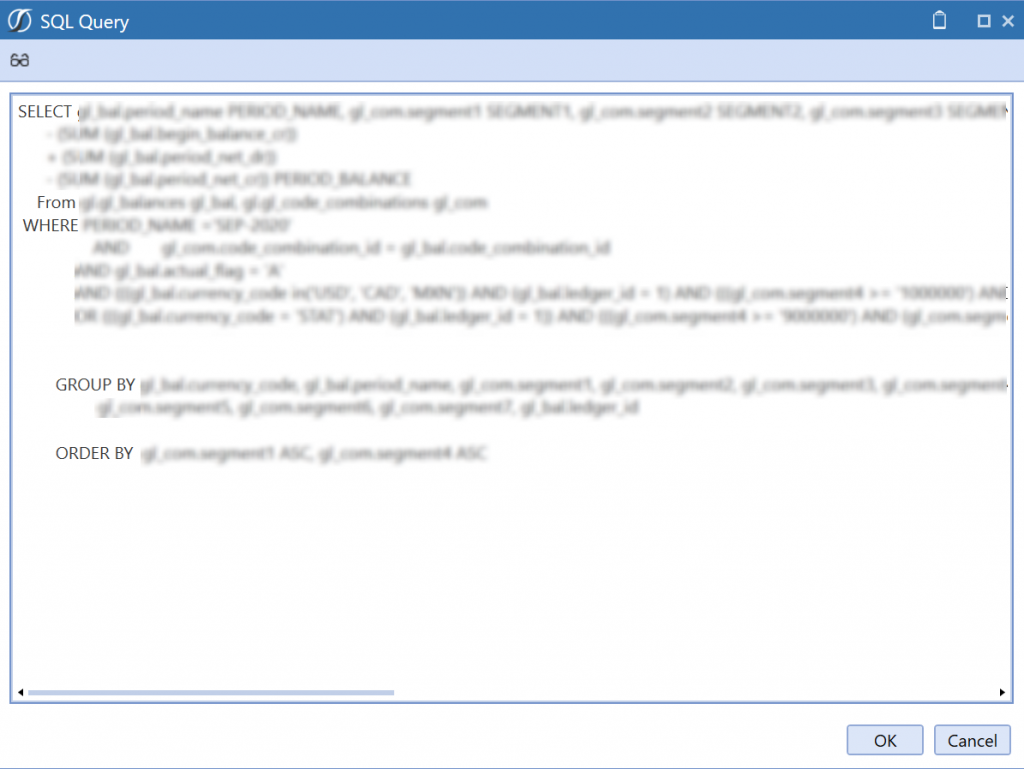 |
Click the Test Data Adapter button to run the query and display results.
 |

Modern Accounting: How to Overcome Financial Close Challenges
Improvements in each of the following period-close core tasks can provide transformative change and are reviewed in this guide include closing the books and external reporting, periodic reconciliations, and managing the period-close process.
Business Rule
Now that our connection is working, we can create a business rule that’ll pull data from EBS into your OneStream application.
Navigate to Application > Tools > Business Rules
Click Create Business Rule.
 |
Enter the following information:
 |
The integration type we will be using is a Connector. Connectors are used for direct integration between the source system (EBS) and OneStream.
The business rule must contain the connection member we created and queries that are formatted to pull data from EBS.
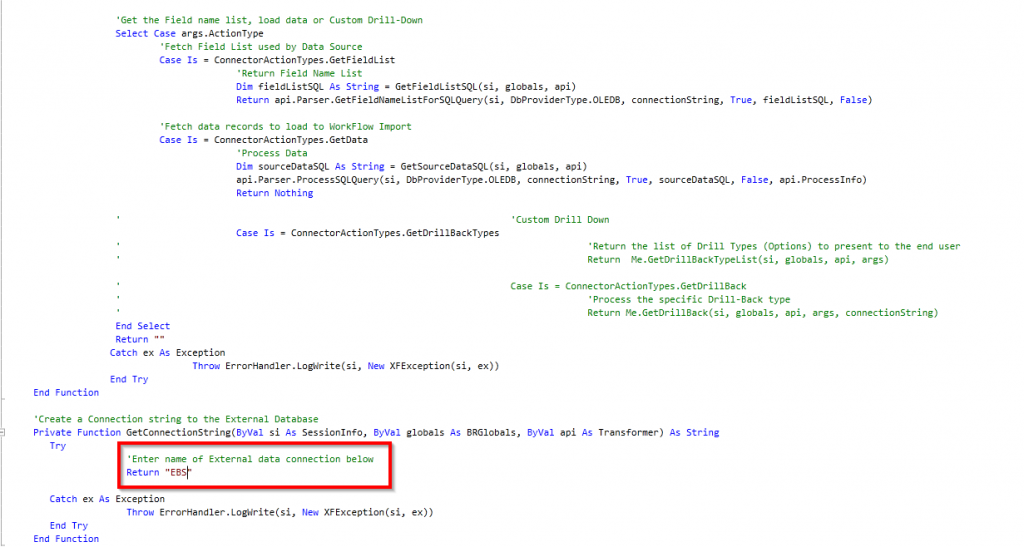
There are three main functions in this business rule:
- GetConnectionString() – returns the connection string
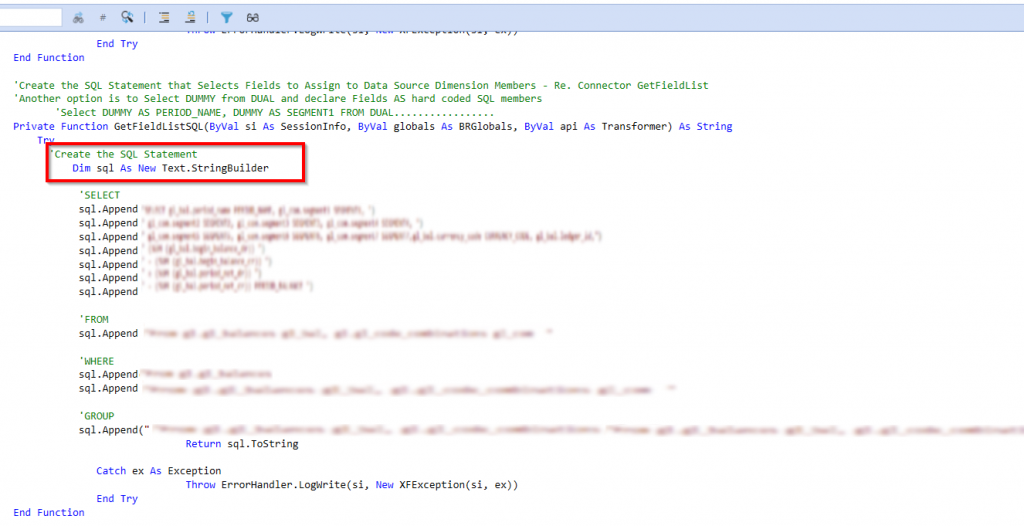
- GetFieldListSQL() – returns the field list to map to dimensions
- GetDataSQL() – returns the data records
 |
 |
Enter in the rule and hit save.
Compile the business rule to check for syntax errors.
 |
Data Source
Click Create New Data Source.
Enter the required information for your application. I am loading my data into the Consol cube, Actual scenario type.
 |
Navigate to Connector Settings and specify the connector name of the business rule that was just created.
 |
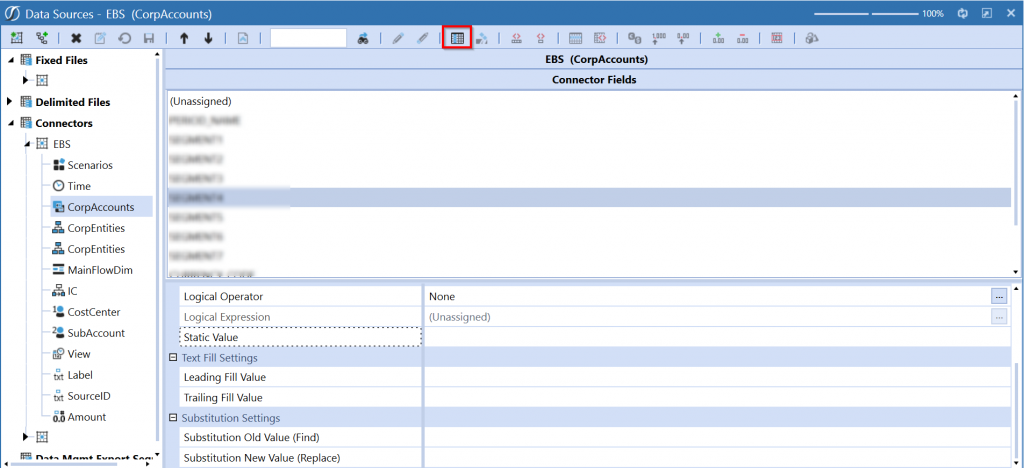
Once you click save, it will populate fields on the main window.
 |
Apply selections for dimensions. This process is similar to part one; however, the data source pulls and displays fields from the query created in the business rule. You will be applying selections to the populated areas. If there are dimensions that don’t have corresponding fields, you will have to hardcode a static value.
 |
Transformation Rules
Next, we’ll be creating our transformation rules.
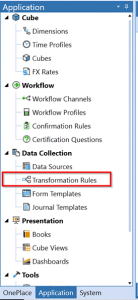
Navigate to the Application Tab > Transformation Rules.
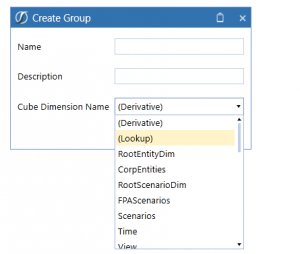
First, we will create our rule groups for each dimension. Click the Create Group button and enter values into the blank fields. Select which dimension you are making a rule group for.
 |
 |
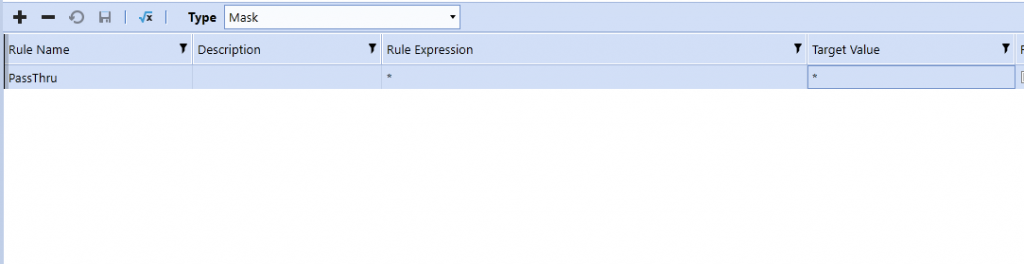
Once the group is created, you can add transformations. There are five types of transformations: One-To-One, Composite, Range, List, and Mask. In the last blog, we discussed how to add One-To-One mappings. Here, we’ll be demonstrating how to add Mask mappings.
Note: Please refer to part one if One-To-One mappings apply to your EBS direct connect.
Below is an example of a Mask. PassThru is the name I gave for this rule. The rule expression is essentially the source value. By adding * to source and the target value, you are telling OneStream that the values (Accounts, Entities, etc.) coming in from EBS will be the exact same in OneStream.
 |
 |
Once the groups have been created, we can assign them to a rule profile.
Click the Create Profile button and enter information specific to the profile.
 |
 |
Select the newly created profile under Rule Profiles and click the Manage Profile Members button to assign groups to a profile.
Note: You can select one or more groups and click the right arrow to add them to the profile.
 |
 |
Make sure to save all your changes.
Workflow Profiles
Navigate to Application Tab > Workflow Profiles.
Assuming a cube root workflow profile has been created, we can make a child under the root workflow profile.
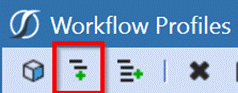
Select the cube profile and click Create Child under Workflow Profile.
 |
Enter a name and select the following options. The default cube name will be what you have set up for your application.
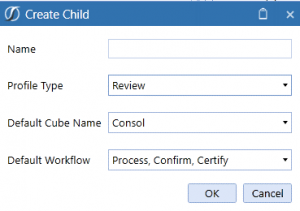 |
Once the Review profile is set up, we want to create a profile to be used for importing our file. Select the Review profile just made and click Create Child under Current Workflow Profile. Enter and select the following options. Template Name will be dependent on how your application is set up.
 |
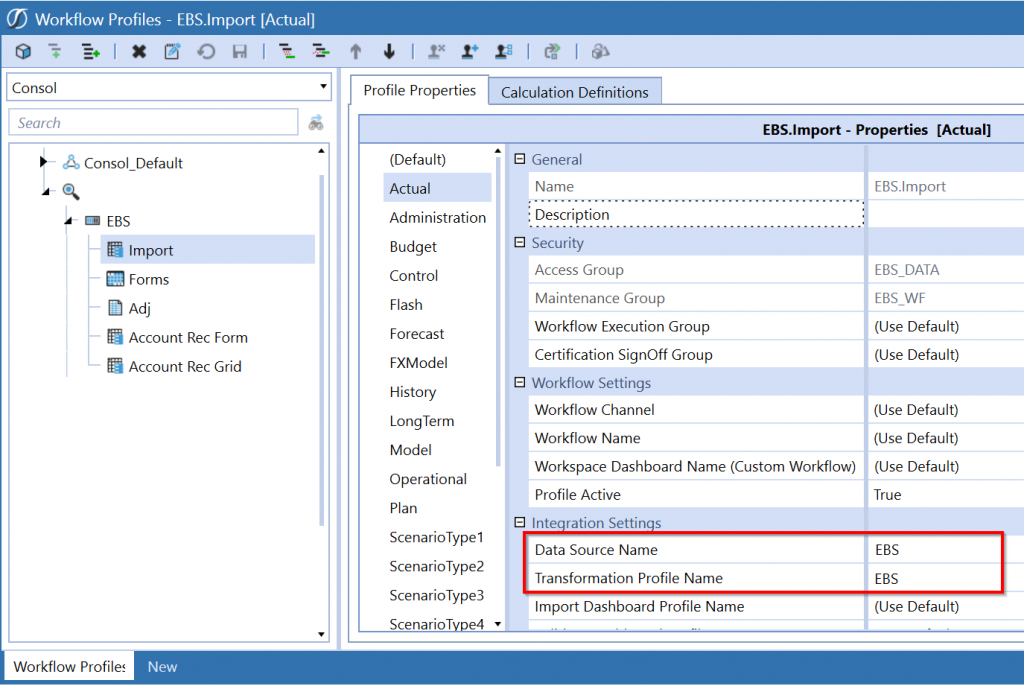
Click the arrow next to the new EBS profile, and select the Import step. Select the Actual scenario and scroll down to Integration Settings. This is where we will set our data source and transformation profile. By doing so, we are linking this workflow profile to the data source and transformation profile we created earlier.
In this example, I first selected the Import step, then the Actual scenario, then Data Source Name = EBS, and Transformation Profile Name = EBS.
 |
Now that we have our OneStream XF Server Configuration Application, Connector, Business Rule, Data Source, Transformation Rules, and Workflow Profile set up, we are ready to load data!
Loading Data
Navigate to the OnePlace tab and select the EBS Workflow.
Note: Step by step instructions on how to select your workflow are provided in part one.
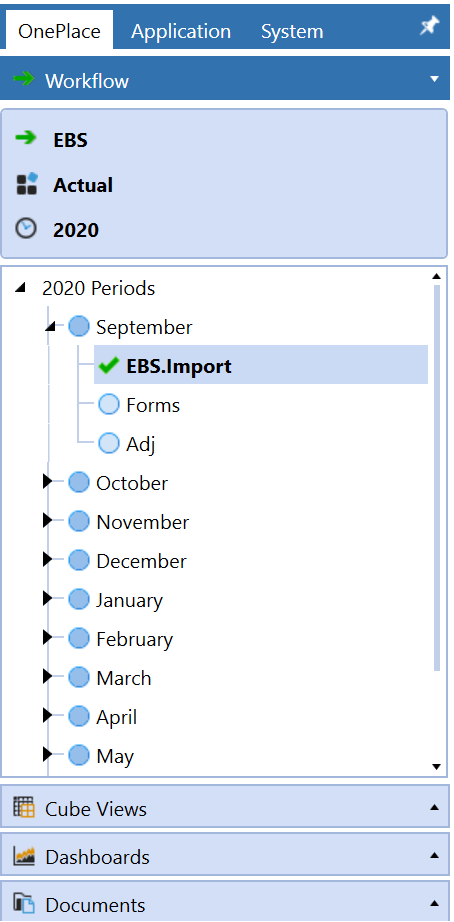 |
Click the arrow to the left of the month you want to load to expand the workflow steps. Select the Import step.
Next, click Load and Transform. Notice how we are not provided with a field to select a file and load. This is because data is directly being pulled from EBS into OneStream. Therefore, clicking OK will automatically load data into the stage.
 |
After clicking OK, you will see that our data has been imported into the stage area of OneStream. Next, Click the Validate chevron at the top and click the Validate button below it. This will execute any validation rules that have been configured and check for any errors in our mappings.
 |
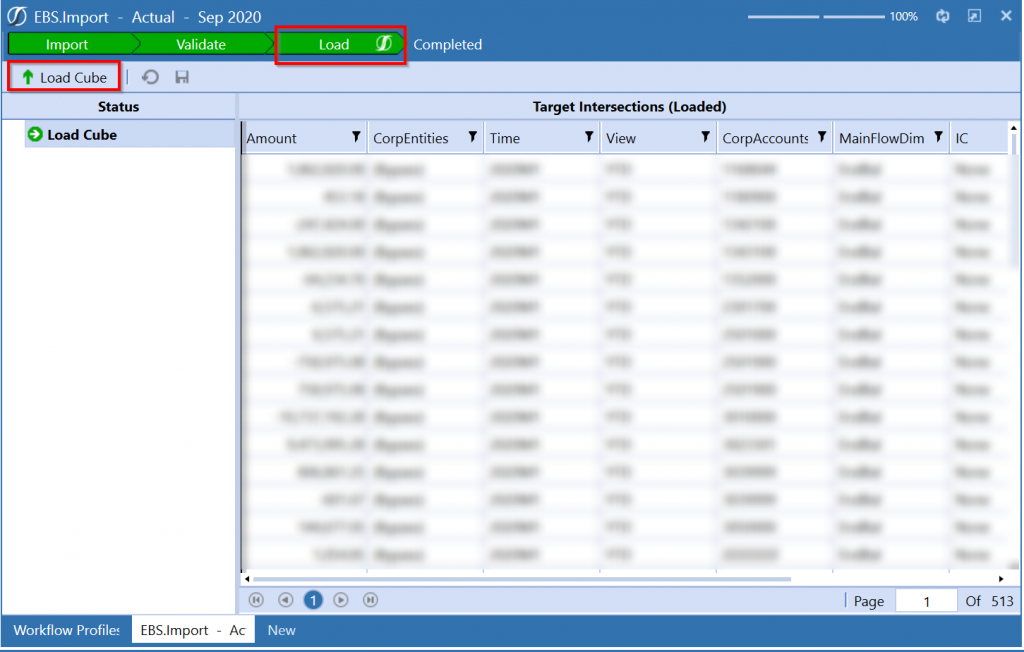
The last step is to load our data into the cube. Select the Load chevron and click the Load Cube button below it. If the Load chevron turns green, all our data is now in the OneStream analytic cube and ready to be consolidated.
 |
Thank you for tuning into this two-part series on loading data into OneStream. I hope this blog helps you understand the process of setting up a direct connect in OneStream for EBS integrations!