
On my most recent client engagement, I was tasked with importing data into OneStream. Data integrations are a strength of OneStream, and there are several methods to load data into the system. The four types of data integrations are: delimited file, fixed file, data management, or data connector. My client required flat file and direct connect imports, and today we are going to take a look at how to configure a flat file data integration.
This article assumes that your cube and dimensions are already configured and set up in OneStream, you have prepared a delimited file such as a trial balance (.csv, .txt, etc.), and you have some familiarity with mapping source values to target values.
Below is a step-by-step process on how to load flat files into OneStream.
Create the Data Source
The first step is to create a data source. Navigate to Data Sources in the Application tab.
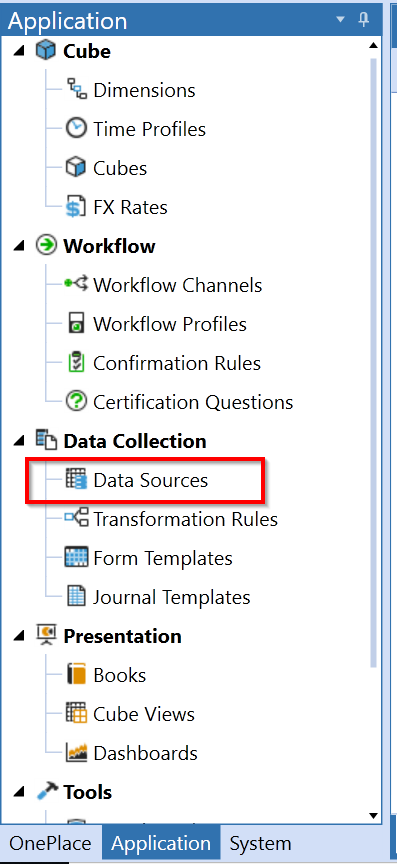 |
Select the Create Data Source button at the top.
Enter in the required information for your application. I am loading my data into the Consol cube, Actual scenario type.
 |
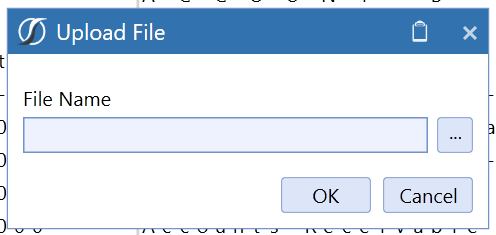
Click the Upload File button. This will bring up a dialogue to select the flat file that will serve as a template for the data source.
 |
Next, you need to assign columns in the file to the dimensions that are in the panel on the left.
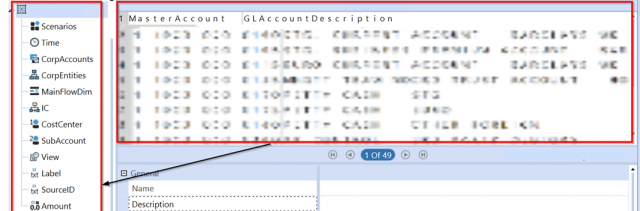 |
Click each dimension and select the column that is appropriate for that dimension. Click the Apply Selection button to save the assignment. The blue background indicates the column selection has been applied to the dimension.
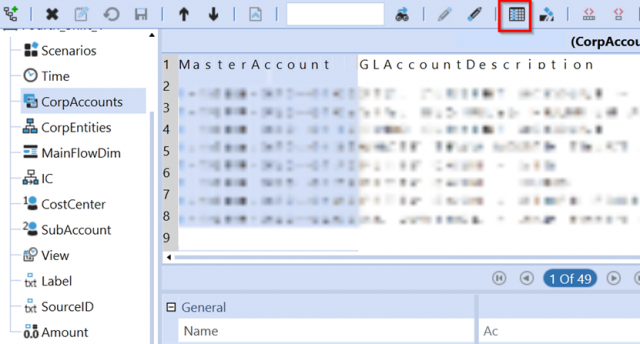 |
The figure below shows how you can apply a label or description in your data source. Click Label and select the column with a description. Click the Apply Selection button.
 |
If there is no column in your flat file that applies to a particular dimension, you can assign a static value in the dimension. In the figure below, I have hard-coded the value “Actual” to the Scenarios dimension. Click Save to apply the static value to the dimension.
Note: When creating data sources, it’s not necessary to create a data source for every flat file. Flat files that have the same column layout share a data source. An example would be if you have three instances of Microsoft Dynamics AX and each trial balance file has identical columns and layout. In this case, we only need to create one Dynamics AX data source.
Create the Transformation Rule(s)
The next step is to set up mapping rules for the flat files we will be loading. Navigate to the Application Tab > Transformation Rules.
 |
Transformation Rule Groups and Rule Profiles may vary depending on how your flat files are coming in. In this example, we have rule profiles created based on the number of entities that are present from all the flat file loads. We’ve organized them by entity because each flat file is specific to that entity and has different dimension mappings compared to other entities.
Note: “HIST” comes up frequently in the following screenshots. This is because we created unique transformation rules and workflow profiles to load historical data.
First, we will create our rule groups for each dimension. Click the Create Group button, and enter values into the blank fields. Select which dimension you are creating a rule group for.
 |
 |
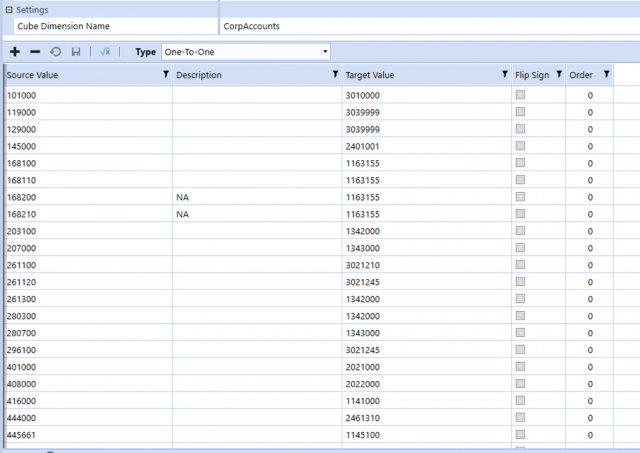
Once the group is created, you can add transformations. There are five types of transformations: One-To-One, Composite, Range, List, and Mask. Select the transformation type, click the + button, and enter in Source Value, Description, and Target Value. Below is an example of mappings for an Account dimension.
 |

Modern Accounting: How to Overcome Financial Close Challenges
Improvements in each of the following period-close core tasks can provide transformative change and are reviewed in this guide include closing the books and external reporting, periodic reconciliations, and managing the period-close process.
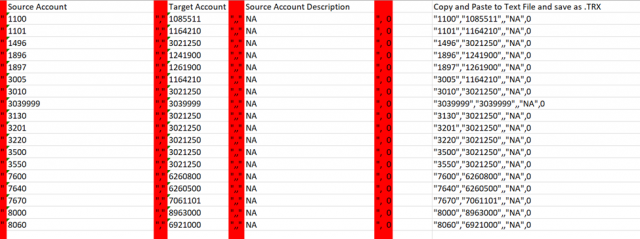
Tip: If you have several mappings, a quick way to load them is through a .TRX file. Simply enter the mappings into an Excel template like the figure below.
Copy and paste the output into a text file and save it as a .TRX file.
Finally, load the file by clicking the Upload button and selecting the .TRX file. The mappings will populate into your Transformation Rules in OneStream.
 |
After all rule groups have been created, we can assign them to a rule profile. Rule profiles consist of a collection of rule groups. To ensure all mappings for a specific data source are together, we typically organize the rule profiles to have one rule group for each dimension from the rule groups.
In this example, we have created our rule profiles based on entities since our flat files are organized by entity.
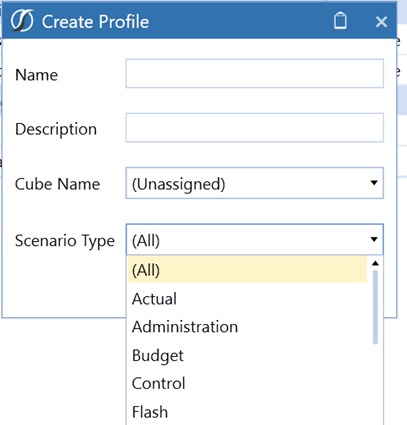
Click the Create Profile button and enter information specific to the profile.
 |
 |
Note: Transformations Rules can be applied to (All) or one scenario type
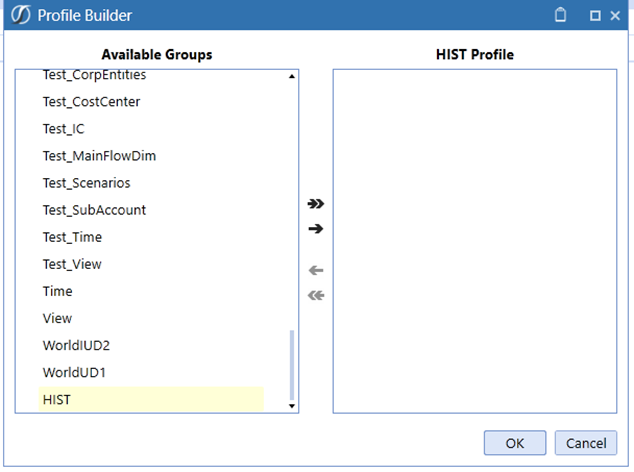
Select the newly created profile under Rule Profiles and click the Manage Profile Members button to assign groups to a profile.
 |
Note: You can select one or more groups and click the right arrow to add them to the profile.
 |
 |
Now that we have our data sources and transformation rules set up, we can create workflow profiles.
Create a Workflow Profile
Among other things, a Workflow Profile specifies which data source and transformation profile we will use to load our data in OneStream.
Navigate to Application Tab > Workflow Profiles
Assuming a cube root workflow profile has been created, we can create a child under the root workflow profile.
Select the cube profile and click Create Child Under Current Workflow Profile.
 |
Enter a name and select the following options. The default cube name will be what you have set up for your application.
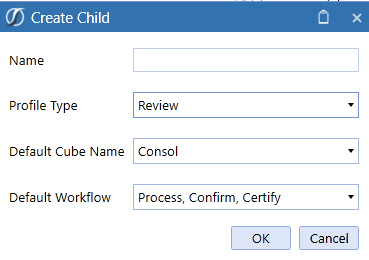 |
The Review profile type allows users to choose how their default workflow will be set up. This profile type can be considered as a checkpoint in the Workflow hierarchy structure.
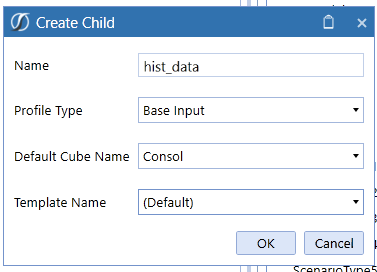
Once the Review profile is set up, we want to create a profile to be used for importing our file. Select the Review profile just created and click Create Child Under Current Workflow Profile. Enter and select the following options. Template Name will be dependent on how your application is set up.
 |
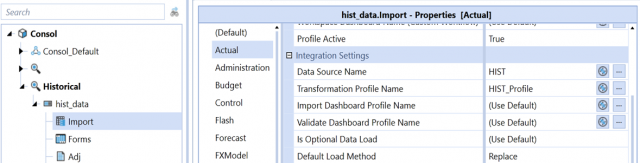
Click the arrow next to the new hist_data profile, and select the Import step. Select the Actual scenario and scroll down to Integration Settings. This is where we will set our data source and transformation profile. By doing so, we are linking this workflow profile to the data source and transformation profile we created earlier
In this example, I first selected the Import step, then the Actual scenario, then Data Source Name = HIST, and Transformation Profile Name = HIST_Profile.
 |
Note: You can apply your data sources and transformation profiles to any scenario that is applicable to your application. Default can be used to apply to all scenarios. Additionally, when creating profiles, ensure the cube (Consol in this example) is selected in order to create workflow profiles under the cube. The option to create profiles will not show up if the cube is not selected.
Now that we have our data source, transformation rules, and workflow profiles set up, we are ready to load data!
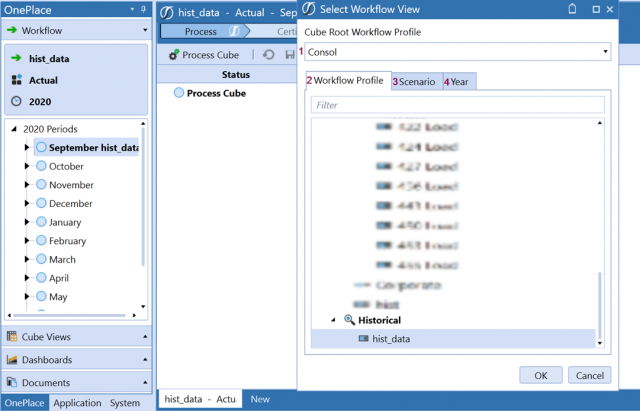
Navigate to the OnePlace tab and select in order: 1. Cube Root Workflow Profile, 2. Workflow Profile, 3. Scenario, and 4. Year. Simply switch between the tabs, select your options, and click OK.
 |
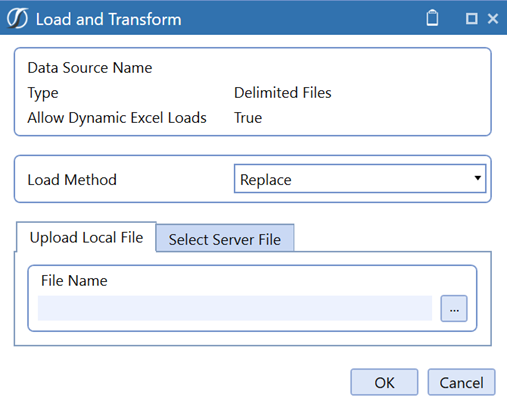
Click the arrow to the left of the month you want to load to expand the workflow steps. Select the Import chevron. Click Load and Transform button below it, and browse for the flat file to be loaded.
 |
 |
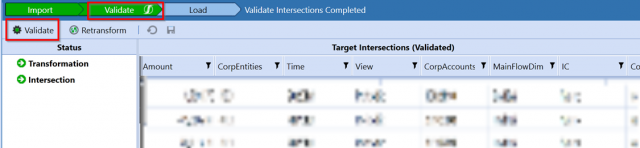
After clicking OK, you will see that our data has been imported into the stage area of OneStream. Next Click the Validate chevron at the top and click the Validate button below it. This will execute any validation rules that have been configured and check for any errors in our mappings.
 |
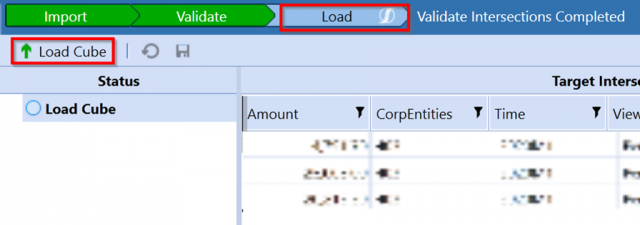
The last step is to load our data into the cube. Select the Load chevron and click Load Cube button below it. Once this has been completed, all our data is now in the OneStream analytic cube and ready to be consolidated.
 |
I hope this blog helps you understand the process of importing flat files and data integrations. Stay tuned for part 2 in which we explain how to set up a direct connect that will pull data into OneStream from an external data source without the need for a file. Thanks!
Hi Maanasa,
Thanks for your blog and it was really help full for me.
Can you please share the OneStream documents to mandavar9@gmail.com if you have any.
Thanks for your help in advance.
Thank you,
Thirumala
Hi
thanks for the article it’s very useful.
Can you tell me if it’s possible to automate this process?
For instance, if we have the file in one folder and execute the process so that the data from that file will be automatically loaded into OneStream.
Thanks,
Daniela