What is Docker?
Docker is a set of platform as a service products that use OS-level virtualization to deliver software in packages called containers. Docker containers are light weighted when compared to virtual machines. The keywords of Docker are develop, ship and run anywhere. The whole idea of Docker is for developers to easily develop applications, ship them into containers which can then be deployed anywhere.
Basic terminologies of Docker:
- Docker Images
Docker images are read-only templates to build Docker images. These images are created from a file called Dockerfile. Within the Dockerfile, you define all the dependencies and packages that are needed by your application.
- Docker Containers
Every time you run a Docker image, it runs as a Docker container. Therefore, a Docker container is the run time instance of a Docker image.
- Docker’s Registry
Docker’s registry, known as DockerHub is used to store Docker images. Docker images can either be pushed or pulled, from or to the Docker repository. DockerHub allows you to have Public/Private repositories.
- Docker Swarm
Docker swarm is a technique to create and maintain a cluster of Docker engines. A cluster of Docker engines comprises of multiple Docker engines connected to each other, forming a network. This network of Docker engines is called a Docker swarm.
- Docker Compose
Docker compose is used to run multiple containers at once with a single command, which is docker-compose up.
Why use Docker for Windows?

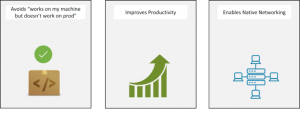
- Avoids the work on my machine but doesn’t work on production problem: With Docker you can run an application within a container which contains all the dependencies of the application and the container can be run throughout the software development cycle. This practice provides a consistent environment throughout the software development life cycle
- Improves productivity: Docker containers originally supported only Linux operating systems. But thanks to the recent release, Docker can now natively run on windows, which means that Linux support is not needed, instead the Docker container will run on the windows kernel itself
- Supports native networking: The entire Docker tool set is now compatible with windows. Since all the Docker components are locally compatible with windows, they can now run with minimal computational overhead.
Docker Toolbox for Windows:
- Docker Desktop for Windows require newer versions of operating system, so users with older OS versions must use Docker Toolbox. Because It doesn’t have Hyper-V functionality.
- If you are using Docker Toolbox on a Windows system that has Hyper-V but cannot run Docker Desktop for Windows (for example Windows 8 Pro), you must use the hypervdriver to create local machines. So it is a Legacy desktop solution.
Docker Desktop For Windows:

- Hyper-V and Containers Windows features must be enabled.
- The following hardware prerequisites are required to successfully run Client Hyper-V on Windows 10:
- 64 bit processor with Second Level Address Translation(SLAT)
- 4GB system RAM
- BIOS-level hardware virtualization support must be enabled in the BIOS settings.
Components Installed With Docker:

- Docker Engine: is an open source containerization technology for building and containerizing your applications.
- Docker Compose: is used to run multiple Docker containers at once by using a single command, which is docker-compose up.
- Docker Machine: is used to install Docker engine. It is basically what you install on your local system. The Docker machine has it’s own CLI client known as the Docker machine and a Docker engine client called Docker.
- Kitematic: Kitematic is an open source project built to simplify the use of Docker on Windows. It helps to automate the installation of Docker and it provides a very interactive user interface for running Docker containers.
Building Docker images with DockerFile:
Docker has a simple “DockerFile” file format that it uses to specify the “layers” of an image. So let’s go ahead and create a Dockerfile in our Spring Boot project:
FROM openjdk:8-jdk-alpine
ARG JAR_FILE=target/*.jar
COPY ${JAR_FILE} app.jar
ENTRYPOINT [“java”,”-jar”,”/app.jar”]
Let’s now build the docker image by typing the following command –
$ docker build -t spring-boot-demo.
That’s it. You can now see the list of all the docker images on your system using the following command –
$ docker image ls
REPOSITORY TAG IMAGE ID CREATED
spring-boot-demo latest 30ad8958ac67 22 hours ago
This should display your newly built image.
Once you have a docker image , you can run the command like
$ docker run -p 5000:8080 spring-boot-demo
In this command, we have used the port mapping. Once the application is started, you should be able to access it at “http://localhost:5000”.
You can also push the image to your DockerHub. For that, We need to tag our local image to our registry by using the command
$ docker tag image username/repository:tag
For example, We have a DockerHub username as ‘dockeruser’, Here is how we can tag the local image of our spring boot application –
$ docker tag spring-boot-demo dockeruser/myapplication
Finally, use the docker push command to push the tagged image to docker hub like so –
$ docker push dockeruser/myapplication
After we publish the image to docker hub, anyone can pull this image and run it in their environment.

