
Sitecore’s developer menu has many benefits, but the main significance is the options it provides for serialization. At the same time, it also provides some shortcut options to perform different operations in the content editor. In this blog, we will review all the information about the developer menu in Sitecore.
Unlike other menus available in the Sitecore content editor, the developer menu is hidden by default. There are two ways to display the developer menu in content editor menu bar.
- Uncheck the “Hidden by Default” checkbox
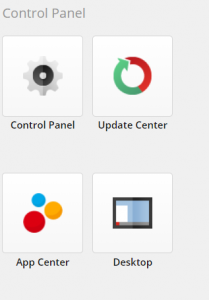
- Open the Desktop option from Sitecore launch pad, and switch to core database.

-
- Open the item at path /sitecore/content/Applications/Content Editor/Ribbons/Strips/Developer and uncheck the “Hidden By Default” checkbox and save these changes.

- Unchecking the above checkbox will make the developer menu permanently visible in content editor.
- Using this option, the developer tab can be made visible by default to the Sitecore administrators or the users having role sitecore\Developer.
- Right click on menu bar and click on the developer option.
-
- Open the content editor in Sitecore and right click on menus ribbon on the top.
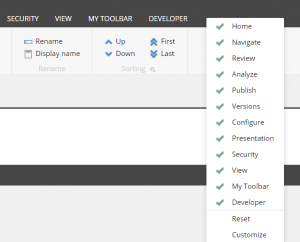
-
- Click on the developer option to make it visible in the menu bar.
- Using this option, a user can see or hide the developer menu as per the requirement.
Now, let’s explore all the out of the box (OOTB) options provided by Sitecore in the developer tab which are divided in different chunks. On enabling the developer tab, it looks like this:

Let’s explore each chunk in the developer tab one by one.
Write:

The write chunk is the most common chunk and is available in all menus in the content editor. It provides only one and the most useful option.
Save:
As the name of chunk and option suggests, the save option is used to save the changes made in any item in the content tree.
Template:

Create:

This is the only option provided by the template chunk. As the name of the chunk and the option suggests, this chunk enables the user to create a new template from anywhere in the content tree. The user may have opened any other node and item in the content tree, but they can create a new template using this option in the developer tab without specifically navigating to the Sitecore\Template node.
Go to:
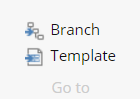
The go to chunk provides navigation options to navigate to the Branch or Template of any item.
Branch:
Suppose an item is created using a branch template in Sitecore. Then to see which branch template was used for its creation, the branch option can be used. As the items created using branch template do not store the reference to the branch template, this option can be useful to find out about their respective branch templates.
Template:
As the name of this option suggests, it is used to navigate to the template from which an item is created in Sitecore.
Serialize:
This chunk contains all the serialization and deserialization options provided by Sitecore. These options can be used to serialize and deserialize the items in the content tree. The location of serialized files for items serialized using Sitecore’s mechanism is stored in “SerializationFolder” setting in Sitecore.Serialization.config file.
![]()
Serialization options:
User can serialize a single item or group of items using the serialization options in developer tab.
- Serialize item:
- This option is used to serialize single and specific item.
- Serialize tree:
- In order to serialize an item with its sub-items, serialize tree option can be used.
Updating options:
The updating options from the developer tab are used for updating the content items in database from the file system. The updating options contain options for updating an individual item, an entire tree, and database also. The items are updated from file system based on certain rules as follows:
- If any item is not present in the content tree but its serialization file exists in the file system then that item is created in the content tree, based on the serialization file.
- If any item is present in the content tree but its serialization file doesn’t exist in the file system, then the item in content tree remains as it is. Sitecore does not remove it from content tree.
- If the items language and numbered version details are same in file system as that of content item, then an item in the content tree will only be updated if the value of updated field is later than the current value.
- Updating the items in content tree update all the information in items based on their files in file system except
- Item name
- Template ID
- Origin ID
- Parent ID
The updating options in developer tab are as follows:
- Update item:
- This option is used to update a single item from file system.
- Update tree:
- If an item is to be updated along with its sub-items, then this option can be used to update that tree from the file system.
- Update Database:
- This option can be used to update entire database as per the serialization files present in file system.
Reverting items:
In contrast to updating options, the reverting options are used to revert the items from Sitecore content tree and load them as per the file system. Reverting the items also has some rules as follows:
- If an item exists in content tree but not in file system, Sitecore removes it from content tree.
- If an item exists in file system but not in content tree, Sitecore adds that item in content tree based on file system.
- If an item exists in content tree but its details differ in the file system, Sitecore will overwrite that item in content tree.
The reverting options in developer tab are as follows:
- Revert item: This option is used to revert and load a single item based on file system.
- Revert tree: This option is used to revert and load an item and its sub-items based on file system.
- Revert database: This option can be used to revert and load entire database based on file system.

Indexing tools:
This chunk provides 3 different indexing options to rebuild the indexes and re-indexing tree. These shortcuts save the user from the efforts of navigating to the Control Panel in Sitecore to rebuild indexes available in their instance.
- Rebuild index: This option enables the user to rebuild each index individually. The dropdown for this option lists all the indexes available in the Sitecore instance and lets users select and rebuild the index as per their requirement.
- Rebuild all: Using this option, users can rebuild all the indexes present in the Sitecore instance.
- Re-Index Tree: This option is useful to re-index part of Sitecore content tree. Using this option, users can re-index specific nodes of content tree as per their requirement.

In this blog, we learn about all the shortcut options provided by developer menu. This menu is helpful to navigate to a branch template of an item, use Sitecore’s serialization options, and rebuild the indexes and re-indexing tree from the content editor. Hope you find it helpful!
Tolle Vorteile im Entwicklermenü in Sitecore und wirklich sehr ausführlich und verständlich beschrieben!
Thank you for appreciating Timseo!