
September 23, 2019.
This post is the closing one in a multi-part series talking about setting up and configuring key and trust stores for IBM MQ and IBM Integration Bus.
Windows Repository Configuration
Today we will talk about adding and accessing the key stores on Windows. Windows is a whole different kingdom with its own terminology and approach to TLS. I will provide “translation” of Microsoft lingo to common terms where applicable. Images are clickable for a sharper picture.
At this point you should have your key stores and trust stores created and populated with certificates from a CA (Certificate Authority). See the first two posts in these series on how to do that.
In order to import the store into Windows, you need to have it in a .p12 format. So, create one from scratch and receive new certificates into it, or a much easier way is to make a copy of an existing store into an empty .p12 store. Again, see the second post on how to accomplish that.
Next, we will import this store into the Windows Certificate Repository Manager. “Certificate Repository” or simply “repository” means “key store”.
Technical Steps
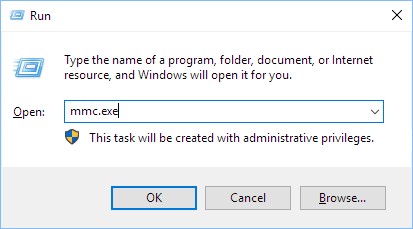
Get administrator permissions on your Windows workstation/server and open the MMC (Microsoft Management Console) by opening a command prompt and typing mmc.exe:
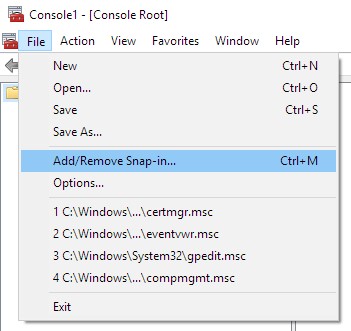
Open the File menu and select “Add/Remove Snap-in”:
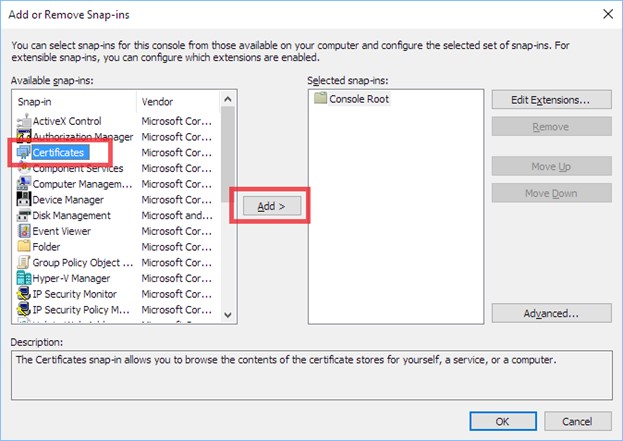
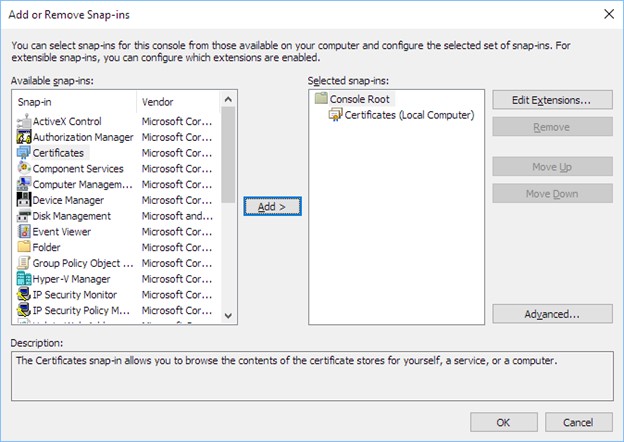
Click on “Certificates” and click “Add”:
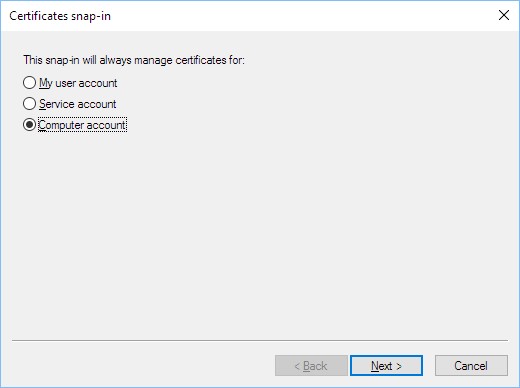
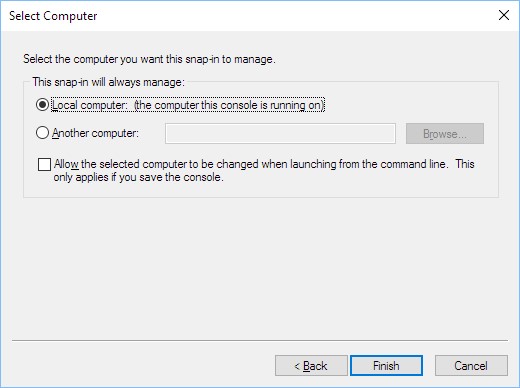
There are two types of repositories you can reference in your MQ code: user and system. User refers to the repository of the user that the application is running as, and system refers to the system-wide store (same principle as user and system environment variables on Windows). We want to add our certificates to the system-wide store, so all users can access it. Explanation for that will be provided later. Thus, we select “Computer account” and click “Next”:
Click “Finish”:
Click “Ok”:
Expand “Certificates (Local Computer)” -> “Personal” and click on “Certificates”.
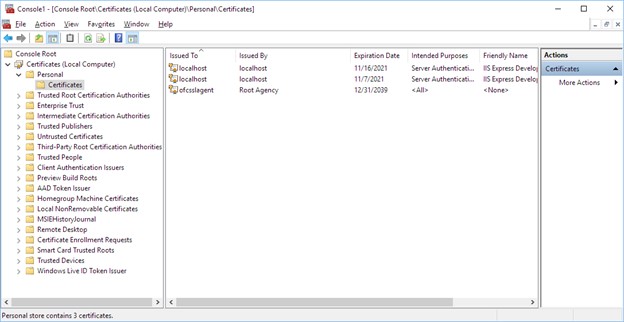
This screen will be your main working area. Navigate your way back here, if you want to see the contents of a Windows certificate repository.
Right-click on “Personal”, hover over “All Tasks” and select “Import…”. Notice the difference in terminology here. MMC uses the verb “import” to describe loading a certificate into a store, whereas ikeyman uses the verb “import” to describe copying certificates from another store into this store. Loading a certificate into a store is called “receive” in ikeyman.

Click “Next”:

Browse to your .p12 file and click “Next”. If you don’t see a .p12 file, try expanding the drop-down on the lower right and selecting “All files”:

Type the password for the .p12 file and check the “Include all the extended properties” checkbox:


Select the second option on the next screen and choose the “Personal” folder under “Certificates (Local Computer)” we navigated to earlier:
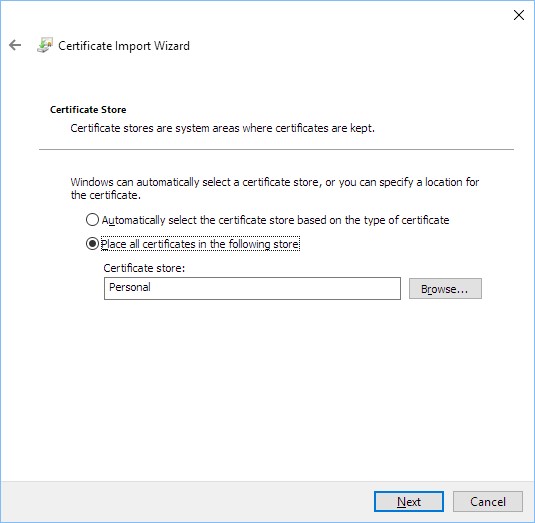
Click “Finish”:

You should receive the following message:

Question: Will this work if instead of a .p12 file we selected the certificate we downloaded from CA?
Answer: No. Importing a certificate (even if you downloaded it with a trust chain, so all four certs are in one file appended together) loses some important information like labels. If you know of a way to import a naked certificate and have it work, let me know in the comments section.
Repository Manager is Ready
You should now see the trust chain and the personal certificate in the Windows repository:

“Friendly Name” means “Key Label”. This is the string you typed in when you created the certificate request in ikeyman. “Issued To” corresponds to the “Common Name” from the certificate request. “Common Name” is referred to as “CN” in command line utilities.
Example of key label and common name fields in certificate request:

“Friendly Name” string MUST be unique store-wide for .NET MQ applications to function correctly, because that’s the string used in the code. “Issued To” has to be unique for some utilities to function, because some utilities reference the certificates in the store by “Issued To” and not by “Friendly Name”. There is no way of telling which one will be used until you try it.
Example of CN output in a command line utility:
![]()
All command line utilities, that I’ve seen, output “key label” field and reference the certificates by that string. If you find one that’s using “common name” or some other string, let me know in the comments. The trust chain certs above use the whole DN (Distinguished Name) as names. A DN consists of a CN plus Organization, Location, etc. fields appended to it.
Granting Permissions
Next step is classic Microsoft. Linux users will love it. A little bit of background is in order to explain why this step is needed.
We ran the MMC as an administrator because working with a system-wide repository requires full permissions on the system and we’re modifying system specific properties. However, that account might not be the account the MQ application will run under. Another thing to consider is that the user logged onto the system might not be the account the MQ application will run under (if it’s setup as a service, for example).
Let’s say for demonstration sake, that you imported your certificates as AdminUser (user that has admin privileges on the box), logged in and coded your application as user Mike123, and will run your application as a service account ServiceUser456.
Firstly, I hope, the reason, we chose system-wide repository instead of a user-specific one, is clear now. We want all users to have access to the same system-wide repository, and we want to administer only one instance of a certificate repository instead of several different ones for different users.
And secondly, the account that will run the application needs permissions to access the certificates in the system-wide store. Permissions are granted by a special utility that you need to download from Microsoft:
http://www.microsoft.com/en-us/download/details.aspx?id=19801
It’s called “Windows HTTP Services Certificate Configuration Tool” (don’t ask me why). You need to install it on your machine (again as an administrator) and memorize the path (it will not create a shortcut for you anywhere). By default, it’s installed into C:\Program Files (x86)\Windows Resource Kits\Tools.
Next, you need to learn its syntax which is pretty straight forward. First option is the action: “-g” for “grant”, “-l” for “list”, and so on. Second option is “-c” for certificate repository you want to use: “LOCAL_MACHINE\MY” is for personal repository on local machine (system-wide) which is exactly where we loaded our certs. There is also a “CURRENT_USER\<Store>” option is you decided to go with a local user repository. Third option is “-s” for “Issued To” name of the certificate. This utility is one of the few that references the certificates by “Issued To” string. Fourth option is “-a” for account to grant permissions to. Don’t include “-a” option, if you’re just listing permissions.
Two most common examples:
WinHttpCertCfg -g -c LOCAL_MACHINE\MY -s “v5104003.domain.org” -a “ServiceUser456”
WinHttpCertCfg -l -c LOCAL_MACHINE\MY -s “v5104003.domain.org”
First command will grant permission to access our repository to our service user account that will run the application. Second command will list all permissions on a cert. Of course, in order to grant permissions, you need to run these commands as an administrator.
Utility output example:
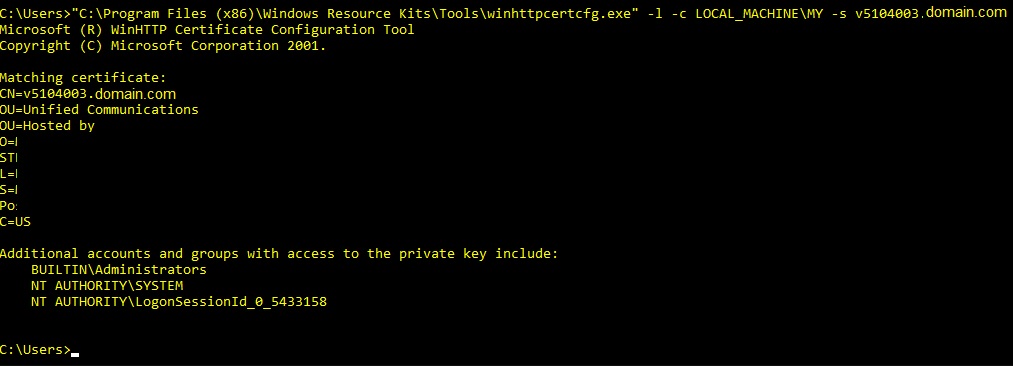
This concludes the repository setup.
Source Code Example
Next, I will show, very quickly, how to use this in the code. We will be using .NET Core C# MQ Managed Client sample provided by IBM and modified for our needs.
SSLKeyRepository in the code refers to Windows Certificate Repository. You can reference the user one by USER or the machine-wide by SYSTEM. We setup the system-wide repository, that’s why we’re using *SYSTEM.
CertificateLabel refers to “Friendly Name”.
UserId is the user that will be passed to MQ server in MQCSP for authentication. It doesn’t have to be the same user that the application is running under or the user logged onto the Windows box. Look at one of my previous posts for MQCSP details.
SSLCipherSpec is the cipher suite (cipher spec in MQ lingo) to use on the channel. Not all of them will work for .NET connections, but the one in the example should work. In one of the next posts, I will list the steps on how to help .NET Framework and Windows honor TLS 1.2 ciphers.
Code snippet:
properties = new Hashtable();
properties.Add(MQC.TRANSPORT_PROPERTY, MQC.TRANSPORT_MQSERIES_MANAGED);
MQEnvironment.SSLKeyRepository = @”*SYSTEM”;
MQEnvironment.CertificateLabel = “v5104003personalkey”;
MQEnvironment.UserId = “AppUser789”;
MQEnvironment.Password = “password”;
MQEnvironment.Hostname = “server1.domain.org”;
MQEnvironment.Channel = “channel1”;
MQEnvironment.Port = 1414;
MQEnvironment.SSLCipherSpec = “TLS_RSA_WITH_AES_128_CBC_SHA256”;
queueManager = new MQQueueManager(queueManagerName, properties);
queue = queueManager.AccessQueue(queueName, MQC.MQOO_OUTPUT + MQC.MQOO_FAIL_IF_QUIESCING);
message = new MQMessage();
message.WriteString(“Perficient Blogging is the Best!”);
queue.Put(message);
queue.Close();
queueManager.Disconnect();
That was a fistful, I know. If you have any questions, let me know in the comments section. Stay tuned for more fun stuff from the realm of IBM MQ and Integration Bus configuration!