
System Requirements
The system requirements for Oracle BI Applications installation:
- Oracle Fusion Middleware requires a minimum 1-GHz CPU
- Windows minimum physical memory required – 4 GB.
- Windows minimum available memory required – 8 GB.
Additional System Requirements and Supported Platforms for Oracle Business Intelligence EE Release 12.2.1 can be found in Oracle Fusion Middleware 12c (12.2.1.0.0) Certification Matrix placed at:
Downloading Files
A lot of files need to be downloaded for the installation to complete. The links to these files are given under the individual components. Downloading all the files for this version of OBIEE installation can be done from:
http://www.oracle.com/technetwork/middleware/bi/downloads/default-3237328.html
Installation Steps – Summary
The following installation steps are required in order during the installation and configuration of standalone OBIEE 12c in Windows environments.
- Database Installation for RCU (MS SQL Server 2014 – in this case)
- Java Installation on OBIEE Server (JDK 8u112)
- Weblogic 12.2.1.2.0 Installation
- OBIEE 12.2.1.2.0 Installation
- OBIEE 12.2.1.2.0 Repository Creation
- OBIEE 12.2.1.2.0 Configuration
- OBIEE Client Installation – Developer’s Box (OBIEE 12.2.1.2.0)
RCU Database Installation (MS SQL Server 2014)
MS SQL Server 2014 is used in this example as the RCU database for OBIEE 12.2.1.2.0. The DBA team must already install the database in the Windows server before start of this installation and one should have the sys admin user credentials. So this is one of the pre-conditions. How the RCU is installed will be covered later in the article.
JDK 8u112 Installation on OBIEE Server
- Go to the following link – http://www.oracle.com/technetwork/middleware/bi/downloads/default-3237328.html
- Click on Accept License Agreement.

- Click on the highlighted section as shown.
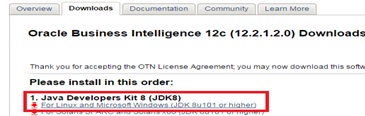
- Click on the download button as shown.
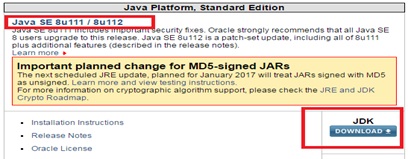
- Move to Java SE Development Kit 8u112, accept license agreement and download the highlighted version into the server.

- Keep the file into the following location.

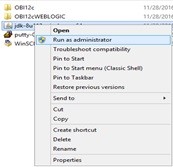
- Right click on the file and Run as administrator as shown below.
- Click Next.

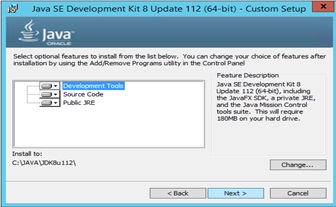
- The default installation folder would be under C:\Program Files\Java. We need to make sure that there is no SPACE in the java installation path. So let’s click on Change.

- Create the following folder structure. C:\JAVA\JDK8u112. Click OK.

- Click Next.
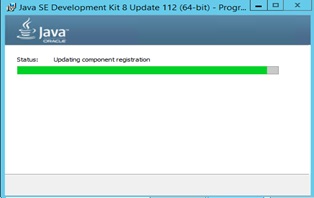
- Progress Bar would be displayed.
- For JRE set up as well the default Program Files path would be displayed. Click on change.

- Make another folder for JRE in the same JAVA folder just like we did for JDK and click Next.

- Progress Bar would be displayed.

- Once the installation is complete click Close.
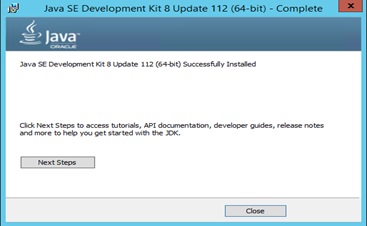
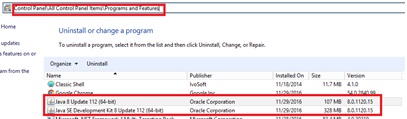
- Go to control panel as shown and check that the correct version of JAVA has been installed.
- JDK installation is complete. Next Step is Weblogic Server Installation.
Weblogic Server 12.2.1.2.0 Installation
- Download the WLS from the following location: http://www.oracle.com/technetwork/middleware/bi/downloads/default-3237328.html

- Download the marked file after accepting the license agreement.

- Place it into the server, unzip it as shown below. One can keep or delete the readme file.

- Go to Windows Start Menu -> Type cmd -> Run as administrator as shown.

- Go to the path (change directory) where the .jar file is located.

- Enter the command as shown below and press enter. The format would be JDKLocation\bin\java.exe –jar jarfilename.extension

- It would say Extracting the installer.

- The Oracle FMW installer would open. Click Next.

- Skip Auto Updates and click Next.

- Put the location as shown below and click Next. Please note that this location would be the same during Oracle BI installation.

- Click on Fusion Middleware Infrastructure and click Next.
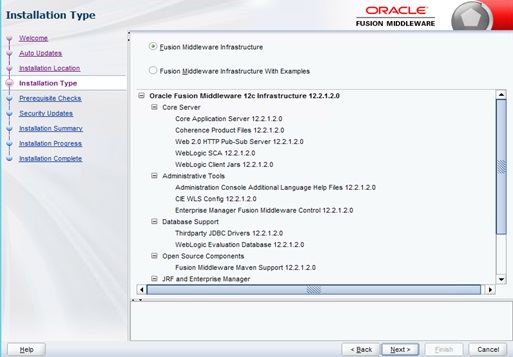
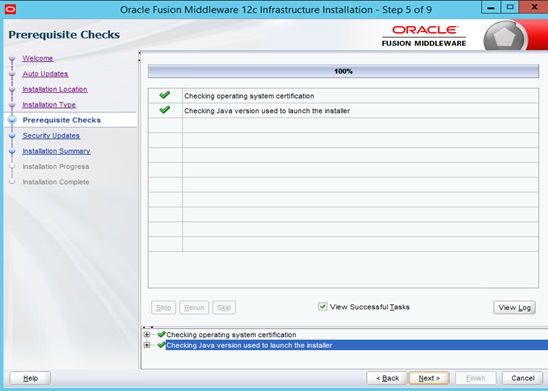
- Pre-requisites checks must be passed. Click Next.
- Uncheck the security updates checkbox and click Next.

- The following pop up will arrive. Click Yes.

- The installation summary page would be displayed. Click in Install.

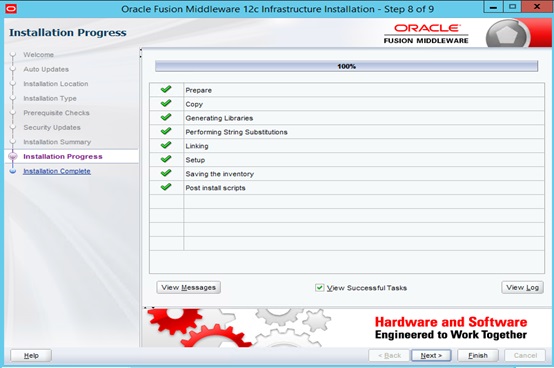
- Installation progress would be displayed and the individual components would be ticket off green as it proceeds. Might take some amount of time.

- Once it is complete click Next.
- The completion page would be displayed. Click Finish.

Guide to Oracle Cloud: 5 Steps to Ensure a Successful Move to the Cloud
Explore key considerations, integrating the cloud with legacy applications and challenges of current cloud implementations.

- The following message in the command prompt would be displayed. Exit CMD.
![]()
- Oracle Fusion Middleware Weblogic server has been successfully installed. Next step is OBIEE software installation.
OBIEE 12.2.1.2.0 Installation
- Download the OBIEE from the URL: http://www.oracle.com/technetwork/middleware/bi/downloads/default-3237328.html

- Accept license agreement and download File 1 and 2. Place the two files in a single folder in the server as shown. Unzip both the files.

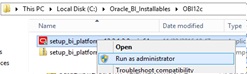
- Right click on the first file and Run as administrator.
- Oracle Universal Installer will prepare itself.

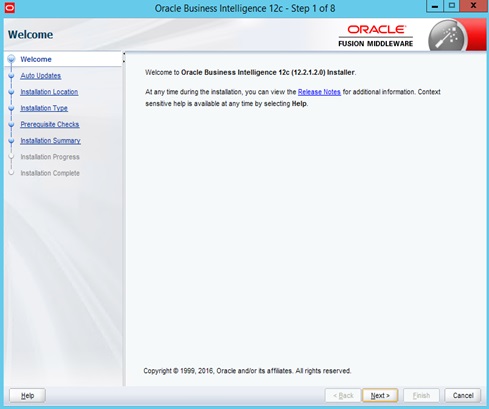
- In the welcome page click Next.
- Skip Auto Updates and click Next.

- Select the same home location selected during weblogic installation. Click Next.

- Click the selected Radio Button and click Next.
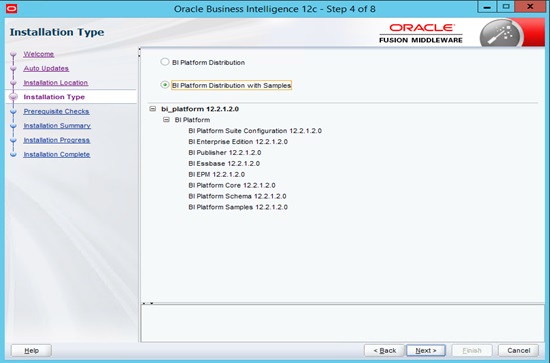
- Pre-requisites check is successful. Click Next.

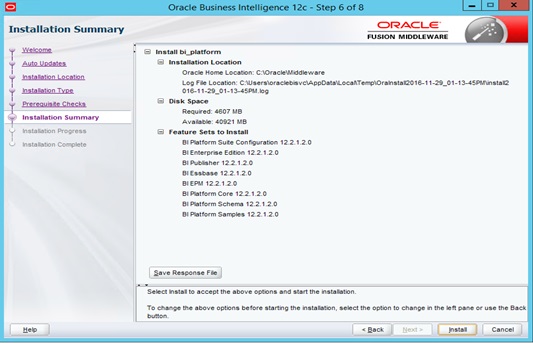
- In the summary page click Install.
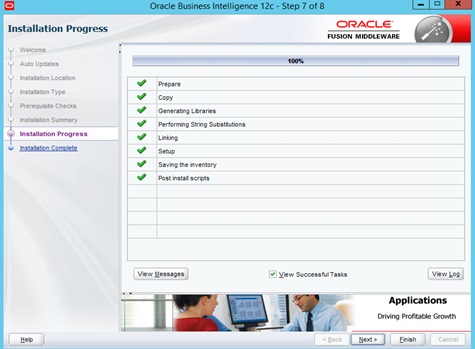
- Wait till the progress bar shows 100% on every time.

- Once this is done, automatically a page would appear to repair/remove MS Visual C++. Select Repair and click Next.

- Repair Complete. Click Finish.

- Coming back to the installation progress page click Next.
- Click Finish on the complete page.

- Oracle BI 12c has been installed successfully. Next step to install the RCU in the already installed RCU Database i.e. SQL Server 2014.
OBIEE 12.2.1.2.0 RCU Creation
- Run the following two commands as sys admin user in SQL server database where the RCU is going to be installed. Here obirep is the database in the SQL Server.
ALTER DATABASE obirep COLLATE SQL_Latin1_General_CP1_CS_AS;
ALTER DATABASE obirep SET READ_COMMITTED_SNAPSHOT ON;
- Go to the location: C:\Oracle\Middleware\oracle_common\bin and right click on the windows batch file named rcu and run as administrator.

- RCU welcome page would be displayed. Click Next.

- Select the following option and click Next.

- In the database connection details enter Database Type, Unicode Support Option, Server IP, Port, database name (obirep), Username (sys admin user) and its password. Click Next.

- Pre-requisites check should pass. Click OK.

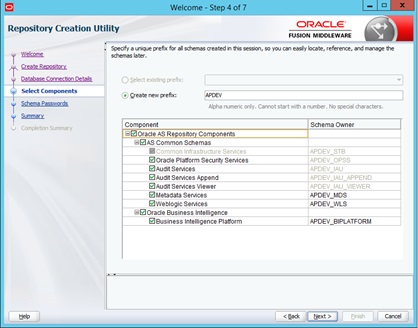
- Select a prefix (APDEV here, for prod it would be APPROD). Select all the components and click Next.
- Again a pre-requisites page would appear with all passed results. Click Ok.

- Select Use Same passwords for all schemas (i.e. RCU schemas created under database obirep). Click Next. Note down the password somewhere.

- In the summary page it shows all the components names, their schema names and the owners. Click Create.

- In the completion summary page all the details would be displayed. Like Host, Port, Database, execution time. The log files would be saved under the locations highlighted in red. If required, one can move to those locations in the server and check the log files. Click Close.

- Log into the database server using SQL Server Management Studio and check that all the schemas have been created after the installation. Next is to configure the OBIEE.

OBIEE 12.2.1.2.0 Configuration
- Go to C:\Oracle\Middleware\bi\bin and do the following to the config file.

- On the arrival page of OBI Configuration assistance uncheck the Essbase and click Next.

- After passing the prerequisites check click Next.

- Keep the Domains Directory, Domain Name and Domain Home as default selected. Enter the weblogic password for DEV environment. Confirm the same. Click Next.

- Click Use Existing Schemas. Enter the database type, connection string in the given format, Prefix (APDEV for development, APPROD for production) and the schema password we set in our RCU installation step.

- Keep the port as default (9500-9999). Click Next.

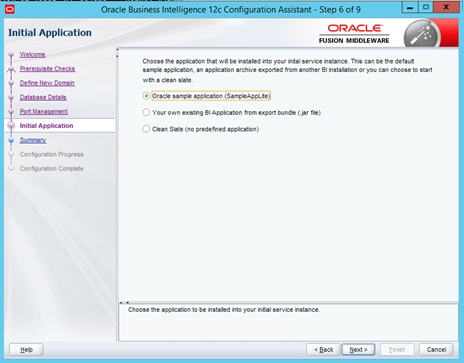
- Next is selecting Initial Application. Select sample application (SampleAppLite) and click Next.
- Summary page would have all the details such as analytics URL, enterprise manager, console URL etc. One can save the response file for later use. Click Configure.

- Configuration would be under progress. Wait for all the tools to be configures completely. Might take 20-30 minutes in total.

- Once done click Next.

- Save the response file again if needed and click Finish.

- Press enter to exit installer.

- Open a browser (I have used Chrome) and put the analytics portal URL in the address bar. One can get it from the response file saved. Here it is http://OracleBi.phillyshipyard.com:9502/analytics

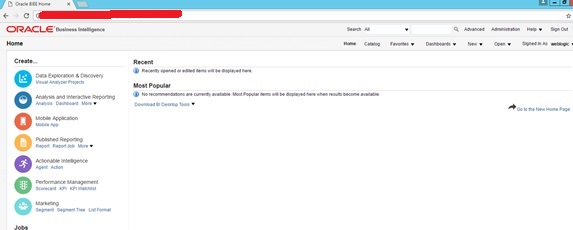
- Login using the weblogic credentials. The following items would be displayed upon login.
- Move to Dashboard -> Quickstart.to view one of the default dashboards which comes with OBIEE 12c (Sample Lite install). This is only for a demo purpose and would be removed/hidden at a later stage once development activity starts. These dashboards give a brief overview of how OBIEE 12c dashboards and visualization actually works.

- To start, stop and check status of the BI Services (at a later stage) move to C:\Oracle\Middleware\user_projects\domains\bi\bitools\bin location. There would be 3 files alongside many other in the directory.
Start Script: It starts all the BI services associated with the OBIEE server.
Stop Script: It stops all the BI services.
Status Script: Shows the current status of the BI services.

Right click on the status script and run as administrator. Will show all the services/servers within the main OBIEE server at running state. So there is no need to stop or start any of them. During development phase or anytime the server being down one might need to execute these scripts accordingly.

- Thus OBIEE 12 installation and configuration is completed successfully. The final step (only for developers box, not for the server) is to install OBIEE client.
OBIEE 12.2.1.2.0 Client Installation in Developer’s system
- OBIEE Client tool is required when Developer’s do offline/online development connecting to the server instead of directly logging onto the Windows server. If the Developer is connected to the VPN then he/she can make changes to code in online mode in BI environments. Or they can simply take the code from the server, work offline, make changes to the code in their local system using this client tool and then deploy the changes onto the server again. To download this client tool, go to the URL:
http://www.oracle.com/technetwork/middleware/bi/downloads/default-3237328.html
Accept license agreement and then click download the file shown below to your own system.
![]()
- After downloading the zipped file, unzip the setup file and place it under a folder in your Windows system as shown below.

- Right click on it and Run as administrator.

- Preparing the installer screen will load.

- After few moments, welcome screen will appear. Click Next.

- Put the installation path as shown below (no spaces in the path remember) and click Next.

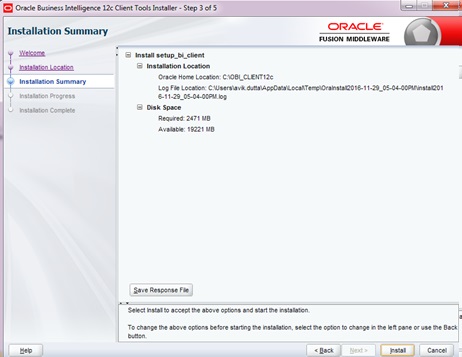
- Arrive at Installation Summary page and click Install.
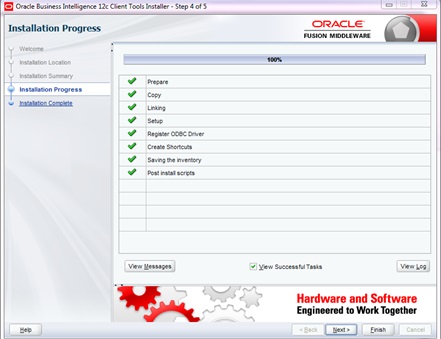
- Installation progress bar would be displayed. Wait for every option to be green checked. Might take few minutes. Do NOT click Next instantly.
- After a few moments MS Visual C++ 2010 set up screen would appear. Click Install after checking the box I have ready and accept the license term.

- After few moments it would say that the installation is complete. Click Finish.

- Now, coming back to the Installation progress page click Next. Installation Complete message would be displayed. Click on Finish.
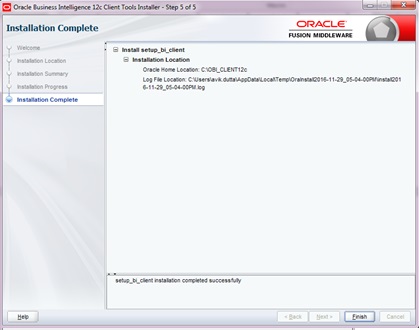
- Go to start menu -> Oracle Business Intelligence Client folder and one can see the installed client.

- Oracle BI 12c client has now been installed successfully.
if there is a machine with running setup of forms and reports 11gr2, fusion middleware 11g weblogic 10.3.x
then what obiee can be installed along with it. ? using existing Fusion Middleware ?
thank you.