
The OBIEE BI Server cache is the most effective way of improving response times of OBIEE dashboards followed by database modifications and tuning. Using data present in the cache limits the load on the database considerably. It is also effective for improving network, BI server and dashboard performance for obvious reasons. However, after a certain interval the same cache needs to be cleared since data in warehouse is ever changing and new cache needs to be built for the reports to pick up updated data and use it in nearest future. The most important decision that needs to be taken while deciding cache purging is: When and how to flush the cache.
There are multiple options for cache purging such as:
- Full Cache Purge: If the datamodel is small compared to the database then purge the entire cache.
- Flush only database(s): if there are multiple databases used to create subject areas and reports purge cache for ONLY those databases that are not required (to be cached).
- Purge by Table: This is much more specific that a particular fact needs to be purged for new cache to be loaded. Can be done through RPD after a certain interval.
- Finally, Purge by query. So only purge few rows (new, to be updated or updated rows) and do not make any change to the existing old historical data.
This article will describe the step by step process of we can automate the OBIEE server and web cache purging using shell script and including it in daily ODI load run. The script runs after the load is run daily incremental data load. The script has been made generic to be used in any environment
Requirement:
As we know that OBIEE uses cache (both at server and web level) to store the query results. After daily ETL run we have to purge both the cache manually (using Manage-> Cache in OBIEE Admin Tool & Administrator option in Analytics) so that users can view the latest data in reports and dashboards. To reduce this manual effort a shell script has been designed that would purge both server and web cache without the manual need to access to OBIEE tool. This script is added as the last step of the daily ODI load plan so that as soon the data gets refreshed the cache gets purged.
Purge BI server cache:
Write a shell script by using nqcmd command to clear OracleBIServer cache. The nqcmd utility is available both on Windows and UNIX systems. The syntax of nqcmd command is:
nqcmd –d my_dsn –u my_username [-p my_password] –s sql_input_file –o my_result_file;
Steps:
- Create a file called txt ( sql_input file) and place it at following location of BI server: [FMW_HOME]/instances/instance1/bifoundation/OracleBIApplication/coreapplication/setup
- Assign the above path to a variable called SETUP_DIR.
- Assign the path [FMW_HOME]/ Oracle_BI1/bifoundation/server/bin” to a variable called N
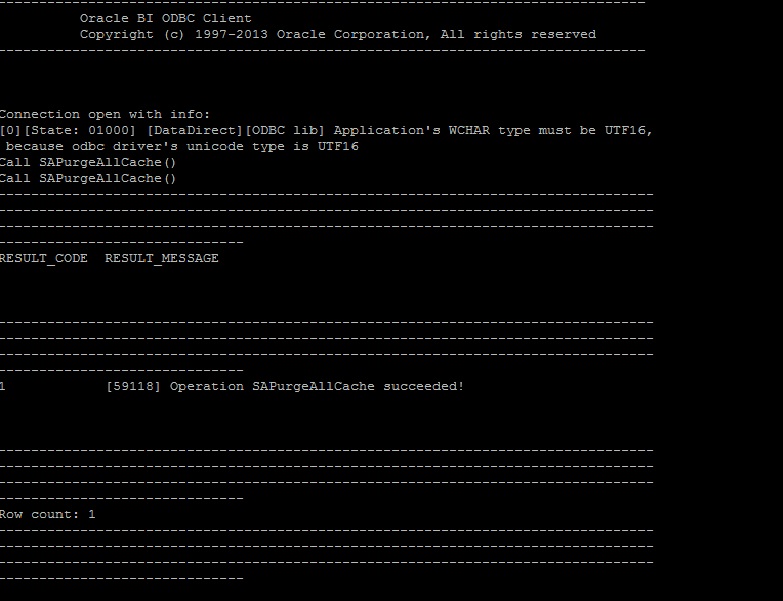
- In the file, enter the code “Call SAPurgeAllCache();” (without the quotes), which is a special BI Server command for clearing the entire cache.
- Now create a shell script called OBIEE_Cache_Purge.sh to run the nqcmd command and place it in a directory where you store your custom scripts which includes the following commands.
- In the script, before running nqcmd, we must first run bi-init.sh to launch a command prompt or shell window that is initialized to your Oracle instance. This utility can be found in the same set up location mentioned in step 1. Put the following command in the script for initialization: source $SETUP_DIR/bi-init.sh;
- After the initialization, put the below command in the script which would purge the cache. $NQCMD_DIR/nqcmd -d AnalyticsWeb -u weblogic -p manager1 -s $SETUP_DIR/purgecache.txt;
To purge the presentation server cache:
OBIEE 11G has a catalog manager command called “ClearQueryCache” to clear out the Presentation Server cache.
The syntax of ClearQueryCache command is:
./runcat.sh -cmd clearQueryCache -online <OBIPS URL> -credentials <credentials properties file>
Steps:
1. Create a catalog manager credential properties file. Open a text file and type the following entries.
login=<weblogic_admin_Username>
pwd=<weblogic_Admin_Userpassword>
And save in a directory with the file name as catmancredentials.properties.
2. Assign the catalog manager path of the bi server to a variable called RUNCAT_DIR as shown below:
RUNCAT_DIR=
“[FMW_HOME]/instances/TGC_BIINSTANCE/bifoundation/OracleBIPresentationServicesComponent/coreapplication_obips1/catalogmanager”
3. Run the command “uname –a” to get the system details .Then extract the system name and assign it to a variable with the following commands var=$(uname -a)
name=${var:6:10}
4. Put the above name to the analytics URL and assign it to another variable.
CAT_URL=http://$name:9704/analytics/saw.dll
The above steps 3 & 4 are designed to make the script a generic one so that it would run in any environment (Dev,Test, Prod etc.) without any alteration to it.
5. Run the following command to purge the Presentation Server cache.
$RUNCAT_DIR/runcat.sh -cmd clearQueryCache -online $CAT_URL -credentials $SETUP_DIR/catmancredentials.properties
Test BI server cache purging:
1. Login to Analytics and click on some reports and dashboards
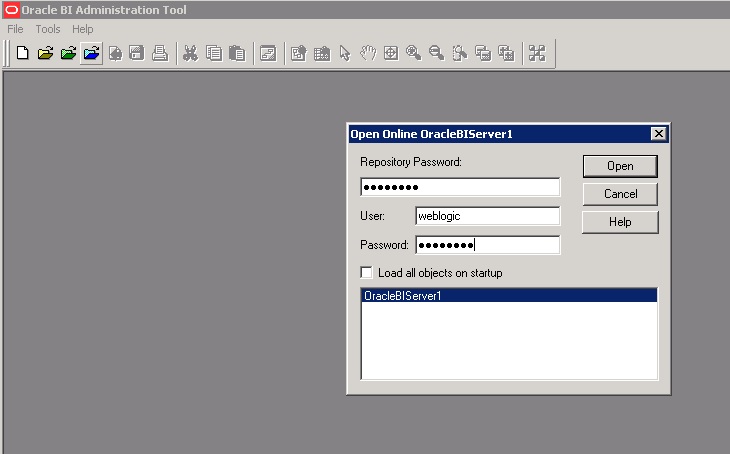
2. Open the BI Administration tool and open the repository in online mode.
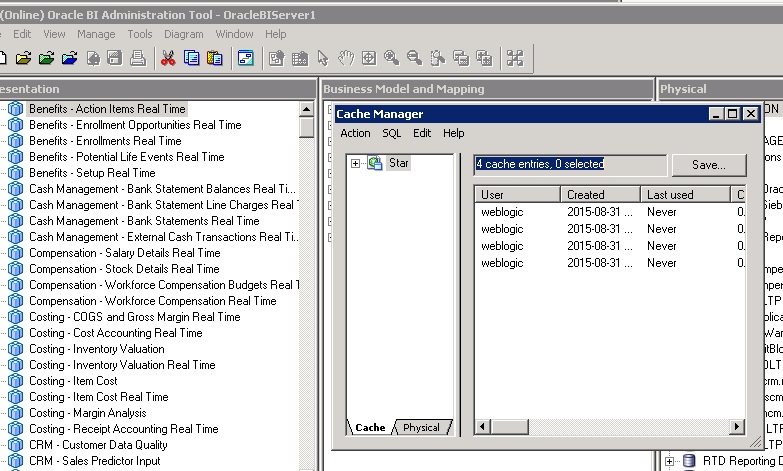
3. Go to Manage -> Query-> Cache .


Guide to Oracle Cloud: 5 Steps to Ensure a Successful Move to the Cloud
Explore key considerations, integrating the cloud with legacy applications and challenges of current cloud implementations.
4. Note the cache entries as shown in figure below.
5. Now run the script to get the following output.
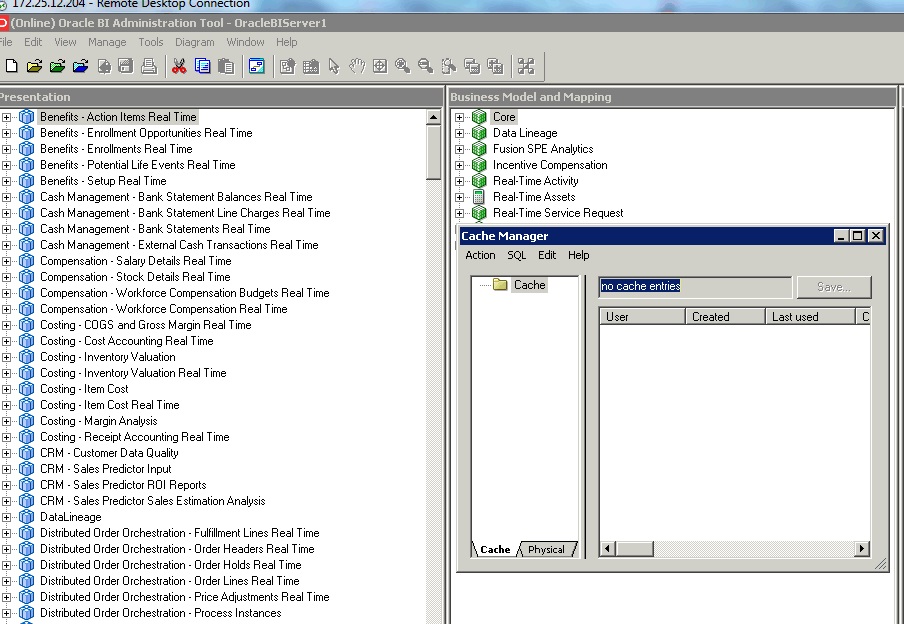
6. Now go to the cache again in the repository and check to see the entries got deleted.
TEST Presentation server purging:
1. Login to Analytics and click on some reports and dashboards.
2. Go to Administration -> Manage session.
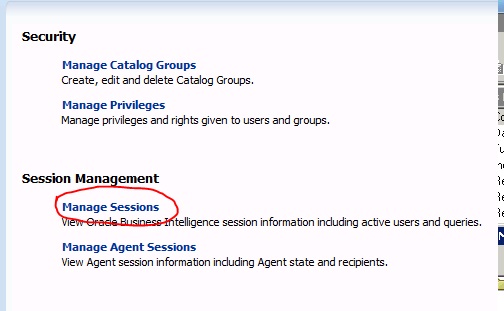
3. Check for the cache entries.
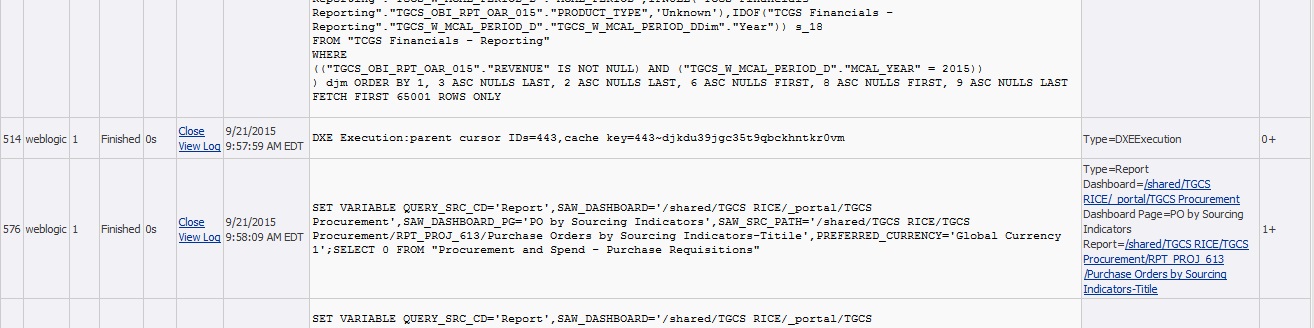
4. Now run the script to get the following output.
![]()
5. Go back to manage session again and check to see the entries got deleted as shown below.
![]()
Add the cache purge process as ETL post load activity:
To ensure the cache purging process automation, we have added a step in our load plan to execute cache purging scripts. This step has been added at PLP section of load plan. Also we have added this step as a Serial step to ensure this will be last step of PLP process. To achieve this we have done the below activities:
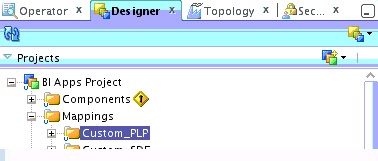
1. Create custom PLP folder under BI Apps Project Mappings with proper release tag ‘BIA_11’ and version as shown below:

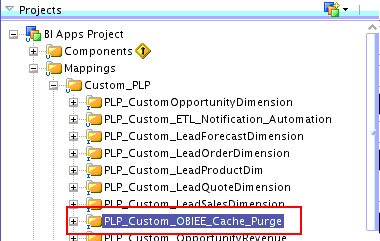
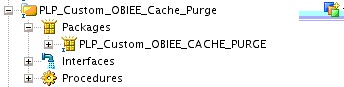
2. Under Custom_PLP folder create another folder ‘PLP_Custom_OBIEE_Cache_Purge’ with proper version. All the realted code for cache purge will be residing under this folder.
3. Now create a package ‘PLP_Custom_OBIEE_Cache_Purge’.

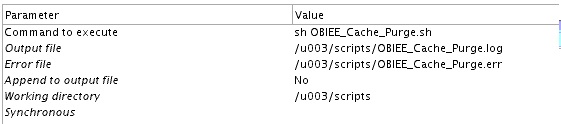
4. Now Go to Diagram tab of the package and add a tool ‘OdiOSCommand’ in the diagram. Provide the details of the OdiOSCommand as shown below:

Parameter Details given below:
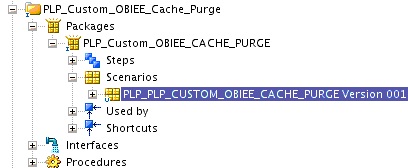
5. Save the changes. Create a scenario for the above package.
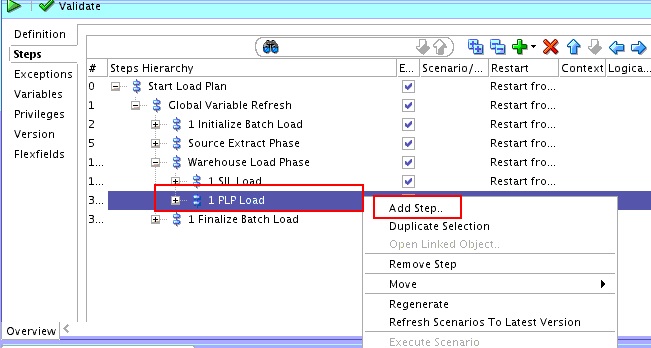
6. Now we need to add this above scenario in the load plan. Open the load plan in which you want to add this cache purging activity. Right click on the ‘1 PLP Load’ Step present under Start Load Plan Global Variable Refresh Warehouse Load Phase
7. Provide the details for the step as given below:
Step Type : Serial
Step Location: Add a child step to selection
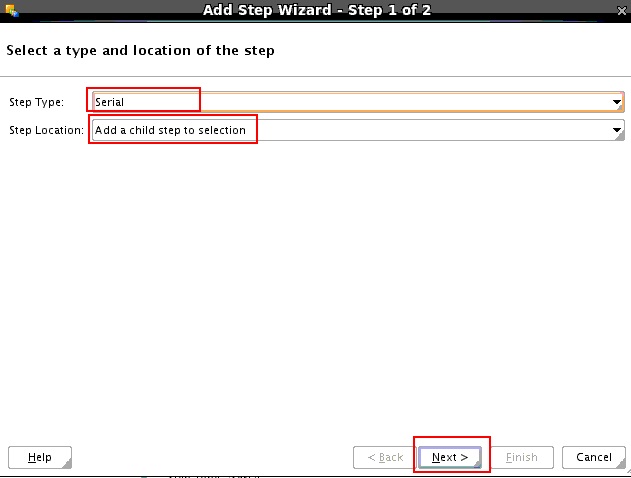
Then Click on Next.
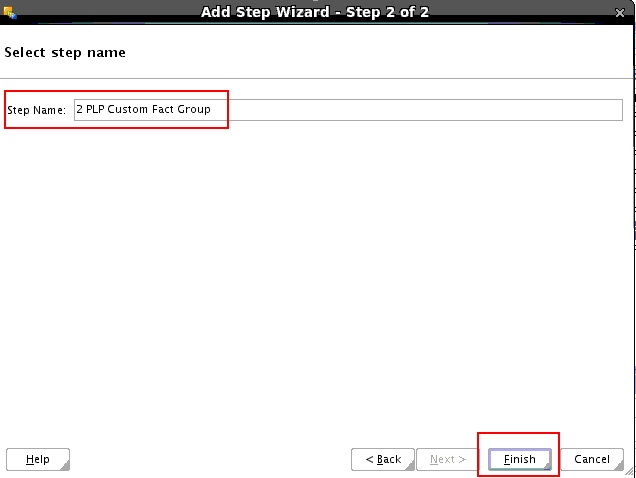
Now Provide th Step Name and click on Finish to create the step.
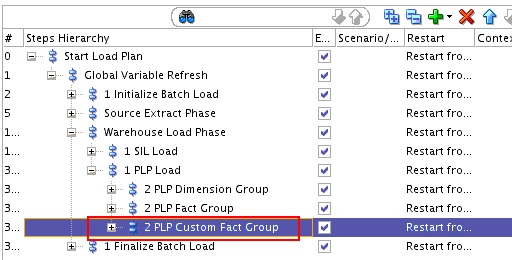
8. Expand the ‘1 PLP Load’ Step and you will find the new Serial Step created there.
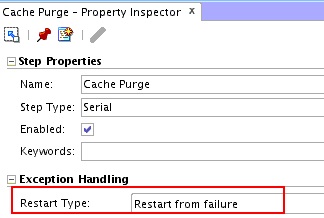
9. Again Right Click on ‘2 PLP Custom Fact Group’ and Add a Serial step ‘Cache Purge’ as shown below:
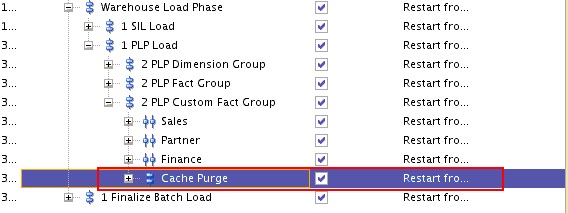
Set the Restart Type option for this step as ‘Restart from Failure’.
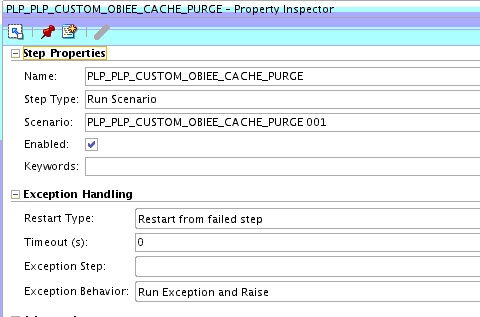
10. Now expand the ‘PLP_Custom_OBIEE_Cache_Purge’ folder present under BI Apps Project Mappings Custom PLP. Expand the package ‘PLP_Custom_OBIEE_Cache_Purge’. Drag and drop the scenario ‘PLP_PLP_CUSTOM_OBIEE_CACHE_PURGE version 001‘ present under the ‘PLP_Custom_OBIEE_Cache_Purge’ package on to the ‘Cache Purge’ step created in the load plan. After adding the scenario the load plan should look like below:

11. Set the property of the newly added scenario in the load plan as shown below:
So now the Cache Purging has been added in your load plan as a step and this process will run as a step in the load plan.