
Welcome back! Today we’ll be discussing the second phase of your migration to Skype for Business Server 2019. If you are just joining us for the first time I’d recommend back tracking to my Phase 1 blog article. In the first phase we planned and now in this phase we will begin preparing for the migration. So with that said, off we go!
Phase 2: Preparing for Migration
Now that we have the basic building blocks on planning the migration, it is now time to discuss preparing for the migration. This is done by considering the following topics:
- Apply updates
- Before you migrate, updates must be applied to your environment. For the most up-to-date information, see the Skype for Business downloads and updates at https://go.microsoft.com/fwlink/p/?linkid=232630.
- Configure DNS records for pilot pool deployment
- Before deploying the pilot pool, you must update the DNS Host A entries for the pilot pool. To successfully complete this procedure, you should be logged on to the server or domain as a member of the Domain Admins group or a member of the DnsAdmins group.
- Run Best Practices Analyzer
- The Best Practices Analyzer tool gathers configuration information from a deployment and if the configuration is set according to Microsoft best practices. You can download the Best Practices Analyzer from the Microsoft Download Center at https://go.microsoft.com/fwlink/p/?linkid=246173.
- Back up systems and data
- Before you begin the migration, perform a full system backup and document your existing system, including an inventory of user accounts that are homed on each pool, so that you can roll back if it becomes necessary
- Configure clients for migration
- These configuration changes should be made on Lync Server 2013 or Skype for Business Server 2015 (the version you are migrating from ).
- Deploy the most recent server, client, and device updates (hotfixes) for your existing installation.
- On the previous version of Skype for Business Server, use Client Version Filtering to only allow clients with the most current updates installed.
- These configuration changes should be made on Lync Server 2013 or Skype for Business Server 2015 (the version you are migrating from ).
- Verify the legacy environment
- The steps in verifying your legacy environment are as follows:
- Verify that legacy services are started
- Review the legacy topology in Skype for Business Server Control Panel
- Review legacy users in Skype for Business Server Control Panel
- Verify legacy Edge and federation settings
- Verify legacy XMPP federated partner Configuration
Let’s dig a bit deeper into each of these verification steps by showing you a step by step process.
Verifying that legacy services are started
-
From the legacy Front End Server, navigate to the Administrative Tools\Services applet.
- Verify that the following services are running on the Front End Server:


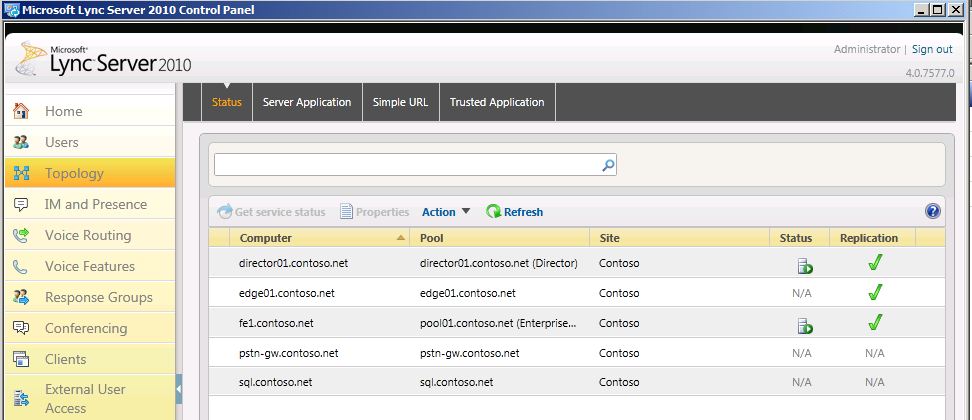
Reviewing the legacy topology in Skype for Business Control Panel
-
Log on to the Front End Server with an account that is a member of the RTCUniversalServerAdmins group or a member of the CsAdministrator or CsUserAdministrator administrative role.
-
Open the Skype for Business Server Control Panel.
- Select Topology. Verify that the various servers in your legacy deployment are listed.
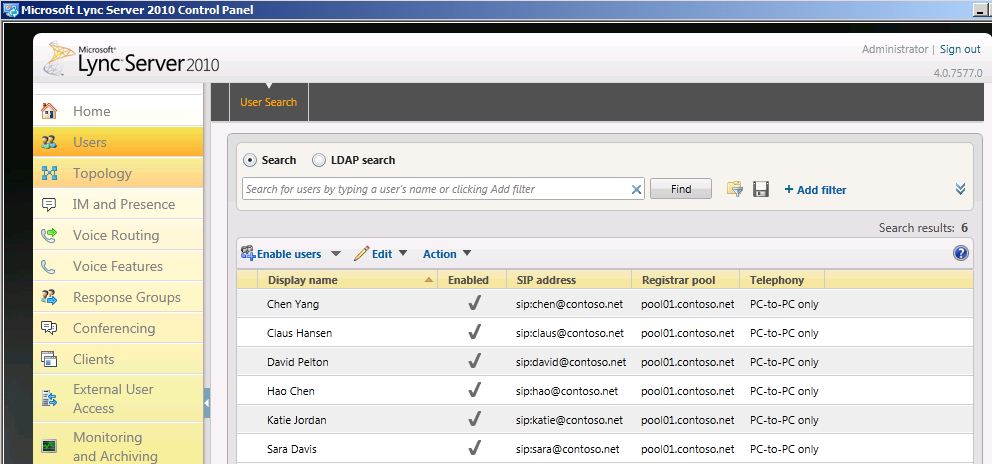
Review legacy users in Skype for Business Control Panel
-
Open the Skype for Business Server Control Panel.
- Select Users, and then click Find.
- Verify that the Registrar Pool column points to the legacy pool for each user listed.
Verify legacy Edge and federation settings
-
Start Topology Builder.
- Select Download Topology from existing deployment.
- Choose a file name, and save the topology with the default .tbxml file type.
- Expand the legacy installs node to reveal the various server roles in the deployment.
- Select the site node and verify that a Site federation route assignment value is set.
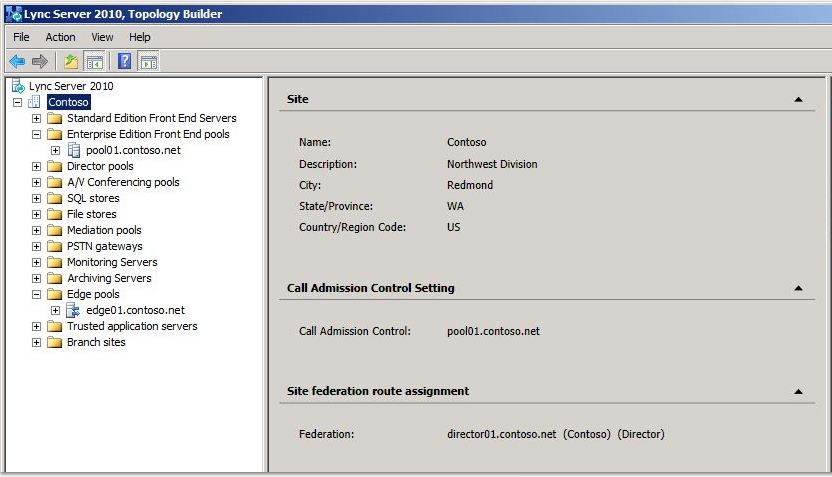
- Select the Standard Edition Server or Enterprise Edition front end pool. Determine whether an Edge pool has been configured for media below Associations.

- Select the Edge pool and identify whether a Next hop pool is configured below Next hop selection.

Verifying legacy XMPP federated partner configuration
-
From the legacy XMPP server, navigate to the Administrative Tools\Services applet.
-
Verify that the Office Communications Server XMPP Gateway service is started.

There you have it, now that we have completed phases 1 and 2 of your migration to Skype for Business Server 2019 you are well on your way! However, this only lays the foundation for our migration, in the next few phases we’ll be building on this by deploying our first pilot pool and progressing from there! Nevertheless, I hope you have found this helpful and I’ll see you for Phase 3!