
Guide to Oracle Cloud: 5 Steps to Ensure a Successful Move to the Cloud
Explore key considerations, integrating the cloud with legacy applications and challenges of current cloud implementations.
Following my previous blog post on how to add a new Dimension to a Data Sync task, this post looks at how to add a Fact and perform a lookup on dimensions while loading the target fact table in a data warehouse using Data Sync. To refer to the blog post on adding a Dimension follow this link. The latest releases of Data Sync included a few important features such as performing look-ups during an ETL job. So I intend to cover these best practices when adding new dimension and fact tasks. These instructions are based on Oracle BI Data Sync version 2.3.2 and may not apply to previous versions of Data Sync.
- In this example, I will load a new fact table called W_OTLIS_TICKETING_F to be loaded from the source table OTLIS_TICKETING. The new fact table will support joins to 2 existing dimension: W_OTLIS_STATE_D and W_OTLIS_METRO_STATION_D.
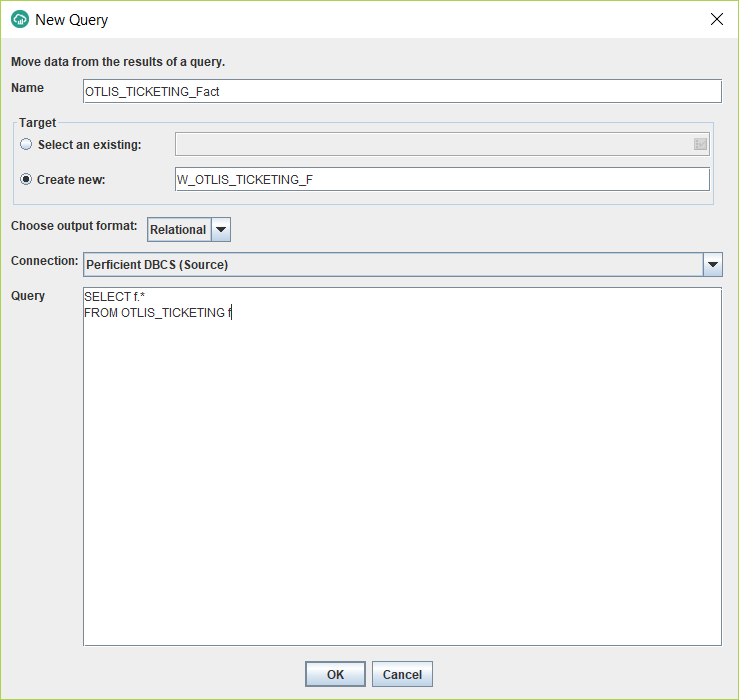
- Under the Project tab, select Relational Data, and then Data From SQL. (Other options work, but in this example I will use a SQL query to source data for the fact since that allows maximum flexibility to customize the source query in the future if needed.)
- In the new window, enter the name of the new task (without any spaces), enter the name of the new target table for the fact (follow your naming convention), choose the Relational output format, select the source Connection, and enter a SQL statement to select the columns needed from the source table. In my example, I am selecting all the columns.
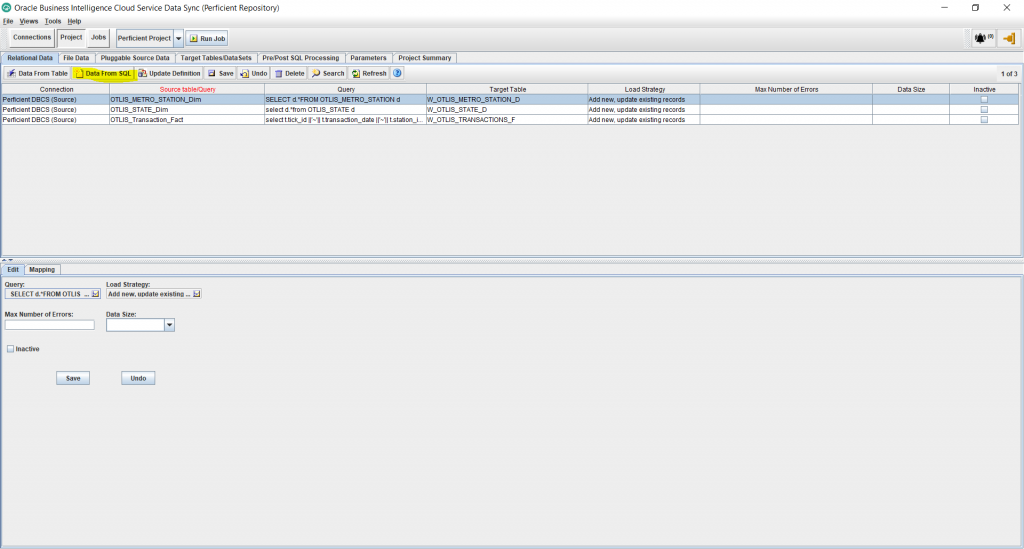
- Wait for a message like the following to confirm the operation was successful. Then click OK.

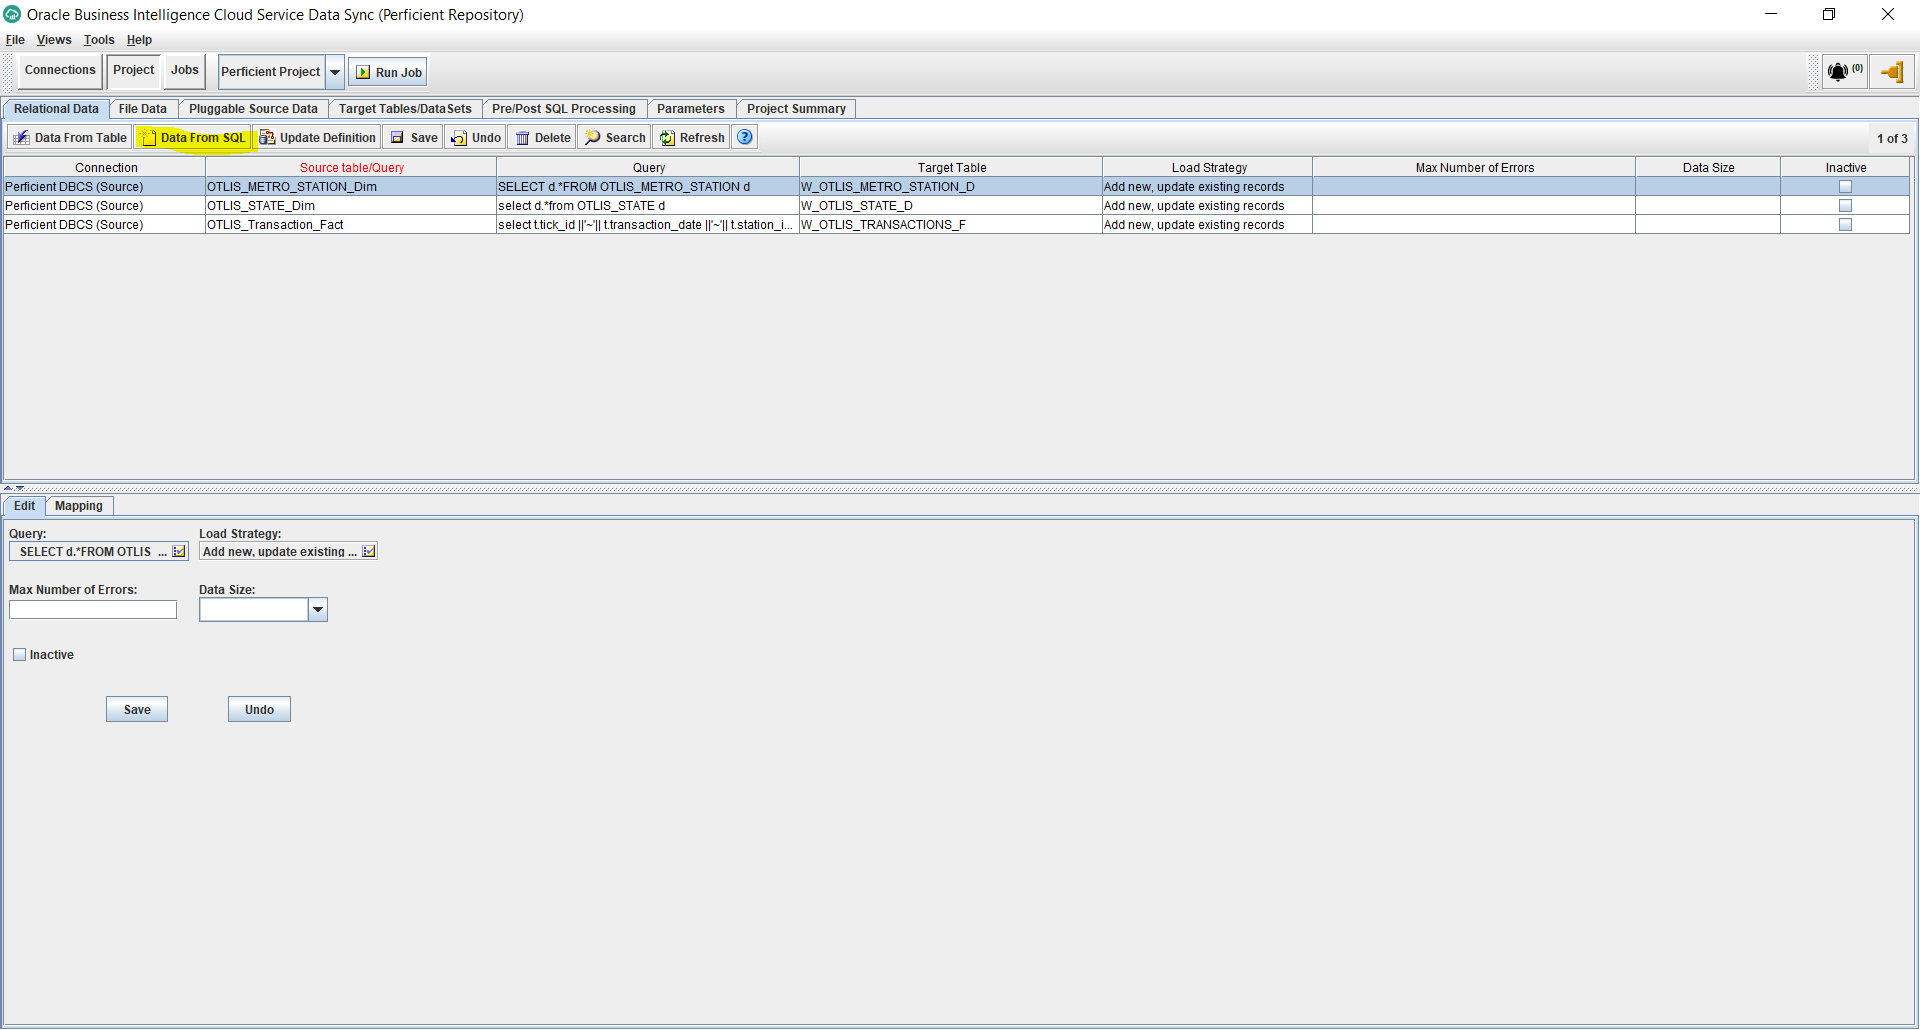
- Under Project, you should now see a new record added for the new task. Click on the newly created task and click on the Load Strategy from below to edit it.
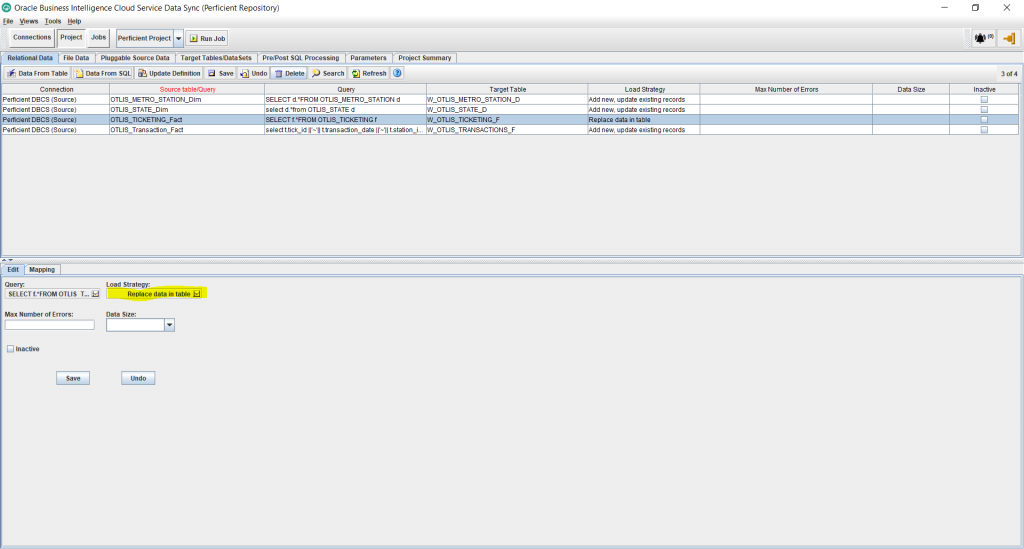
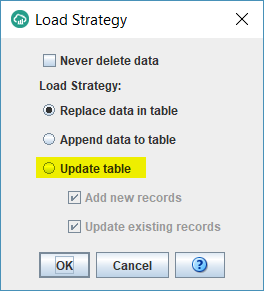
- By default the task does a full load of the table because the Load Strategy is set to “Replace data in table” option. Ideally, if your source table supports incremental tracking using a last update date, you want to switch the Load Strategy to support incremental loads and therefore achieve faster job run times. To do that, select the “Update table” option. Keep both check boxes below that checked. Click Ok.
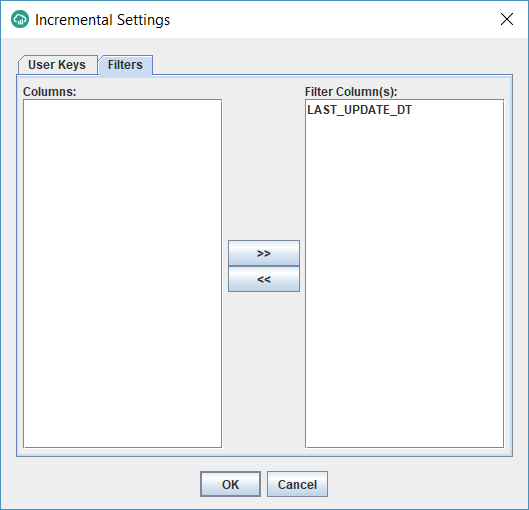
- You should now get another window with 2 tabs as follows. On the User Keys tab, select the column(s) that constitute the unique identifier of the source table. In my example, it is made up of 3 columns: TICK_ID, TRANSACTION_DATE and STATION_ID.
These are the columns that will be used to update the target fact table on an incremental basis to avoid duplicating the same record once its updated in the source. On the Filters tab, select the date column that tracks the date/time of any updates/inserts that happen on the source table. When running incremental, Datasync will only extract source table records that are inserted/updated after the last DataSync job run time.

- You should see a message as the following. Click OK to create the unique index on the user key. The purpose of this is to enhance the performance of incremental loads by creating an index on the matching criteria columns.

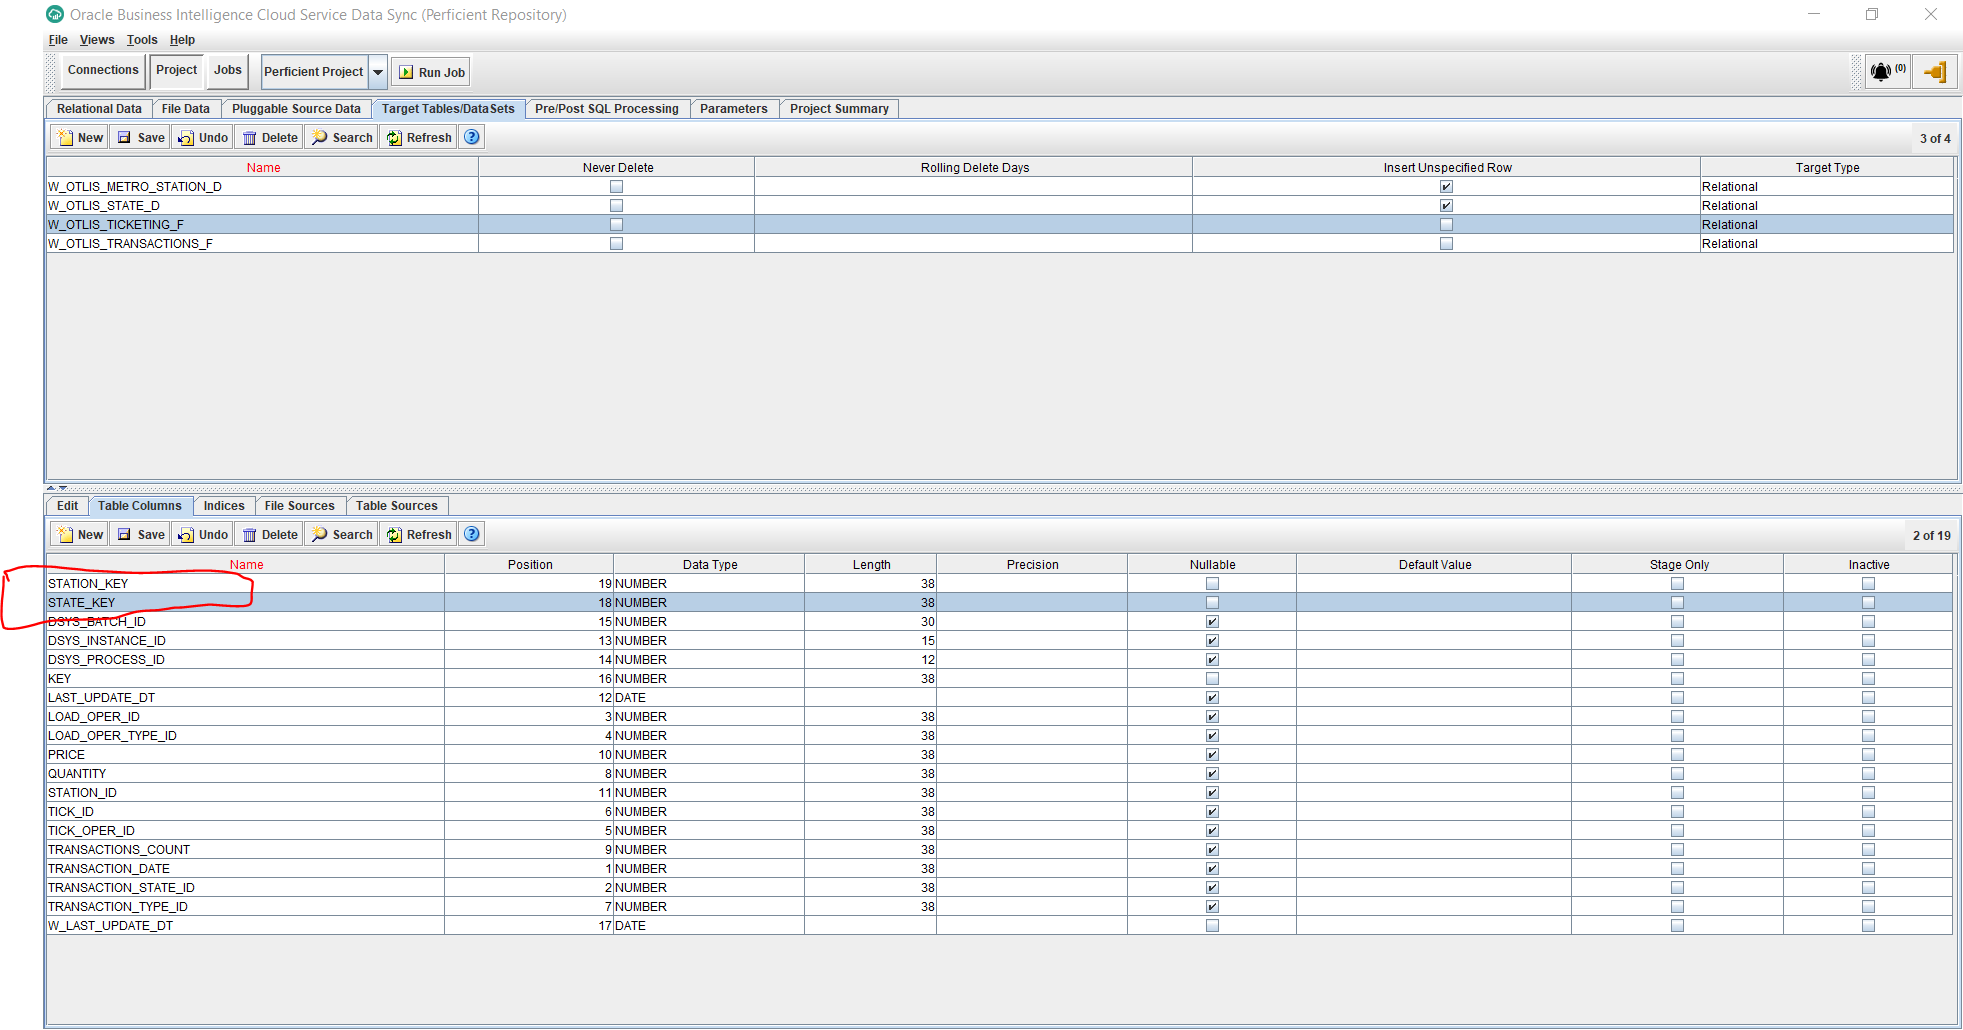
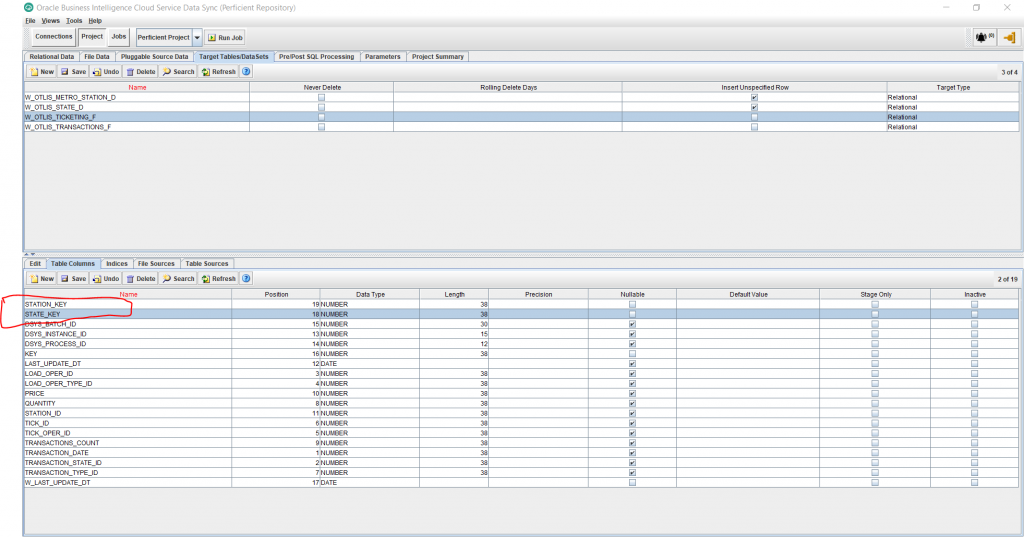
- Under Projects, and Target Tables tab, select the newly created fact table and then select the Table Columns tab from the bottom half of the screen. We will now add 2 standard columns to the fact table. Click on the New button from the bottom half of the screen and add the following 2 columns:
KEY – Data Type: NUMBER – Length: 38 – Uncheck Nullable
W_LAST_UPDATE_DT – Data Type: Date – Uncheck Nullable
Save the changes.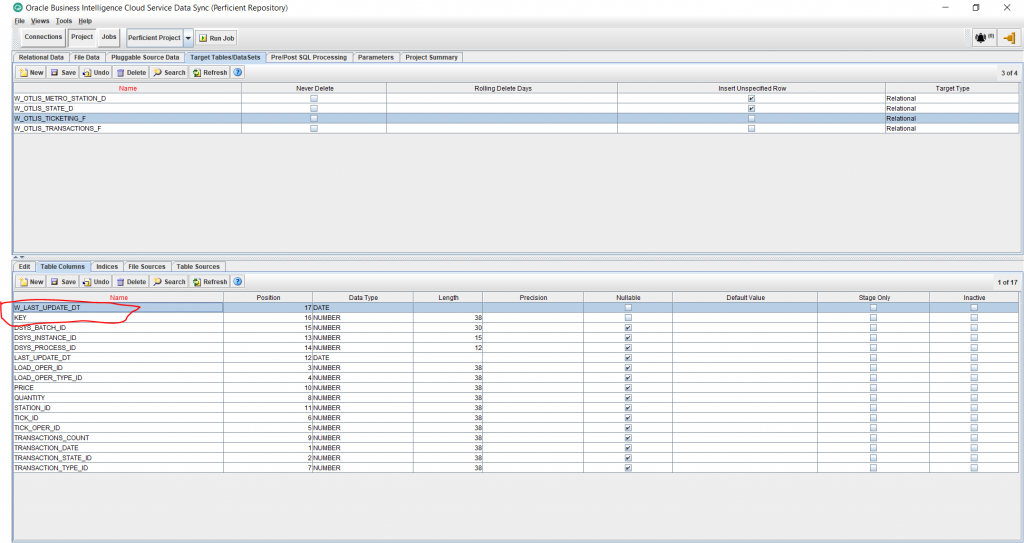
- In a similar way, add 2 more columns to serve as foreign keys to the 2 dimensions we want to support with the new fact. I am adding here 2 columns, one for each dimension:
STATE_KEY – Data Type: Number – Length: 38 – Uncheck Nullable
STATION_KEY – Data Type: Number – Length: 38 – Uncheck Nullable
Save changes..
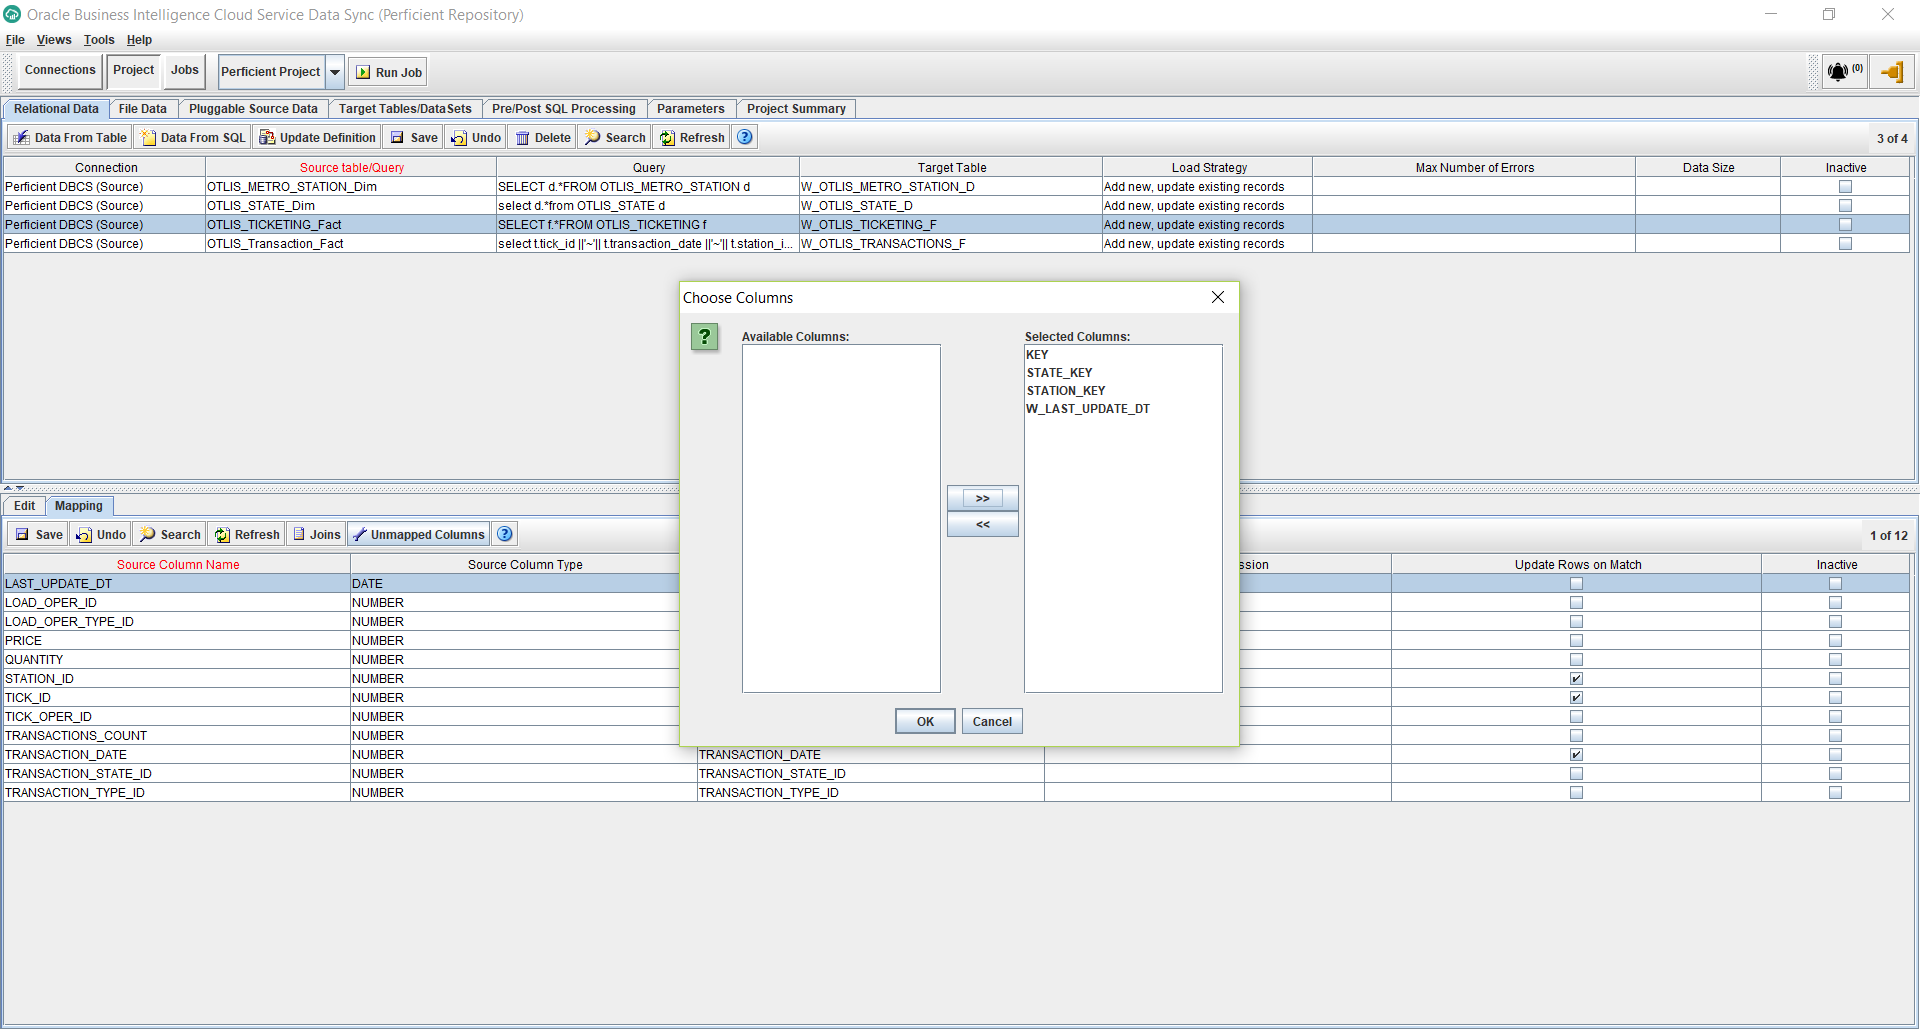
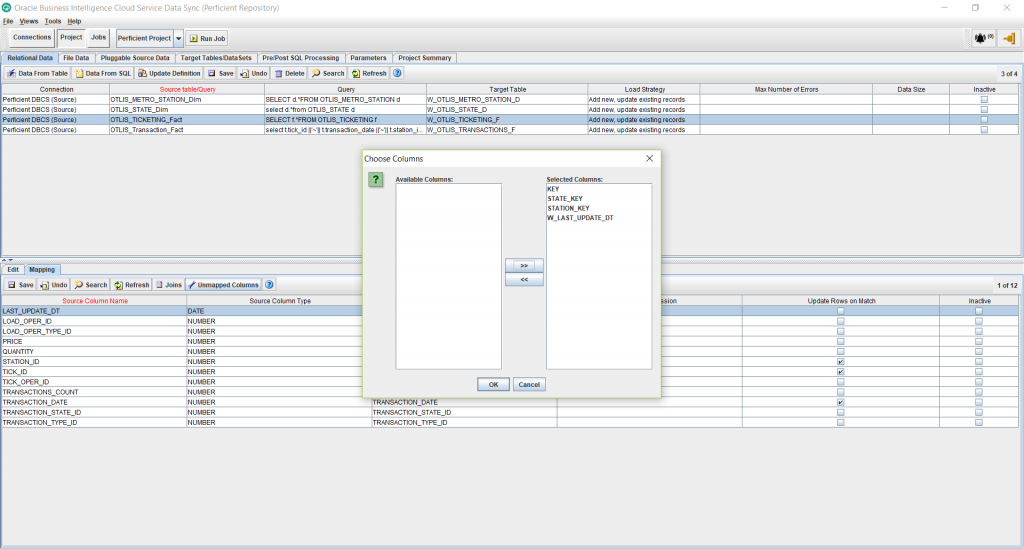
- Click on the Relational Data tab under Projects. Select the newly created task for the fact. In the bottom half of the screen, click on the “Unmapped Columns” button. This shows me a window with the 4 columns I just created. I move them over to the right side under Selected Column and click OK.
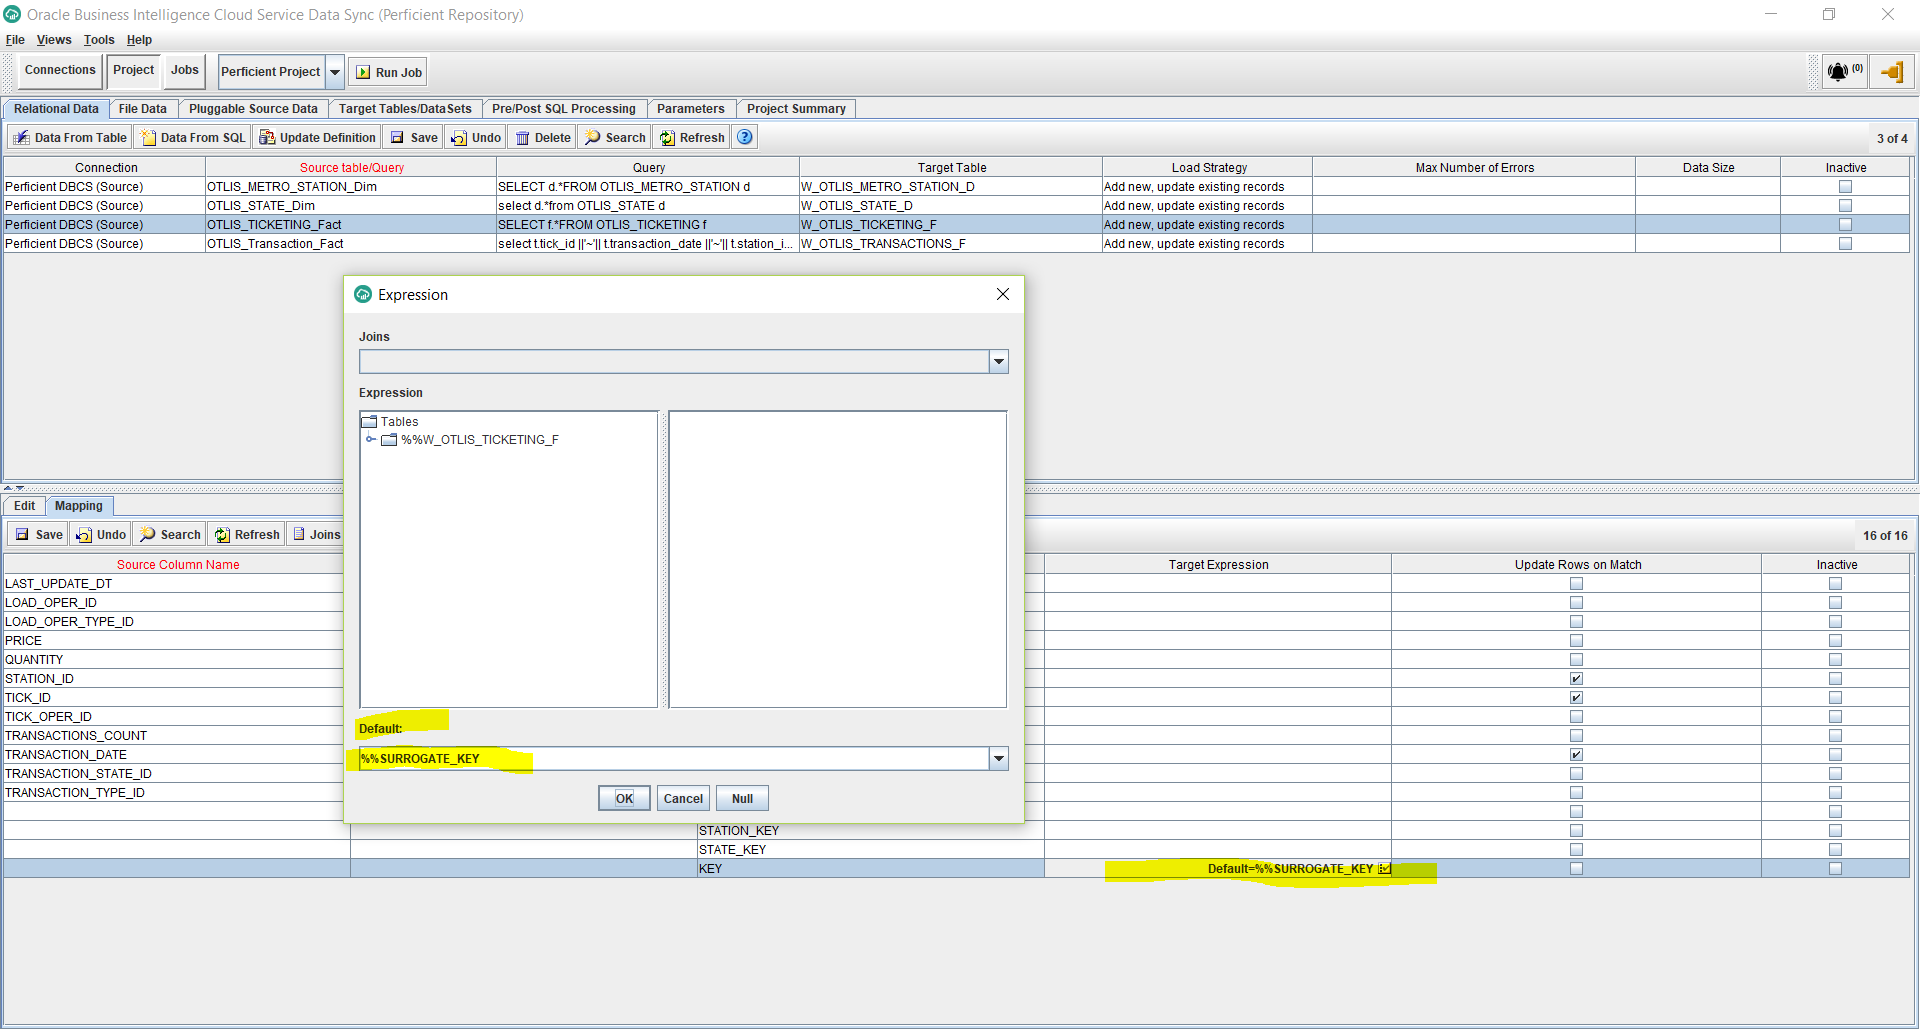
- Edit the Target Expression for the KEY column, and enter the Default as: %%SURROGATE_KEY. This will generate a primary numeric unique key for the new fact table. Click OK.

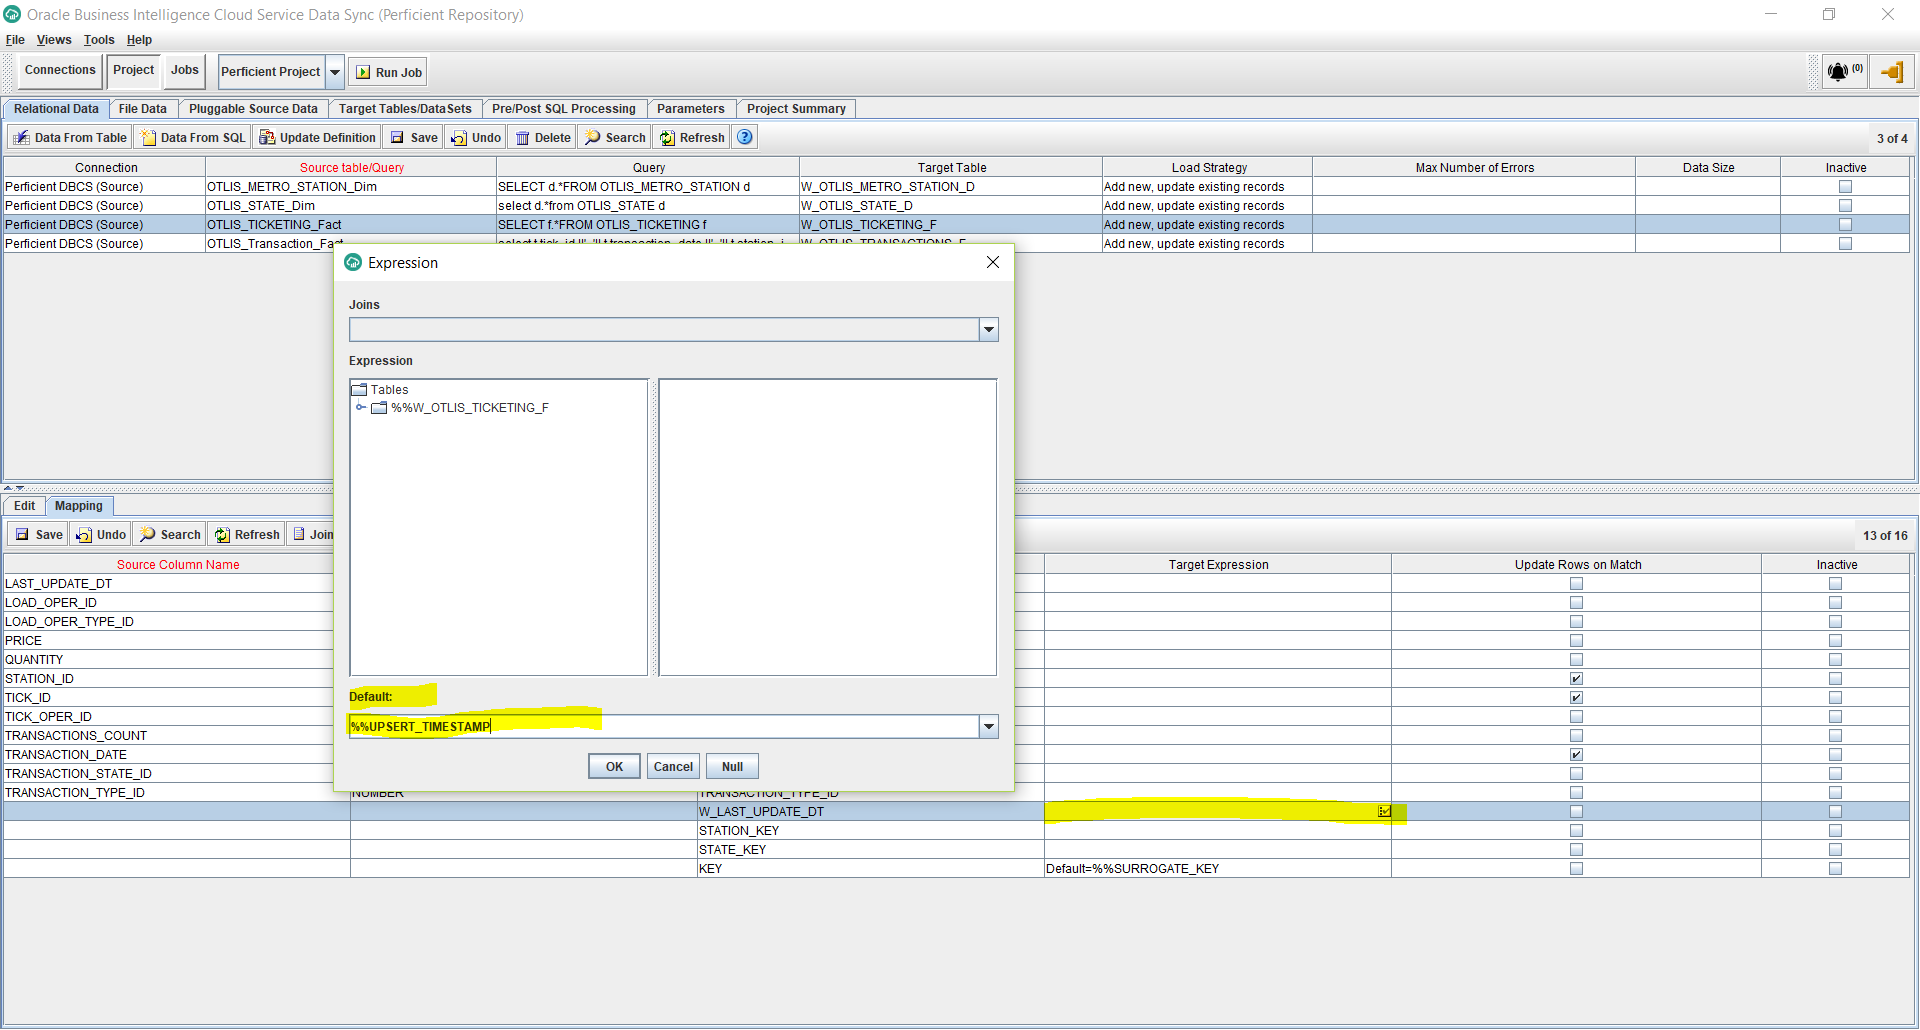
- Edit the Target Expression for the W_LAST_UPDATE_DT column, and enter the Default as: %%UPSERT_TIMESTAMP. This will automatically populate the date and time that the rows will be populated at in the target fact table. Click OK.

- Click Save.
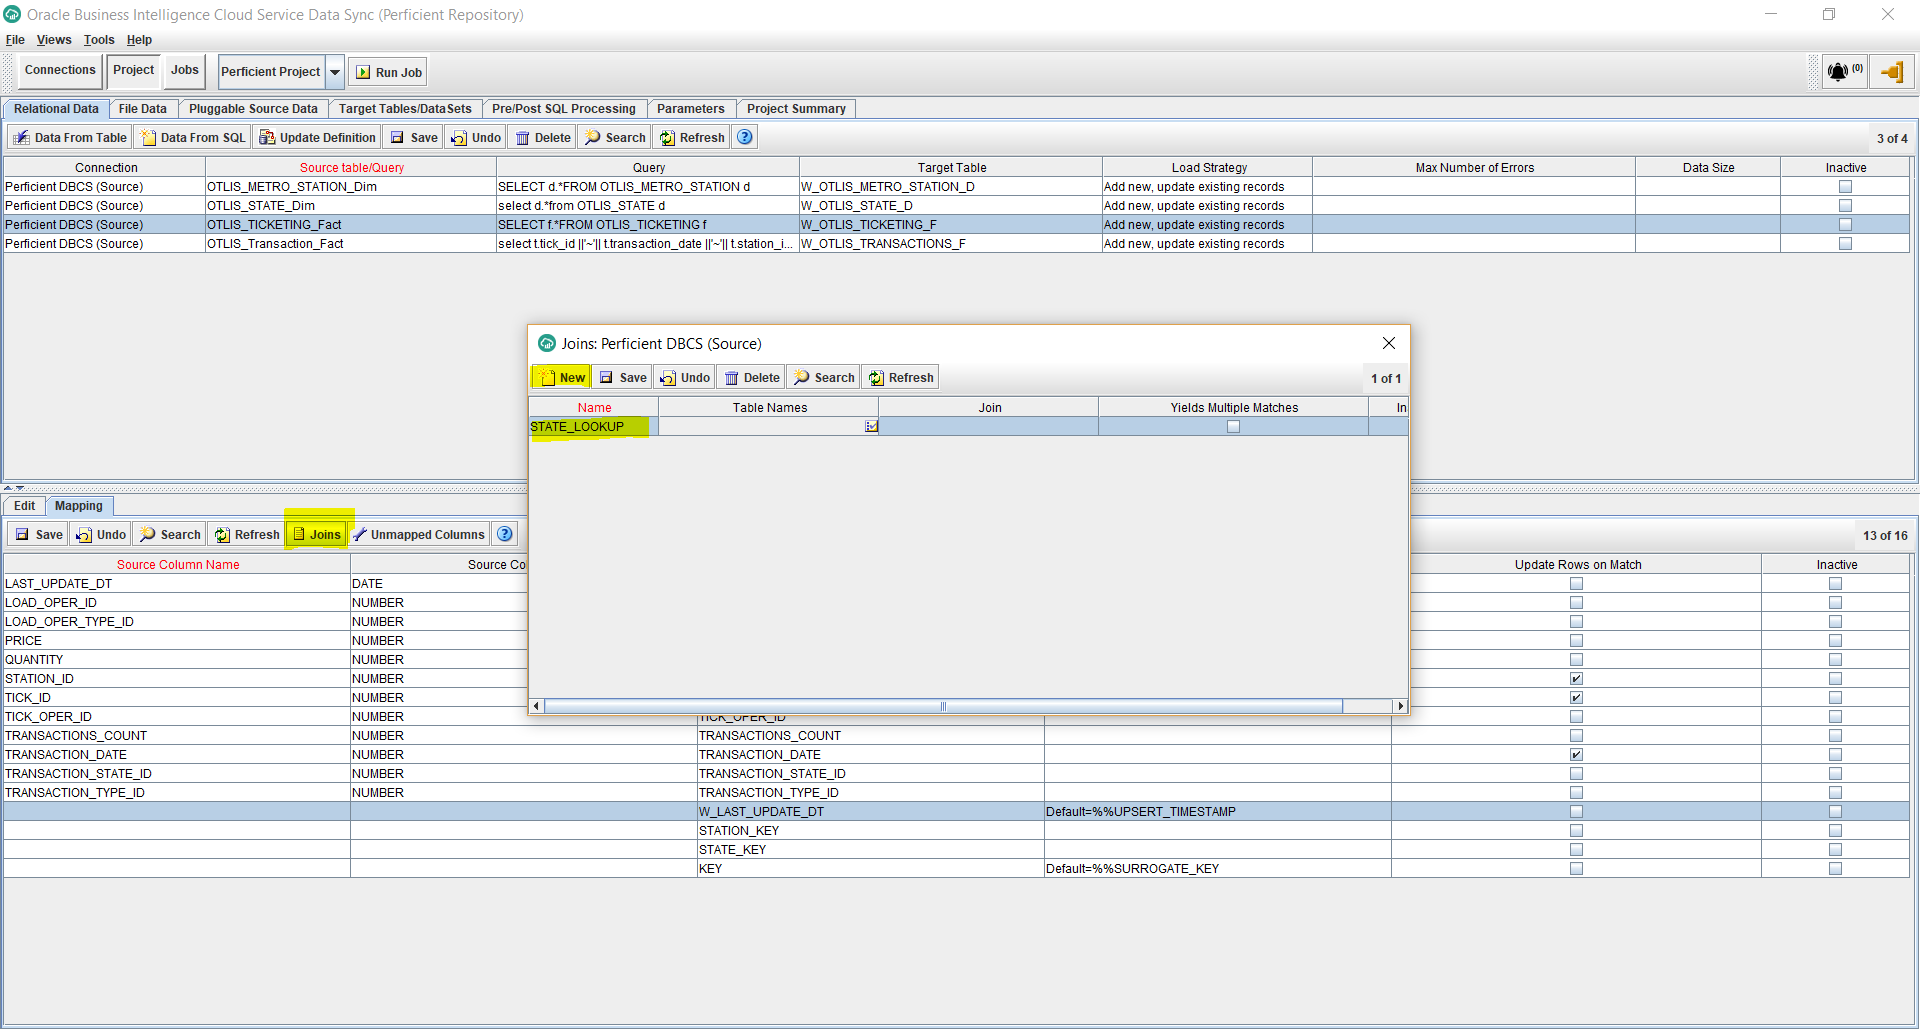
- Click on the Joins button, from the bottom half of the screen. This will allow us to define lookups from the fact to the dimensions to populate the corresponding foreign keys in the fact.
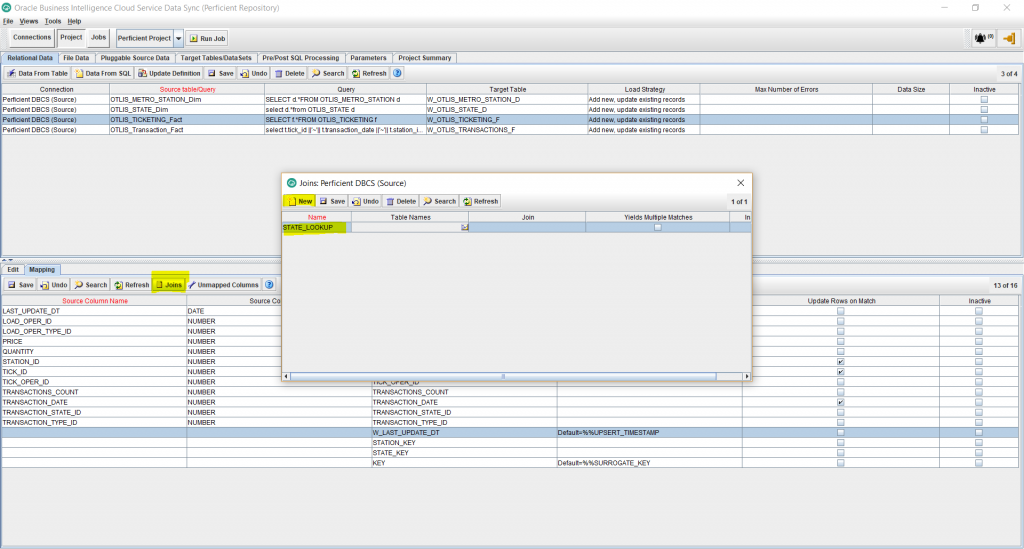
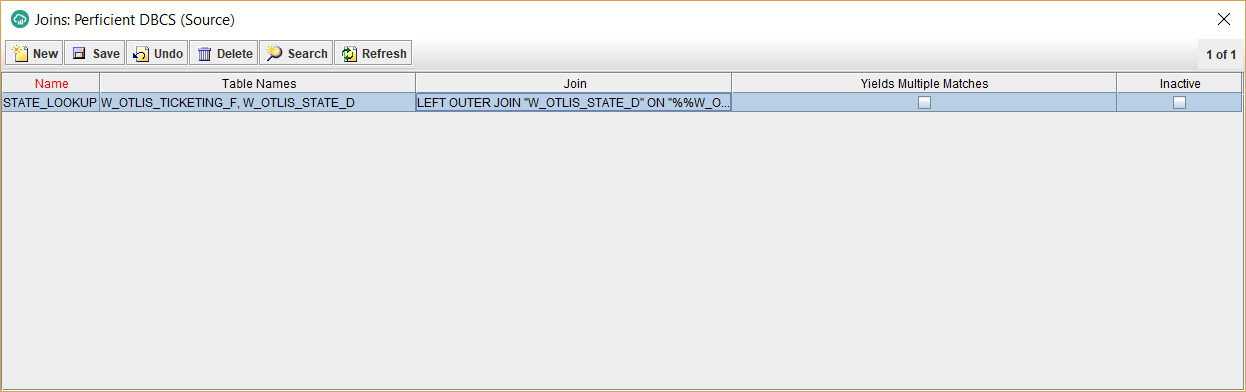
- Click on Table Names next to the lookup name you entered and select the tables that are involved in the lookup, separate by commas. In my example, I am doing a lookup from the W_OTLIS_TICKETING_F fact to the W_OTLIS_STATE_D dimension. So I enter: W_OTLIS_TICKETING_F, W_OTLIS_STATE_D
- For the Join field, enter a lookup expression like the following:
LEFT OUTER JOIN “W_OTLIS_STATE_D” ON “%%W_OTLIS_TICKETING_F”.”TRANSACTION_STATE_ID” = “W_OTLIS_STATE_D”.”TRANSACTION_STATE_ID”
Note that %% before the fact table name indicates that this is a join between the temporary fact staging table and the dimension table. The target fact table hasn’t been loaded yet, hence the lookup join happens with the staging table. The staging table “%%W_OTLIS_TICKETING_F” gets dropped automatically by Data Sync, once a job is complete. Leave the Yields Multiple Matches checkbox unchecked. This is assuming that the column used to lookup on the dimension (in my case above TRANSACTION_STATE_ID) is unique in the dimension and hence the lookup is not expected to yield multiple matches. This should be the majority of the cases with look-ups. If you are looking up on a non-unique dimension column, for a valid reason, then check this box. In that situation, you will have to use an aggregation rule once you map a new column to use the join so it selects one of the several matched values (for example the maximum value).
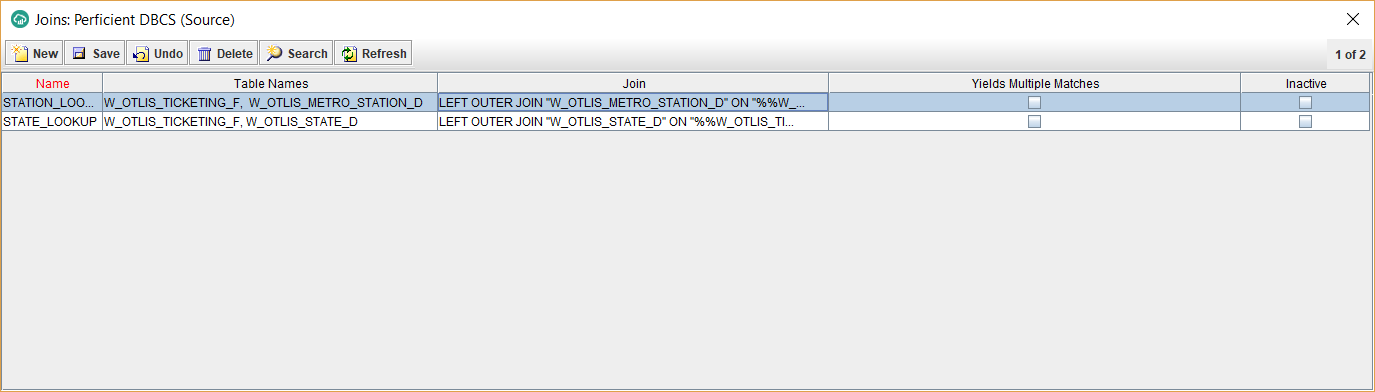
- Similarly, I enter another Join for the lookup on the second dimension.
LEFT OUTER JOIN “W_OTLIS_METRO_STATION_D” ON “%%W_OTLIS_TICKETING_F”.”STATION_ID” = “W_OTLIS_METRO_STATION_D”.”STATION_ID”

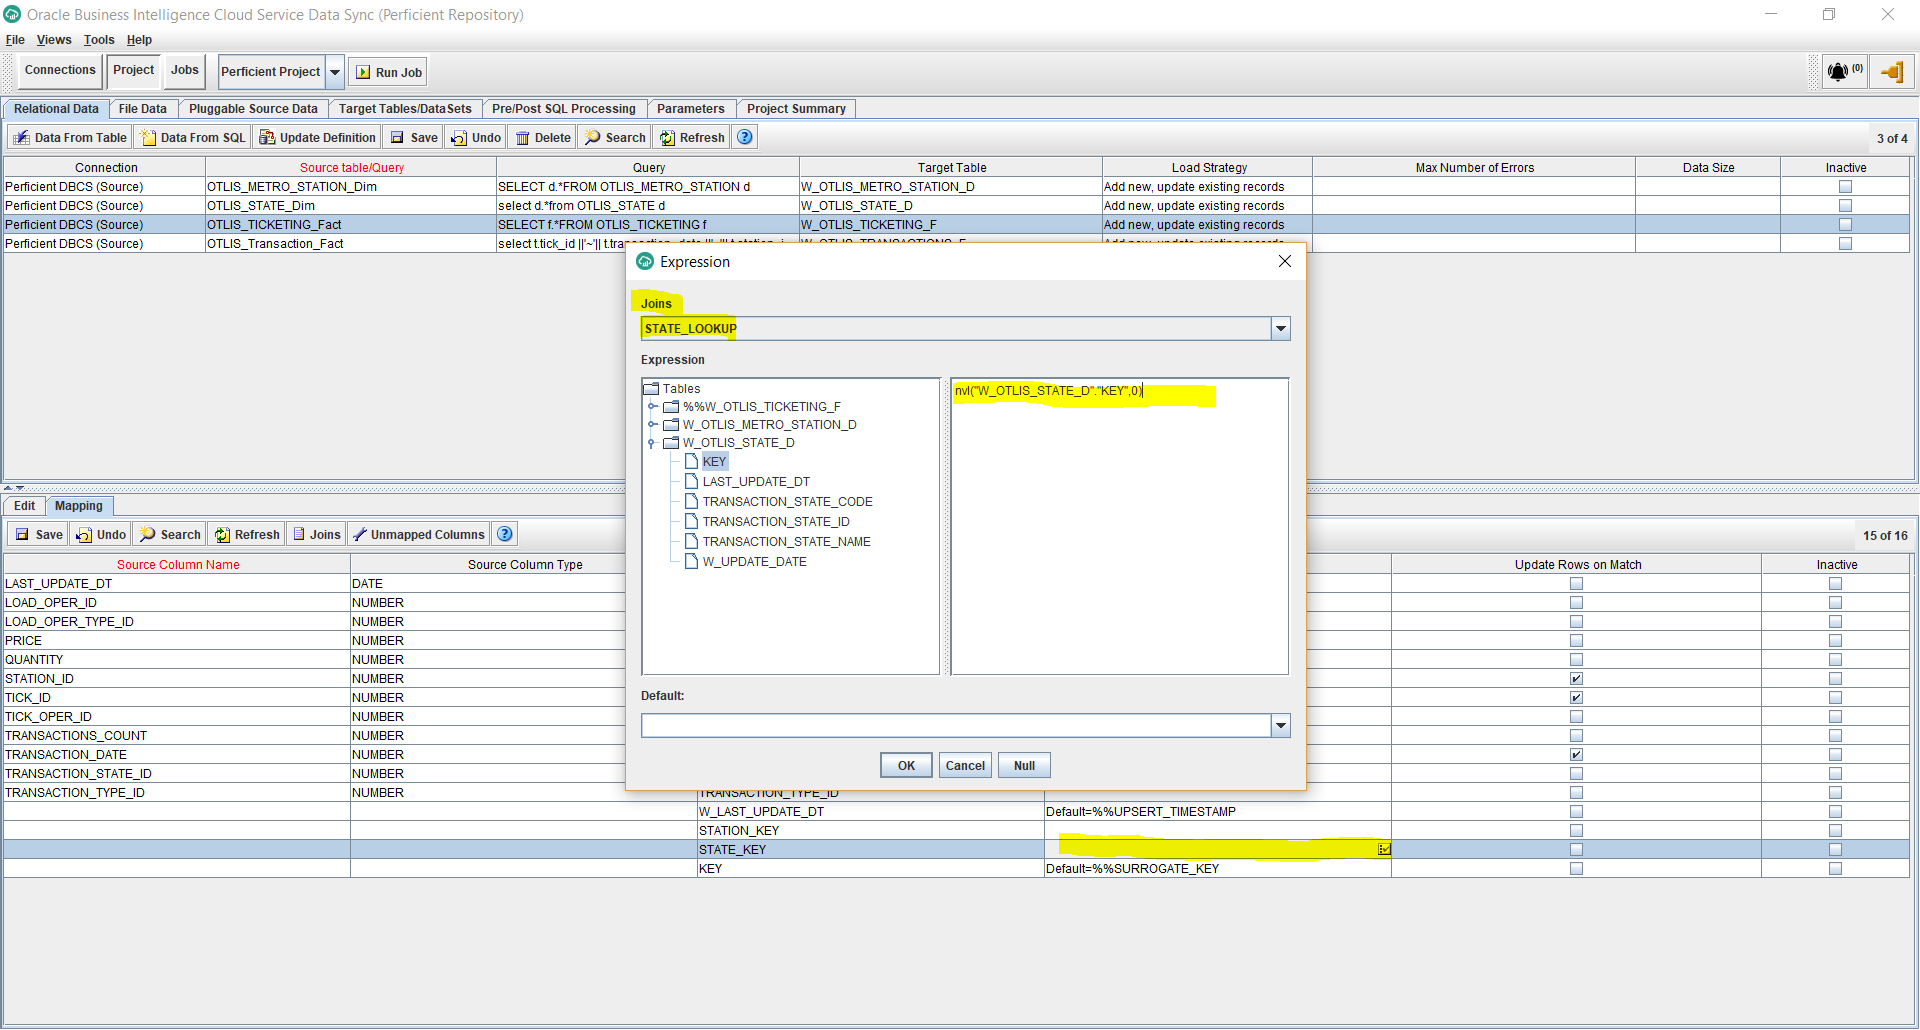
- Now I want to map the STATE_KEY foreign key to use the lookup I created for the State dimension join. To do that, Edit the Target Expression for the STATE_KEY column. Select the STATE_LOOKUP from the Joins dropdown. Enter the following expression and click Ok.
nvl(“W_OTLIS_STATE_D”.”KEY”,0)
The nvl function will make sure to populate the dimension’s Unspecified key value of 0, in case the lookup didn’t result in a match. This insures that any fact records that don’t match with the dimension are not lost, but are carried over to the target as Unspecified. These records can then be easily identified on reports and related data issues can be easily pinpointed.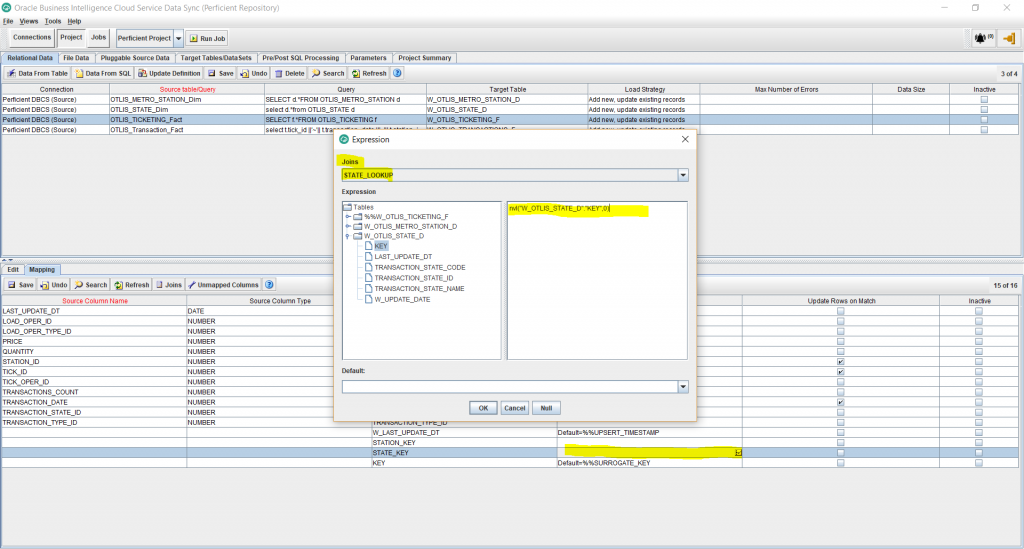
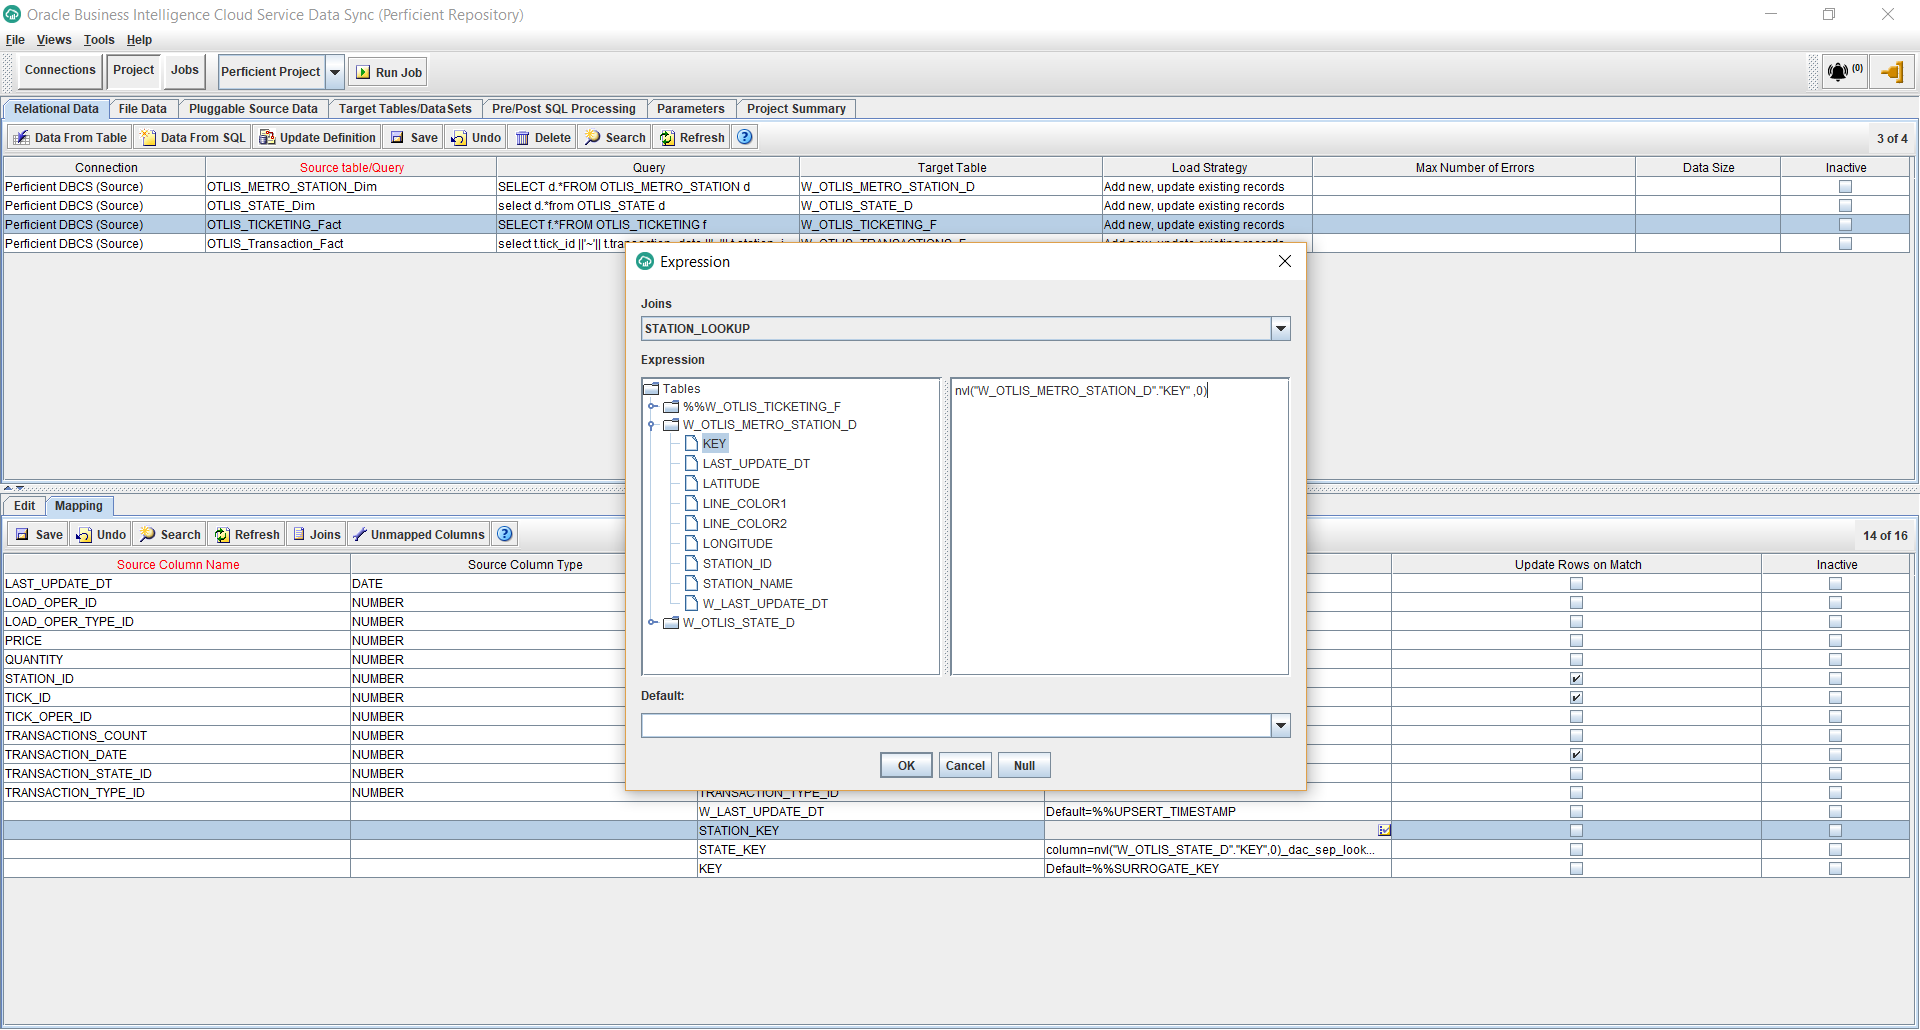
- Similarly, I want the STATION_KEY foreign key to use the lookup I created for the Station dimension join. To do that, Edit the Target Expression for the STATION_KEY column. Select the STATION_LOOKUP from the Joins dropdown. Enter the following expression and click Ok.
nvl(“W_OTLIS_METRO_STATION_D”.”KEY” ,0)

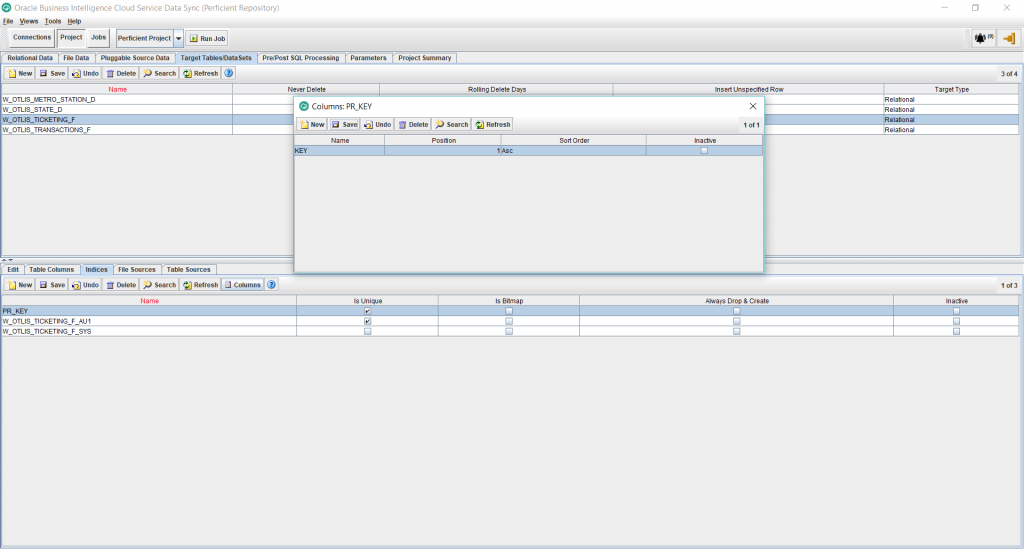
- Under the Projects, Target Tables tab, select the newly added fact table and then select Indices from the bottom half of the screen. We will add a primary key index. So click New and add a Unique Index by checking the Is Unique checkbox. Click Save. Then click on the Columns button to add the name of the column: KEY. This is the same column name added in the previous steps as the surrogate key of the fact. Save the changes.
- This is it for adding the fact task. We are ready now to run the job. This should create the new fact table with the indices and populate the table with the source data, including the lookups to the 2 dimensions. Check to make sure that the record count in the target fact table matches the record count from the source table and that the dimension lookup columns are populated as expected.
- Once the first job run is complete and validated, add some test incremental data in the source table, re-run the job and you should see the new changes updated into the target fact table.