
Many people have used Location-Based Services (LBS) or Real-time Locating Systems (RTLS), both of them can be used in lots of context in our daily life. So in many situations, you may want to integrate a map into your app. Today I’m going to introduce you how to use google map in your app.
Set Up
- If you are using Android Studio and using Gradle as your build tool, simply add these dependencies into your app’s build.gradle:

- Get an API key. There’s a guide to get a key.
- Configure you manifest
- Add API key:

- Specify the Google Play services version number:

- Specify permissions:
![]()
Adding Map
Follow these 3 steps to add a map in your activity:
- Add a fragment into your activity like this:

- Implement the OnMapReadyCallback interface, and then call getMapAsync() on the fragment to register the callback.
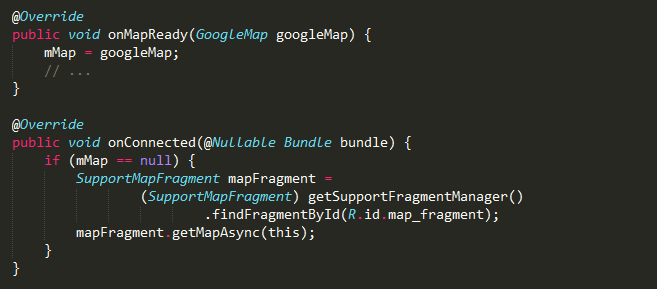
- You may also want to implement ConnectionCallbacks interface and OnConnectionFailedListener interface, so you can notify the user when the connection suspended or failed.
Interacting With Map
The Google Map API provided us several build-in UI component to allow users to interact with the map, you can decide how many UI components you want to enable according to your requirement.
- My location button. When you enabled my location layer, users can see a button on the top right of the map, and by clicking it to orient to the current location. This is not enabled by default.
- Zoom controls. Enable zoom control allows user to zoom in or zoom out through buttons.
- After enabling the compass, the user will see a dynamic compass when interacting with the map.
- Level picker. A level picker allows user to choose different level when the user is viewing a indoor map.
- Zoom gestures. Allow users to zoom in and zoom out with two fingers.
- Scroll (pan) gestures. Allow users to scroll around the map.
- Tilt gestures. Allow users to tilt up or down with two fingers.
- Rotate gestures. Allow users to rotate the map with two fingers.
- Map toolbar. A toolbar appears at the bottom right of the map when a user taps a marker.
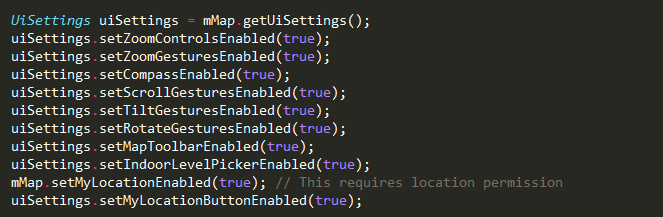
You can also use UiSettings.setAllGesturesEnabled(true) to enable all map gestures.
Working with Markers
Markers can identify locations on the map, you can use this snippet code to add a marker in your map:
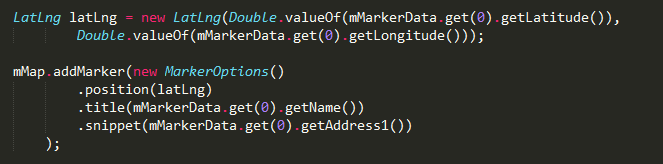
A MarkerOption stands for a configurable marker, you can set the position, title, a snippet under the title and many other properties. Remember if you don’t custom the icon and color, the system will use the default icon like below:

The title and snippet together are displayed by a Window called InfoWindow, we can set a click listener on that too:

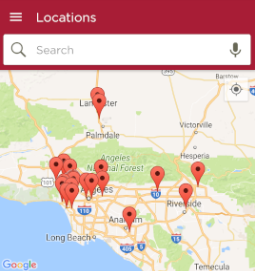
Display markers in group
In some situation you might want to show a group of markers together. We can set bound for the map when we are updating the camera so that all the markers are included in the current view.

The result will be like this:
By far you have managed how to add a simple map into your app, add markers, and handle user interactions, congratulations. But there are many other features you may want to have a try, such as adding polylines and polygons, ground overlays and tilt overlays. You can read the document to get the detail.
I’d welcome your feedback.