
For Cedars-Sinai android app, to meet the clients’ needs, our goal is to develop a user-friendly and robust app. And on the way to accomplish that goal, we need to make sure that during our development, every line of the code we write is not only testable, but also easy to test. To do that, we took some reliable solutions, which might be the reason that makes the whole thing looks a little boring. But there do have some interesting things in our project, one of them is Dagger 2.
What’s Dagger 2?
For those who have used Dagger, might know that it’s a Dependency Injection library for both Android and Java. It’s developed and open-sourced by Square, Inc., but soon Google found this cool and decided to create fork based on that, so they developed Dagger 2.
Usually we do dependency injection with constructor or Factory design pattern, but Dagger 2 is a replacement for them, it allows us to focus on the interesting classes, instead of spending time writing those boilerplate code.
One more thing you need to know about Dagger 2 is that it’s based on JSR-330 standard, which defines a set of annotations for use on injectable classes in order to maximize reusability, testability and maintainability of Java code.
Why Dagger 2?
Although dagger 2 is inspired by dagger but there are many differences between them. First, Dagger 2 no longer uses reflection, which makes it more traceable and easy to debug. This is important, because it will save you a lot of time finding the root of an extremely strange bug if it’s easy to debug. Google also claims that the performance of Dagger 2 is 13% higher than Dagger.
Dagger 2 is also the first to implement the full stack with generated code. Let’s take a look at the code generated by Dagger 2 (usually you can find it at {your module}\build\generated\source\apt):
You can see it’s much like the hand-written code, and that’s the most attractive point among the reasons that made Dagger 2 so popular. Easy to read, simple and traceable.
How to use it?
First, there are 4 main parts in Dagger 2:
- @Inject
- @Provides
- @Module
- @Component
Let’s take a further look at them one by one.

First, we use @Inject to label the dependencies in the target class like below:
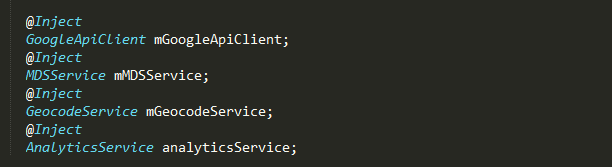
In this way, we tell dagger that this annotated field or class needs to be injected, and dagger will construct instances for this annotated class and its related dependencies.
@Provides, as its name indicates, it’s used to provide the dependencies that will be needed during the injection.

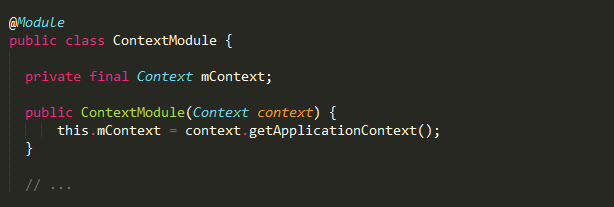
What about @Module. A module is more like a container that we use to hold a set of dependencies that might be used in other parts, we use it to annotate a class to tell dagger where to find the dependencies.
Finally comes to @Component, basically it’s a bridge between @Module class and the field or class that need to be injected, which is annotated by @Inject. Its main purpose is to bind everything together. Let’s see an example:
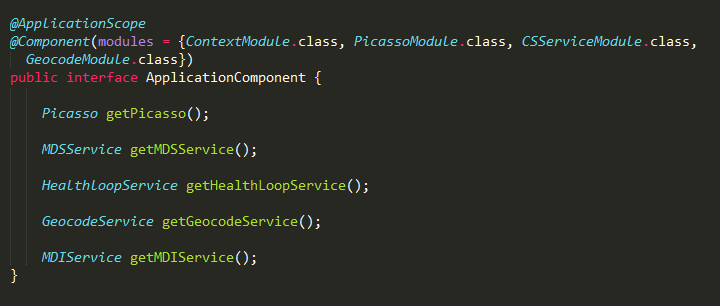
As you can see, we should list all the modules that this component needs, if not we will get errors at compile time. And that’s it, after rebuild the project, Dagger 2 will generate the code for us to inject the dependencies, we only need to do a little more work, and then all the dependencies are injected.

What’s the benefit?
Dagger 2 is designed to decouple the object instantiation, and all the dependencies are configured outside the target class through modules, so it’s easy to change our code if the dependencies changes, for example if you changed the implementation for some classes, then you only need to modify the modules without checking all the target classes where this change affects.
Besides we can reuse all the component. Take Application Component as an example, you can make other component depends on this component, then you can get all the dependencies in Application Component without any further work. And since dependencies are injected into a component, it’s also much more convenient for us to inject mock implementations for those dependencies, which makes our test easier.
Wrapping up
So far we have come through the basic usage of Dagger 2, and I’m sure you have realized how Dagger 2 will change the way we develop our project, and you’ll feel much more powered if you combine dagger with MVP and RxJava. Although the fundamental of Dagger 2 is pretty much as I introduced above, I do recommend you to check the documentation, there’s still a long way ahead of us, like @Qualifier, @Scope and how to manage the component. And I really recommend you to have a look at this sample.
I’d welcome your feedback.
References: