
Concepts
What is GitLab
GitLab is a source control platform based on GIT (a free and open source distributed version control system), which can assist developers to manage their codes in a convenient and efficient way. Normally, through the platform, developers can clearly explore the modification of different version of their codes.
What is GitLab CI
In the latest version of GitLab, a new function as continuous integration server was added. Like most of the CI server, GitLab CI also provided a serious of integration functions such as merging the code, install the dependencies, building, testing and distribution. And developers will no need to install and distribute third-party integration platforms.
Main Procedures
Requirement
Required System Configuration:
- Mac OS X 10.11.3 “El Capitan”
- Xcode version ≥ 7.2
- Xcode iOS Simulator version ≥ 9.2
- Xcode Command Line Tools
- Gitlab.com, version ≥ 8.5
Example System Configuration:
- Mac OS X 10.12.3 “Sierra”
- Xcode Version 8.2.1 (8C1002)
- Xcode iOS Simulator version 10.3
- Xcode Command Line Tool
- Gitlab Community Edition 8.16.4 f32ee82 (update asap)
Create an iOS project with Xcode (use Objective-C as example)
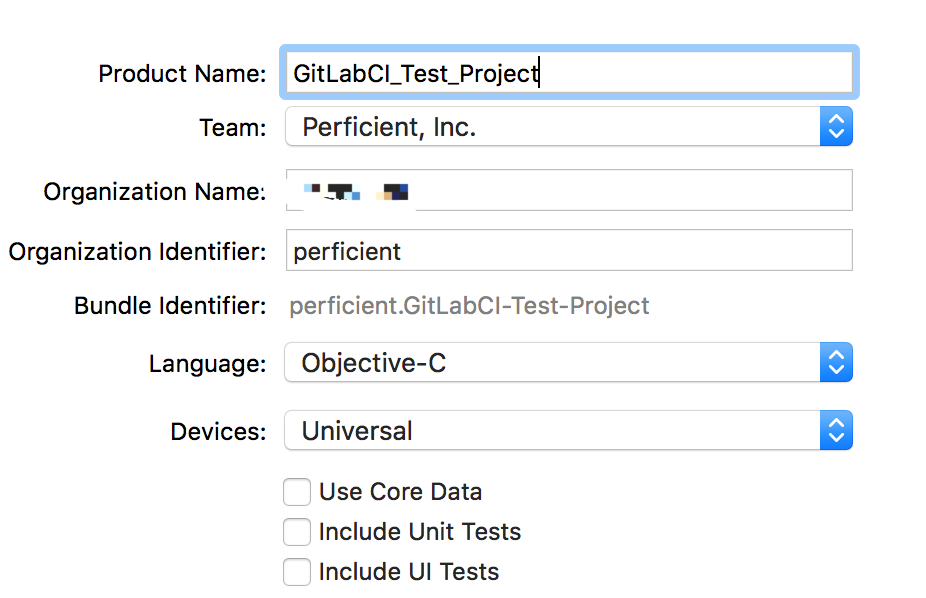
First of all, an iOS project must be created via Xcode (as the pictures shown below).

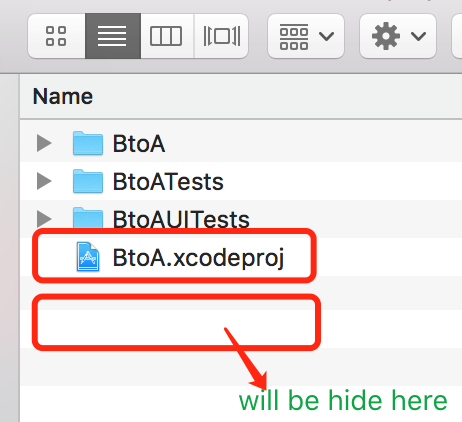
Add a “.gitlab-ci.yml” file to the root directory of one repository(project).
- File name and extension CANNOT be changed.
- The file will be hidden in Linux & Unix based OS.
- Scripts in the file will be executed after the file has been PUSH to Gitlab with repository.
- The file should be put in the same directory as *. Xcodeproj or *.workspace. Need to be mentioned, once we use some third-party tools (list Cocoapods) to manage third-party tools, a new “.workspace” file will be created.
- Create project with tests (if you would like to add test function for Gitlab multi-runner)

Configuring multiple project-specific Runner(s)
For projects that developed by different programming languages, GitLab CI will not able to directly recognize or execute these codes. So, we need to download and install runners to the operation. Each runner will adapt a kind of programming language, in this example, I choose to download one adapt with Objective-C for iOS projects (also, GitLab CI provided a Swift version).
Each runner can have multi configurations to adapt different requirements of different projects. For example, maybe an iOS project need to support iOS 8 as the lowest supported version, but another one may only need to support the latest version, in this case, we would better make two different configurations for these two projects (although they use the same runner to execute codes). Also, if two projects have the same requirement of CI runner, they can share with the same one. Once a runner is marked as a common/public runner, users will be free to add or remove it in projects.

Requirement(s):
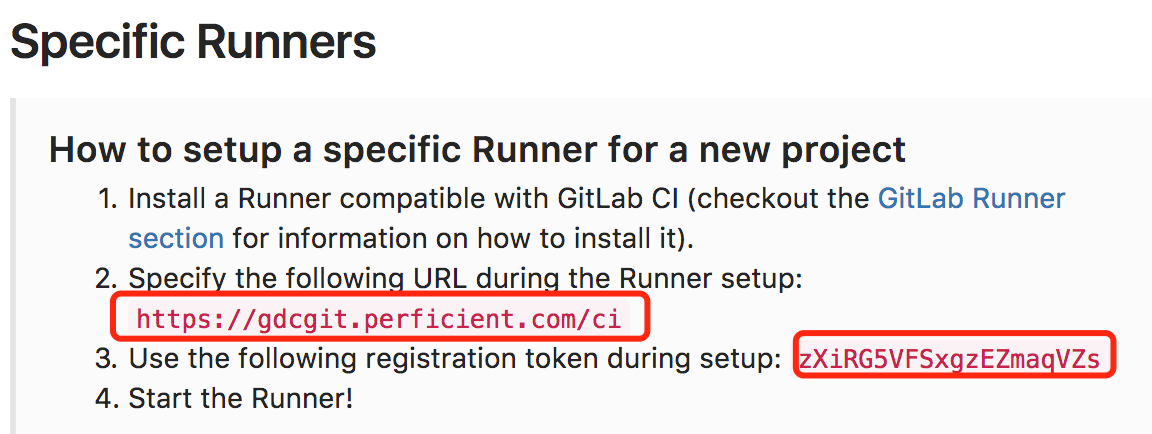
1. Server address & token pair
We need to get a pair of service URL and token to let GitLab CI recognize which project it will bind with, in the next step. The Server address & token will be provided in: “GitLab project webpage -> settings -> CI/CD pipelines”
2.Install GitLab Runner [Mac OS X – iOS]:
We can use the “Terminal” application to do the operations in Max OS X.
- Download the binary for your system (here provided Objective-C and Swift version)

- Register the runner

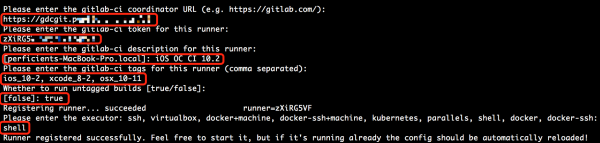
- Install runner as service and start it


Edit the “.yml” file
Normally, three main processes will be added to job queue into the “.yml” file for integration: build, test and deploy.
Build: Once developers upload new versions of code into the GitLab, the GitLab CI will automatically build the project that makes sure the project is buildable.
Test: The test job can run the unit tests and UI tests automatically; the premise is that users add tests scheme in projects and configured it in the “.yml” file.
Deploy: The runner can deploy an executable file as a zipped file in CD/CI Pipeline page. Normally, users can directly download it via web browsers.
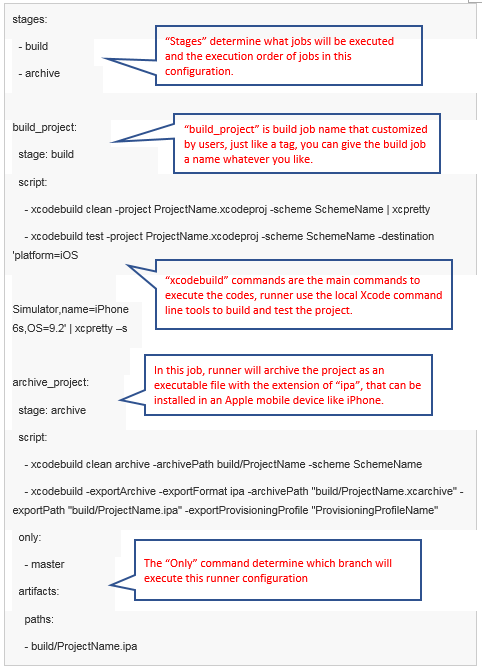
Here is an module configuration of “.yml” file.
Commit and push commits to Gitlab
After we have done all the previous steps, we will able to push our code to GitLab, and GitLab will call it’s CI service to do the integration automatically.
View status on web page
The last step is to view the result of the auto integration, we can see them in the “pipeline” page.
