This approach is officially recommended by Oracle. Data Sync comes with a built-in Oracle BI Content connector, which can be used to extract ERP Cloud data from OTBI. The connector supports three data extraction modes.
- SQL – used to extract data from logical SQL queries
- Report – used to extract data from BI analyses reports
- Subject Area.Table – used for extracting data from Subject Area folders
The ERP Cloud data can be easily extracted from OTBI with the following three simple steps.
1. Create an OTBI Connection
Open the Data Sync UI, click Connections button on the top, and then click on the New icon button to create a new Data Sync connection using Oracle BI Connector.
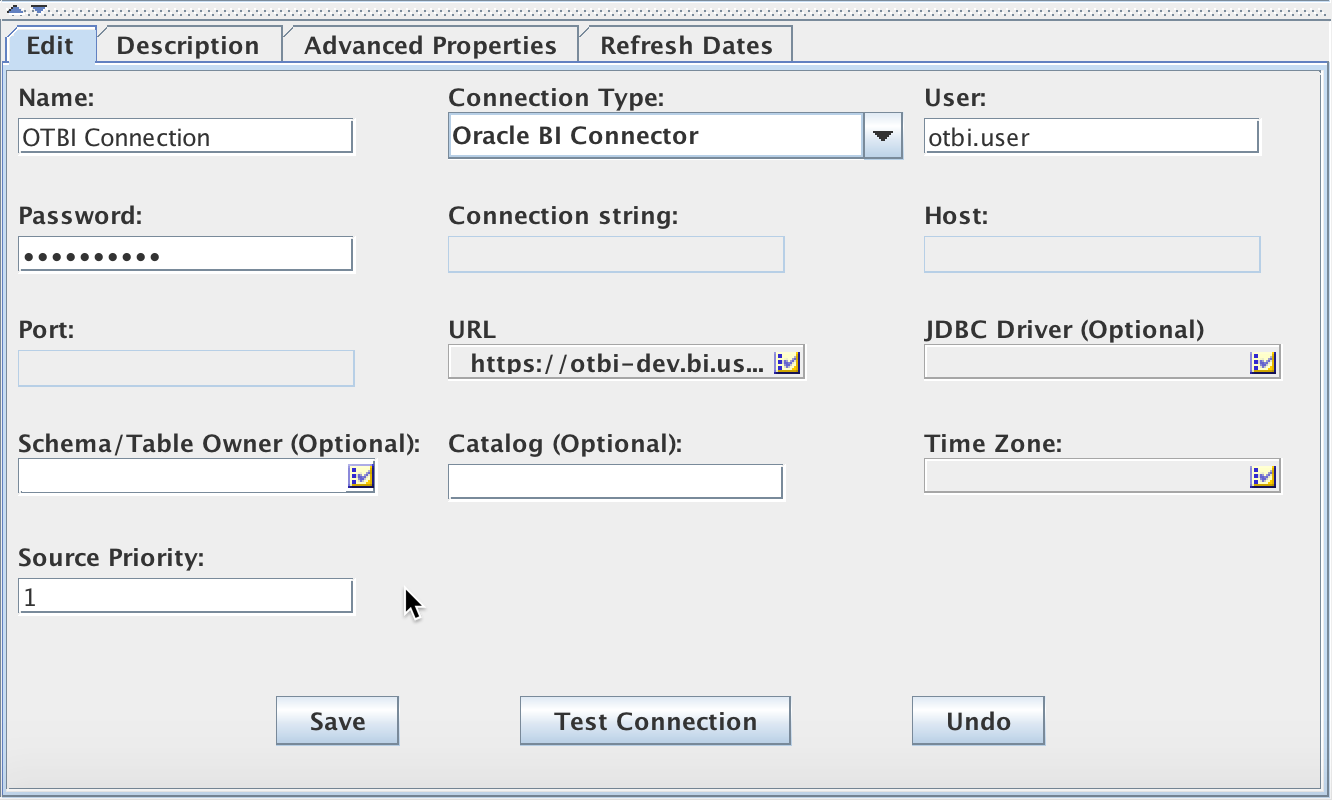
Edit URL field. Enter the web service URL for OTBI analytics
https://<otbi-cloud-url>/analytics-ws
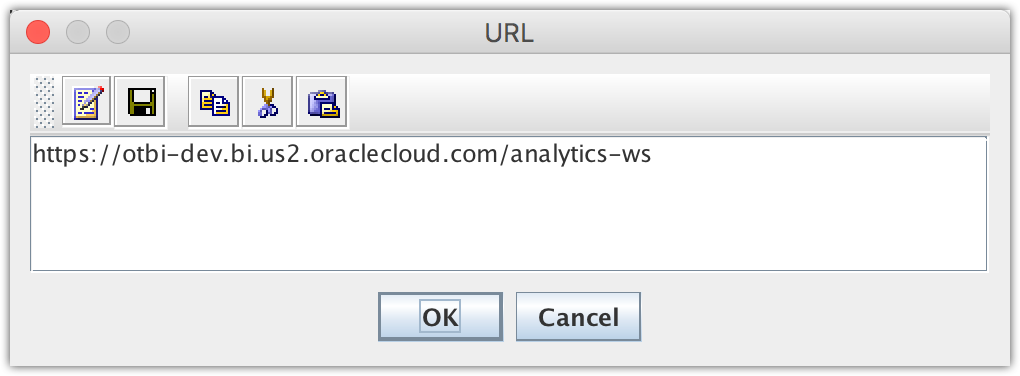
If the web service URL does not work, try enter the normal URL for OTBI analytics
https://<otbi-cloud-url>/analytics
The former (web service URL with suffix -ws) uses less wrappers than later (the normal URL with analytics only), therefore it’s more efficient and should be always used if possible.

Guide to Oracle Cloud: 5 Steps to Ensure a Successful Move to the Cloud
Explore key considerations, integrating the cloud with legacy applications and challenges of current cloud implementations.
2. Create OTBI logical SQLs
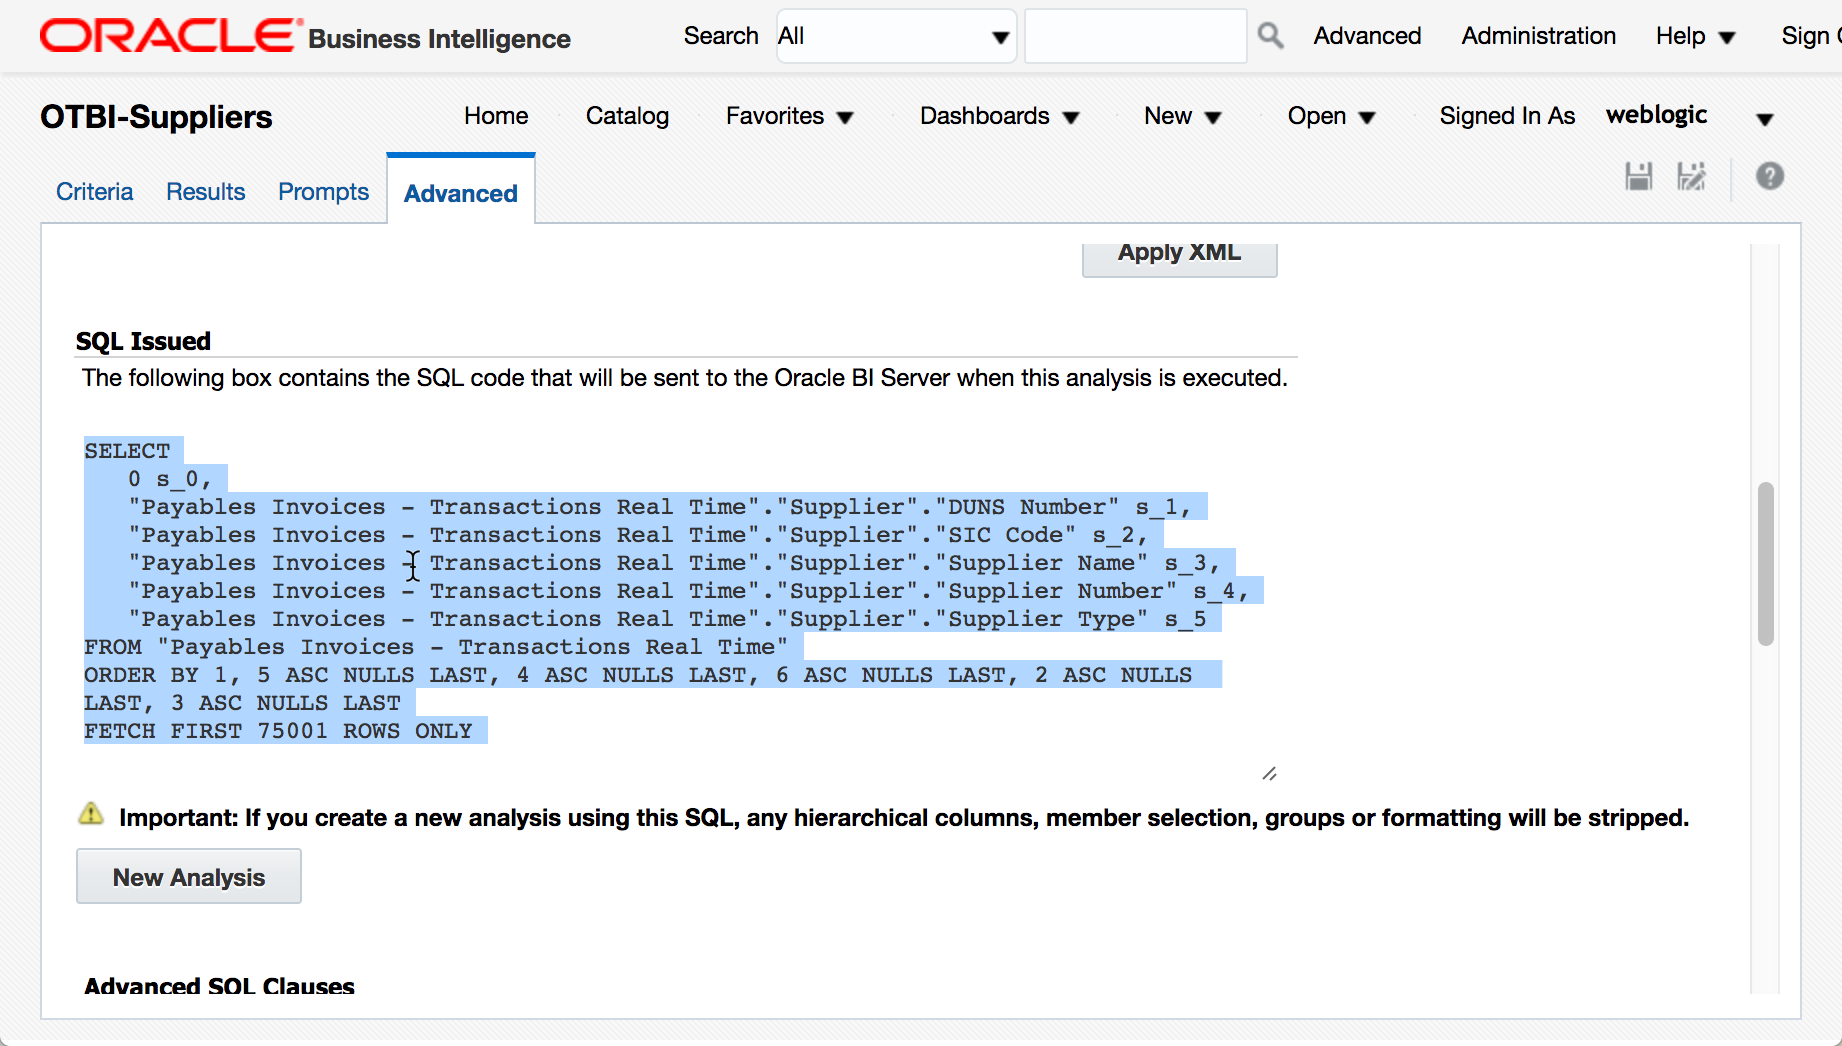
OTBI logical SQLs are created by borrowing the SQL Issued found in the Advanced tab of the analysis report.
Login to the OTBI analytics. Create a new analysis using the Supplier dimension in the Payables Invoices – Transaction Real Time subject area, and save the report to a custom folder, e.g. /shared/Custom/BICS/OTBI-Suppliers where OTBI-Suppliers is the report name.

Select the Advanced tab, select and copy the logical SQL under SQL Issued.
3. Create Data Sync mappings
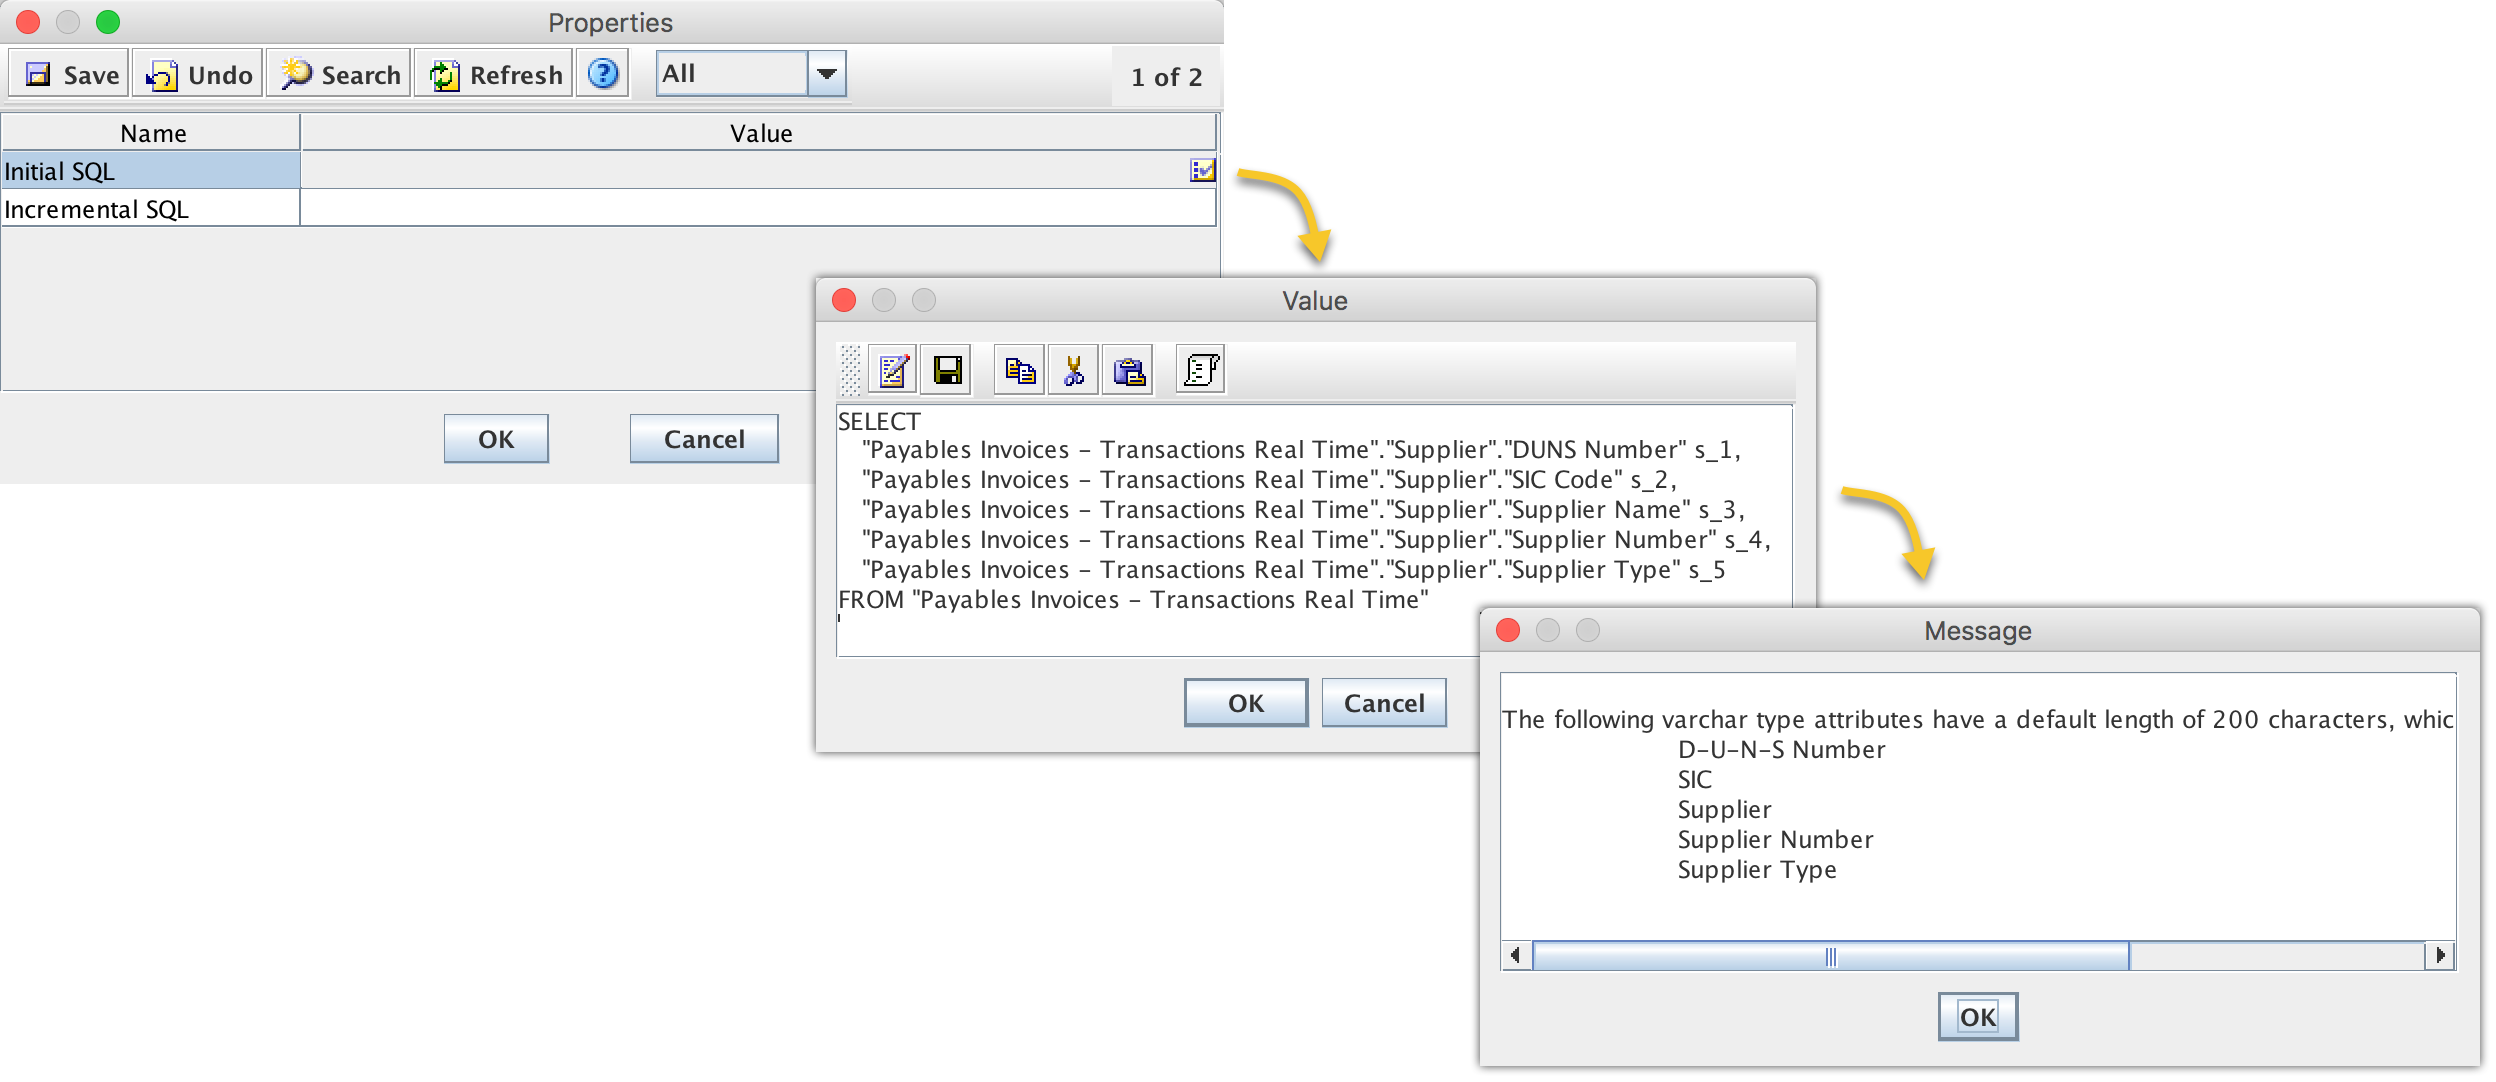
Go back to Data Sync UI. Choose Project, select Pluggable Source Data tab, then click Manual Entry to create a new Data Sync mapping using one of the following three OTBI metadata interfaces: SQL, Report, and Subject Area.Table.

- Select SQL. Paste the logical SQL copied from step 2 above for both Initial SQL and Incremental SQL. Remove these three lines from the query
SELECT0 s_0,"Payables Invoices - Transactions Real Time"."Supplier"."DUNS Number" s_1, "Payables Invoices - Transactions Real Time"."Supplier"."SIC Code" s_2, "Payables Invoices - Transactions Real Time"."Supplier"."Supplier Name" s_3, "Payables Invoices - Transactions Real Time"."Supplier"."Supplier Number" s_4, "Payables Invoices - Transactions Real Time"."Supplier"."Supplier Type" s_5 FROM "Payables Invoices - Transactions Real Time"ORDER BY 1, 5 ASC NULLS LAST, 4 ASC NULLS LAST, 6 ASC NULLS LAST, 2 ASC NULLS LAST, 3 ASC NULLS LASTFETCH FIRST 75001 ROWS ONLY
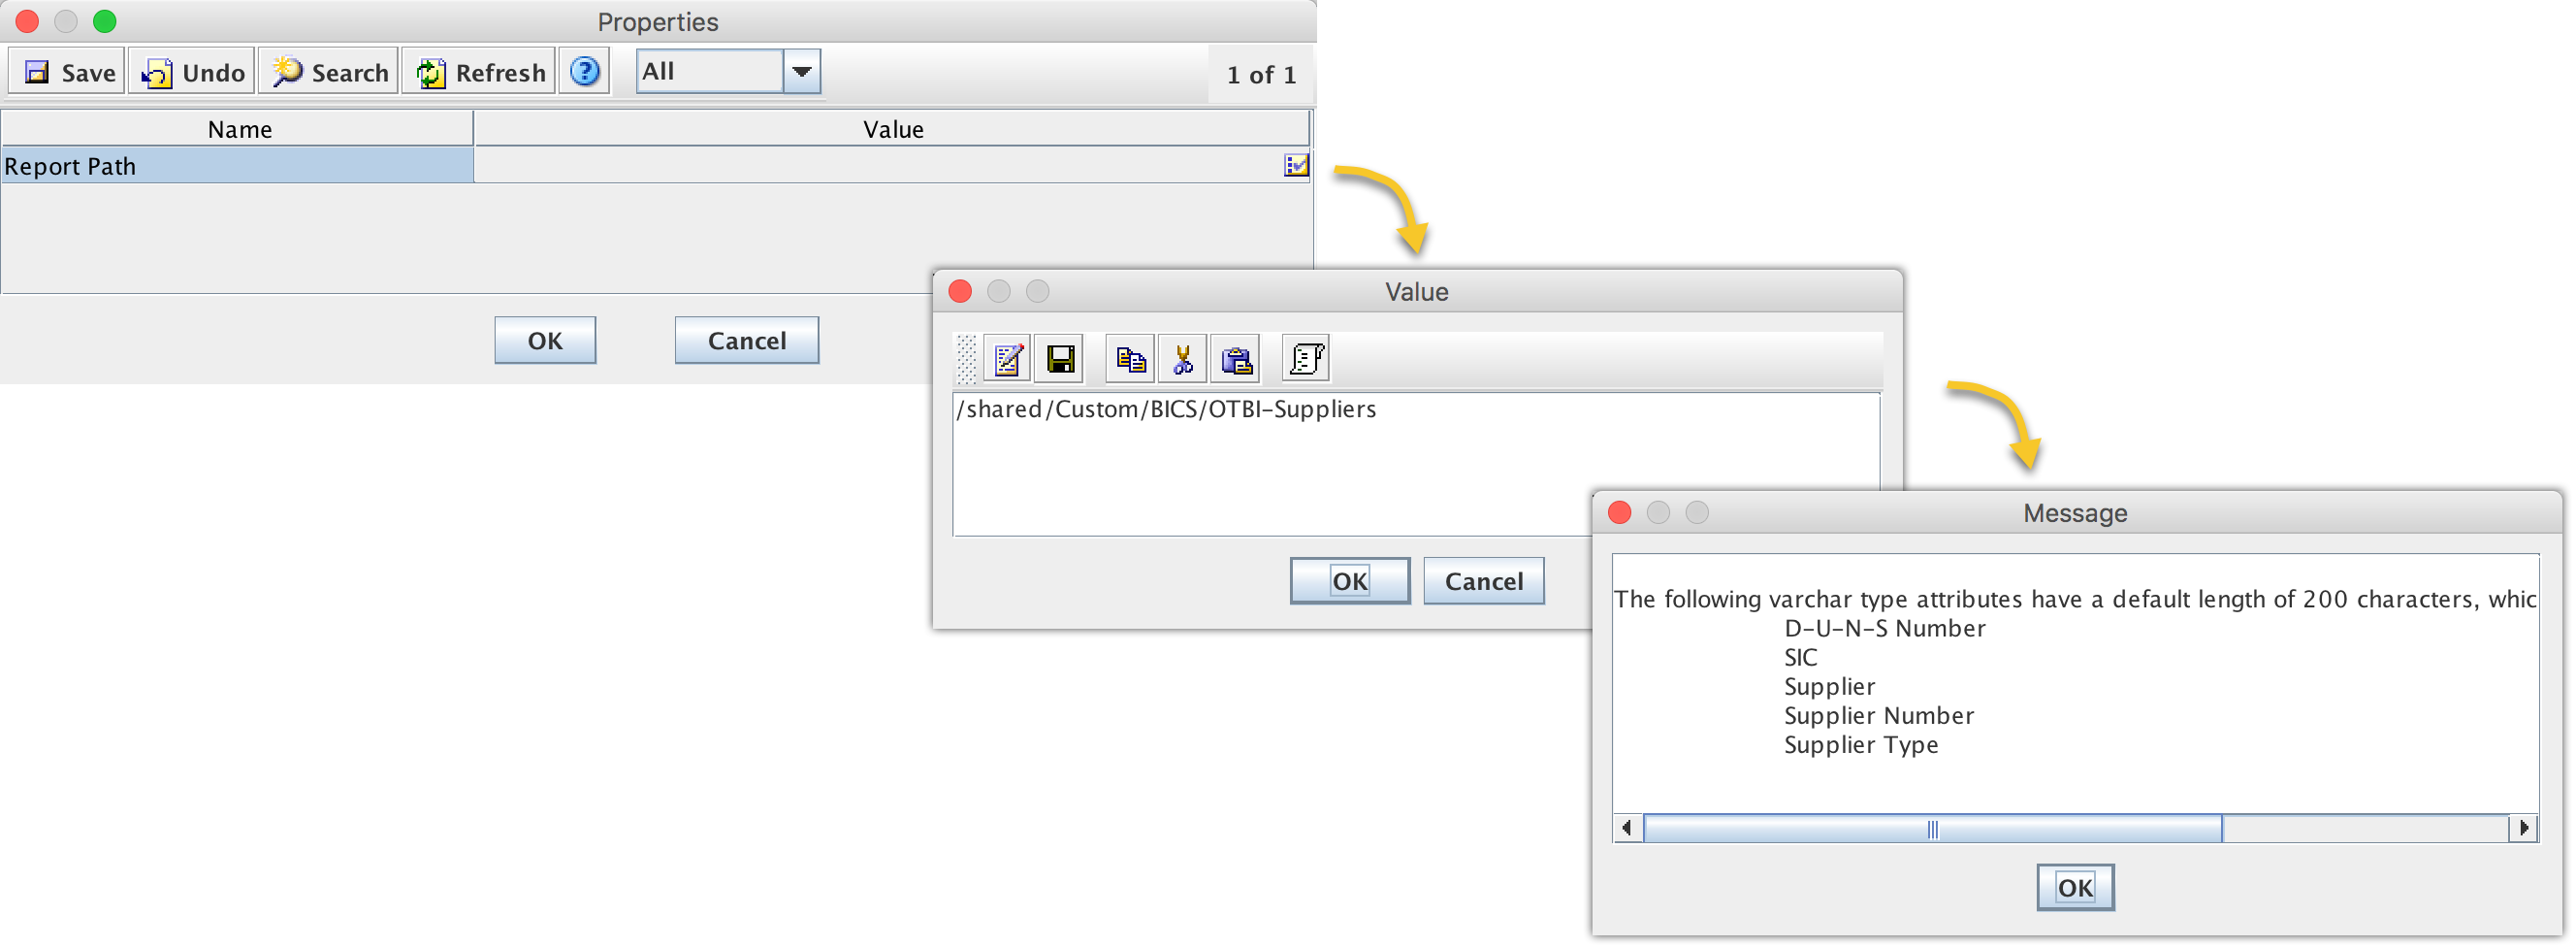
- Select Report. Enter the full path to the new analysis created from step 2 above
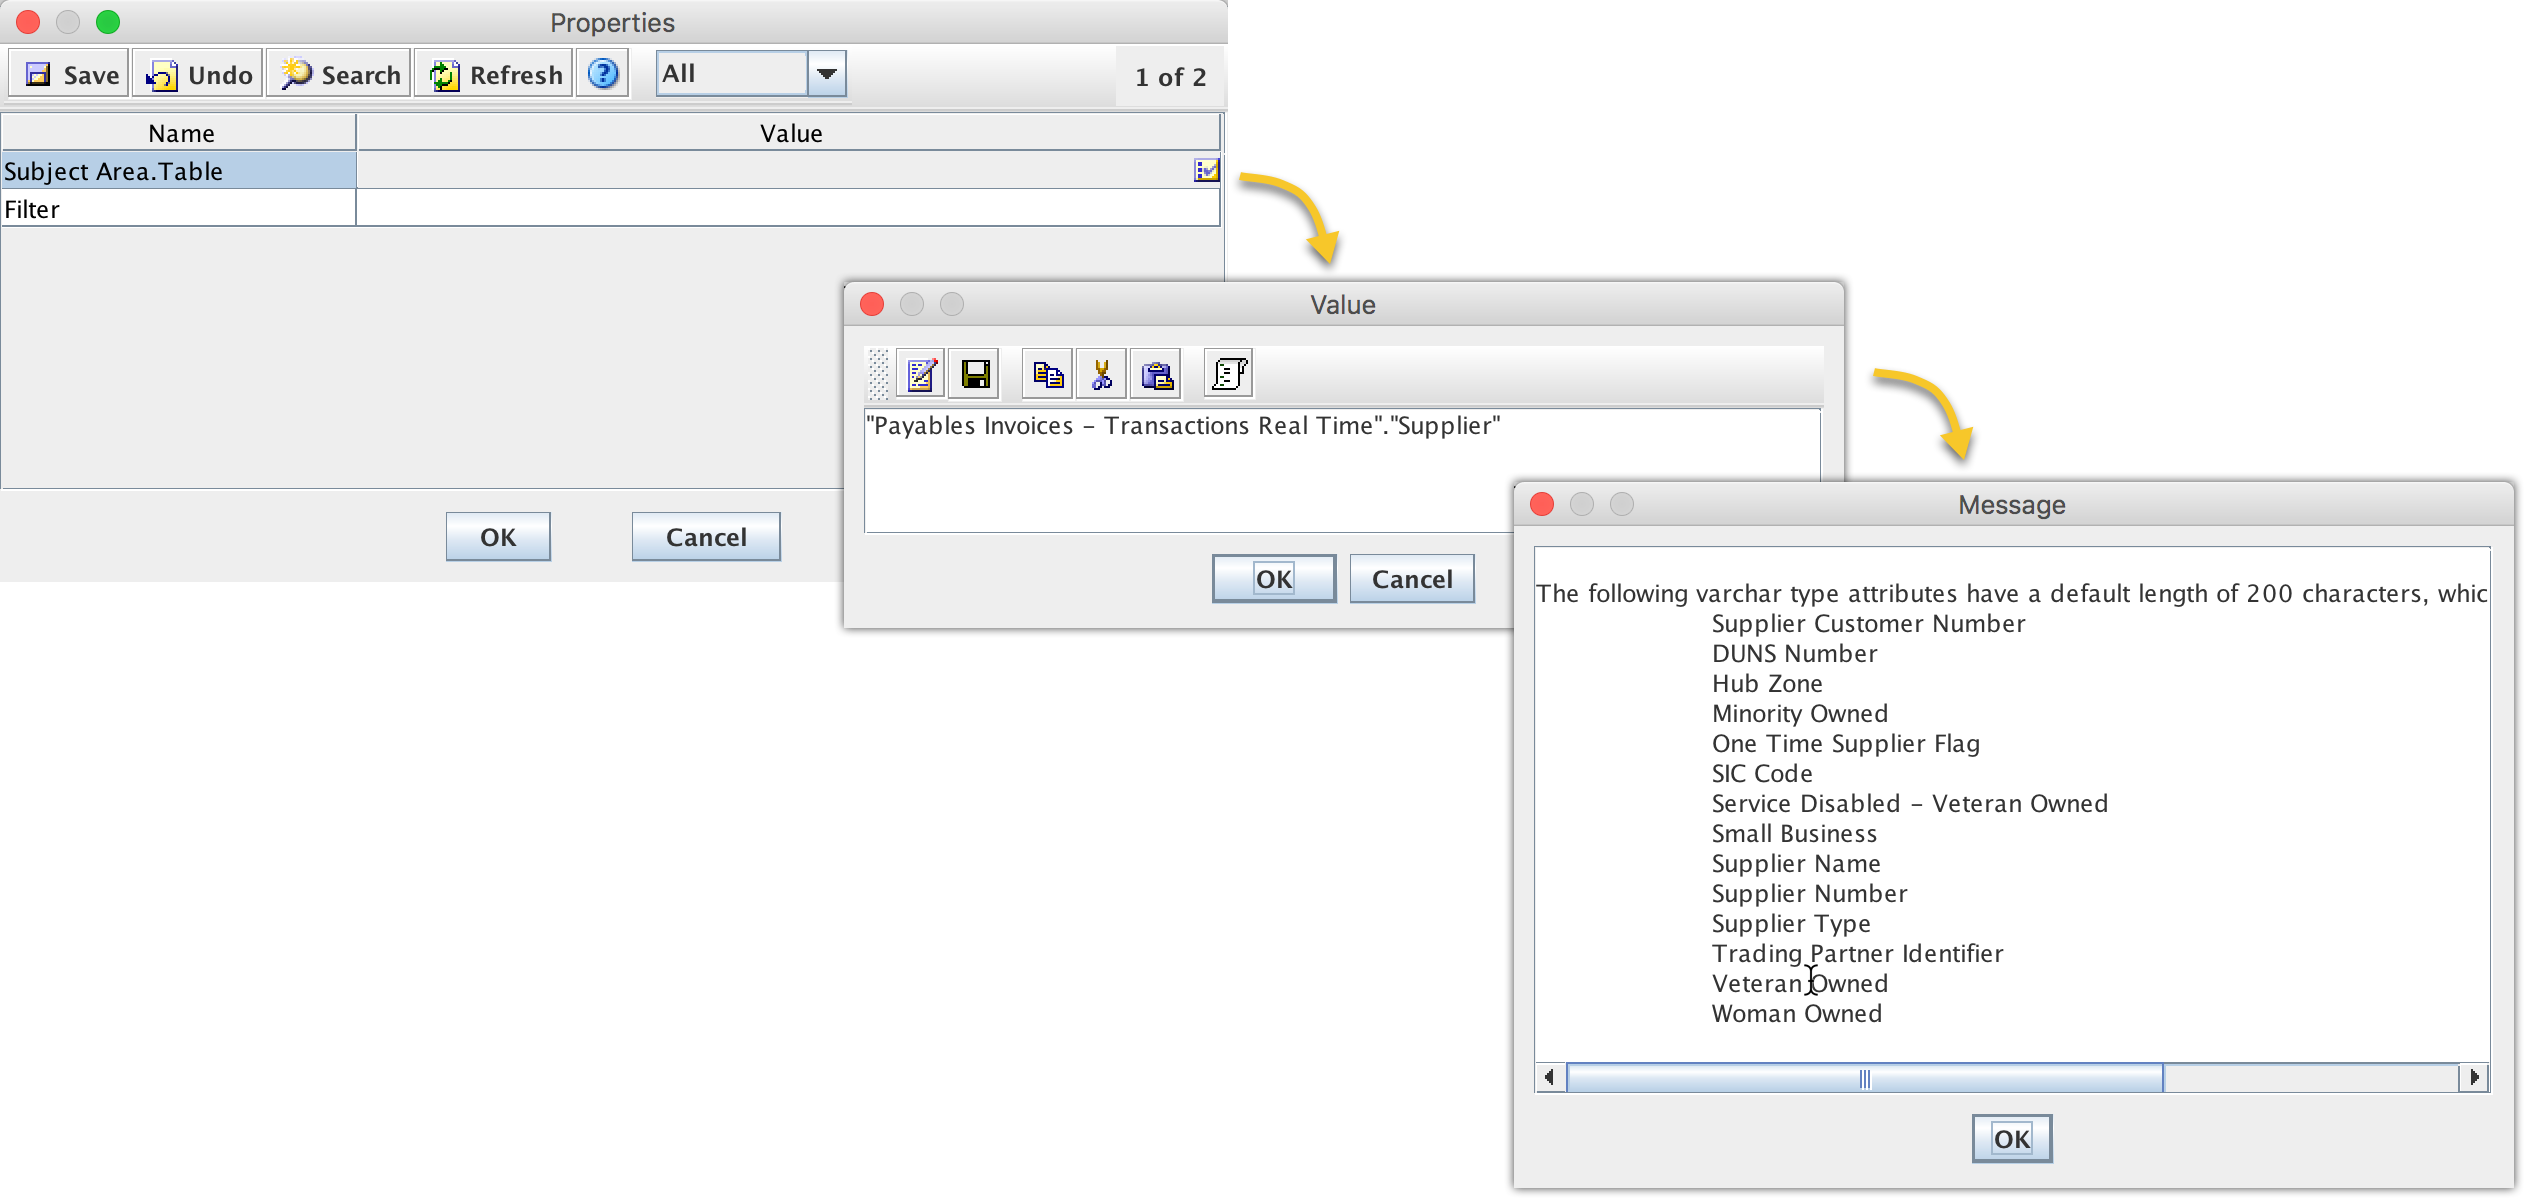
- Select Subject Area.Table. Enter the full path of the subject area table name, e.g. “Payables Invoices – Transactions Real Time”.”Supplier”. The full path value is case sensitive.
So which data extraction mode should be used? The SQL mode is more versatile and useful, should be recommended. The logical SQL supports incremental load for performance, and once created, does not have any reliance on any saved analyses reports. The Report mode does not support incremental load, and has a limitation that can not exceed the 65,000 max data download size. The Subject Area.Table mode is more useful if the Subject Area folders closely mimic the data structures in BICS.
Previous << Best Practices in Reality … | Next >> Using Pyiscal SQL …