
This post demonstrates the steps for applying an OAuth2 policy with Mule API manager. We will use the Mule External OAuth2 Provider as the authorization server.
Most of the steps also apply to the Client-ID enforcement policy. For a Client ID policy, you can skip step 4, and pick the Client-ID enforcement policy for step 5.
This post does not cover the details of OAuth2. For that, you can go here: https://blogs.perficient.com/integrate/2017/03/19/oauth-dance-with-mule-external-provider
Step 1 – Deploy a Running Mule API
If you need instructions on how to create a Mule API, follow these posts:
https://blogs.perficient.com/integrate/2017/01/27/technically-what-makes-a-mule-application-an-api/
We’ll use the basic “hello world RAML” from the previous posts. Please note the basic RAML uses http basic security. Go ahead create a Hello World API and deploy it with auto-discovery (see Technically, What is a Mule API) So we’ll have one piece of application running on the Mule engine and it’s also an API that’s managed by the Mule API manager.
I’m going to assume the API is deployed here: “[your-hello-api].cloudhub.io”.
Step 2 – Obtain the Client ID / Secrete for the API
Assuming the hello-world API is deployed successfully, go to the API manager, click on the API version link for the hello-world API, then click “View live portal”. You should see “Request API access” (please note if your API proxy is not deployed properly, the “Request API access” link may not show up!).
Click on the link, and then click “New Application”,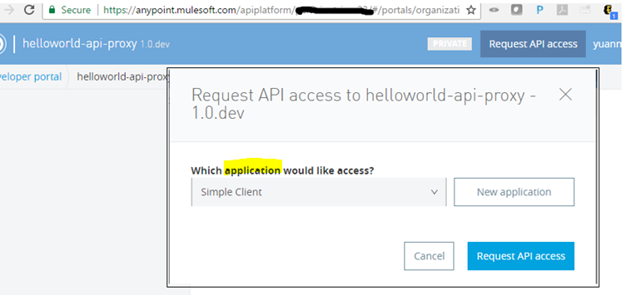
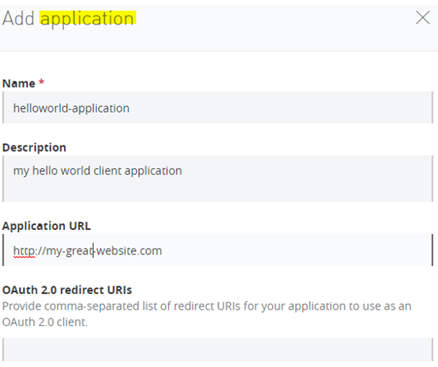
The only required field on this screen is “Name”. Technically, you are registering your “client application” and requesting access to the API.
I would recommend leaving “redirect URI” blank for our test, but if you fill it in, you need to make sure it’s the same callback URL in your token request (see step 6). I call this “don’t ask don’t tell”. If you don’t fill this in here, your token request can use any callback URL. However, if you specify the URL, the OAuth2 provider will actually validate the callback URL in the token request. That is the Mule external OAuth provider behavior based on my test.
Click on “Add”, then “Request API access”, the API owner will receive an alert. You will also get a popup box that shows the client-id and secrete of your application. You will need this pair when you request the OAuth2 token.
Please note this client ID/secrete is different from your organization client id / secrete, which is under Access Management (if you are an admin) and organization. That pair of client ID/secrete is super important and you need protect it very carefully.
I’ve also noticed that the API manager console changed quite a bit lately. It is much easier to view the client-ID/secrete from different pages. The API access is auto-approved (that could be a setting on my profile or it could be a setting on the API).
Anyway, you have your client-ID/secrete now. If you are happy, you can just move on to the next step and feel free to skip the following deeper dive section.
For those who really want to understand what we have been doing, and where this “application” fits in the OAuth2 world, please read the explanation below.
In order to understand the “client application,” let’s briefly visit the four roles defined by the OAuth2 spec: https://tools.ietf.org/html/rfc6749
- Resource Owner – the entity (in this case, it is you) who can grant access to the protected resources (in this case, the API)
- Resource Server – in this case, Mule server
- Client – in this case, the application needs to call the API
- Authorization Server – the OAuth2 server we are going to deploy to the Mule server
Please note: in the real world, the Resource Server and the Authorization Server are tightly intertwined (sometimes they can be the same one), and they work in tandem to coordinate the token and access dance.

Based on the OAuth2 spec, the client needs to register with the authorization server. However, the spec does not define the client registration process. In the case of the Mule API, the OAuth2 client registration is equivalent to “Registering an Application” https://docs.mulesoft.com/api-manager/browsing-and-accessing-apis
I can’t blame you if you feel confused a little bit right now. Is it “client”, or “application” or “client application”?
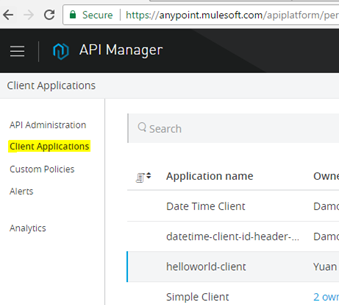
RFC6749 says “client” and “client registration.” It defines “client” as “an application.” Mule API manager uses terms like “application” and “registering an application.” Then on the management page, it shows “Client Applications.” The OAuth2 world is confusing enough without these variations of terminologies. In this case, “client”, “application” and “client application” are the same thing or the equivalent of each other . “Client registration” and “registering application” refers to the same process.
Now you may feel you should have moved on after you got our client-id/secret instead of dealing with these tangled mess of terminologies…
Step 3 – Deploy Mule OAuth2 external provider
We are going to use the Mule external OAuth provider in this post. Please follow this post for instructions on installing the OAuth provider. It’s also a good read to understand OAuth2 in general.
I’m going to assume the OAuth2 external provider is running in Cloudhub, with a domain name like “[your-oauth2-ext-provider].cloudhub.io”. Replace [your-oauth2-ext-provider] with your actual location in the rest of the post.
Step 4 – Modify the RAML to prepare for OAuth2 policy
Please note that you can apply the OAuth2 policy to an API without declaring it in the RAML. If you don’t declare it in the RAML, the client-id, token and other OAuth related parameters will not be passed on to your API. The OAuth2 policy still works. Is that a problem? I would leave that as a debate question to the reader. I know there are cases where the API needs to use these parameters.
Let’s modify the RAML to declare the OAuth2 policy.
Get the RAML snippet for OAuth2:
Now, from the API manager home page, click on the version # of the API. Click on the “Policies” tab towards the lower part of the screen, browse to “OAuth 2.0 access token enforcement using external provider”, click on “RAML snippet”, then select RAM 1.0. Copy the RAML snippet.
Update the RAML:
Close the snippet popup. In the API definition section, click on “Edit in API designer”, modify the RAML as instructed on snipped popup window. Save the RAML.
Now we are ready to apply the security policy.
Step 5 – Apply the OAuth2 policy
Browse to the OAuth2 policy again, this time hit “Apply”. In the “Access token validation endpoint url”, please enter the following:
https://[your-oauth2-external-provider].cloudhub.io/external/validate
Leave the “Scopes” empty. That’s a different subject in OAuth2. We’ll just do the simple case of OAuth2.
That’s it. Now your API is protected with the OAuth2 security policy.
Step 6 – Let’s Call the API
Whew, finally we are ready to call the API. Oh, no, we can’t yet, because this is an OAuth policy, we need to get the access-token first.
Keep in mind, the Mule External OAuth2 provider is a rudimentary implementation. We are just going to run a simple test with Client-Credential grant type.
Please note the callback URL. Since I’m using postman to run the test, the callback URL is where postman will grab the response token, and then postman UI will display it to you. Also, as noted in step 2, when you register the client application, if you fill in the redirect URI, it has to be the same as the callback URL. That’s why I recommend leaving it blank in step 2.
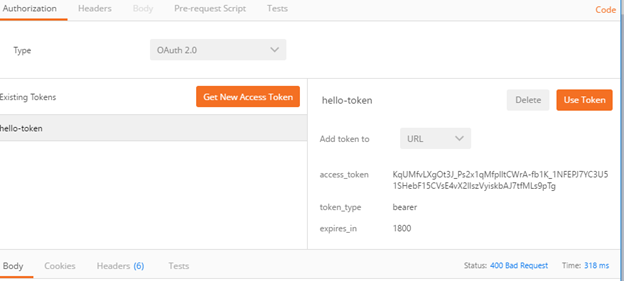
Now we have our token
KqUMfvLXgOt3J_Ps2x1qMfplltCWrA-fb1K_1NFEPJ7YC3U51SHebF15CVsE4vX2llszVyiskbAJ7tfMLs9pTg
First, we try to hit the API without the access-token, you can see access is denied:
![]()
Now, let’s plugin our token:
![]()
OAuth2 has four standard grant types. I only tested the Client Credential grant type. Also, the way I passed in the access-token is the lazy way to do it, there are other ways (Authorization header) to pass in the token, I’ll leave those to readers to experiment. Of course, you can always follow the next link and experiment with all four grant types: https://blogs.perficient.com/integrate/2017/03/19/oauth-dance-with-mule-external-provider/