
This is a high-level technical walk-through on how we can leverage the out-of-box connectors to write a logic for file transfer using Java messaging Service.
Assumption:
-Developer knows basic coding techniques in MuleSoft workspace
– Developer knows about JMS and the queues/ topics messaging model
1. Pre-Config Requirements:
a. Make sure to have java version 1.6 and above. Also, setup JAVA_HOME in environment variables
b. Make sure to have maven 3.x set up and the environment variable created accordingly for that as well.
Note: you can verify your version of java and maven by going to command prompt and typing “java -version” and “mvn -version”
2. Set up your Apache MQ
In this step we set up an Apache MQ server a crate a Queue or Topic that can be used to send messages into ESB.
– Create an account with Apache that is available free. Download the Apache binaries for MQ set up here.
– Based on whether you are using Windows or Unix, download the appropriate binaries and extract them into the target location
– From the console window, change the location to the Apache root directory’s bin folder and run the following command”
activemq start
– Once started, you can login to the admin console of Apache mq using http://localhost:8161/admin
(user name and password: “admin” and “admin” should work). If not, check the conf files for the same

At this point, you should have logged into the sample Apache MQ that you just started as an admin and be able to create queue, topics, etc. and send messages into them.
For example, I have created a sample queue below and sent a message into it:
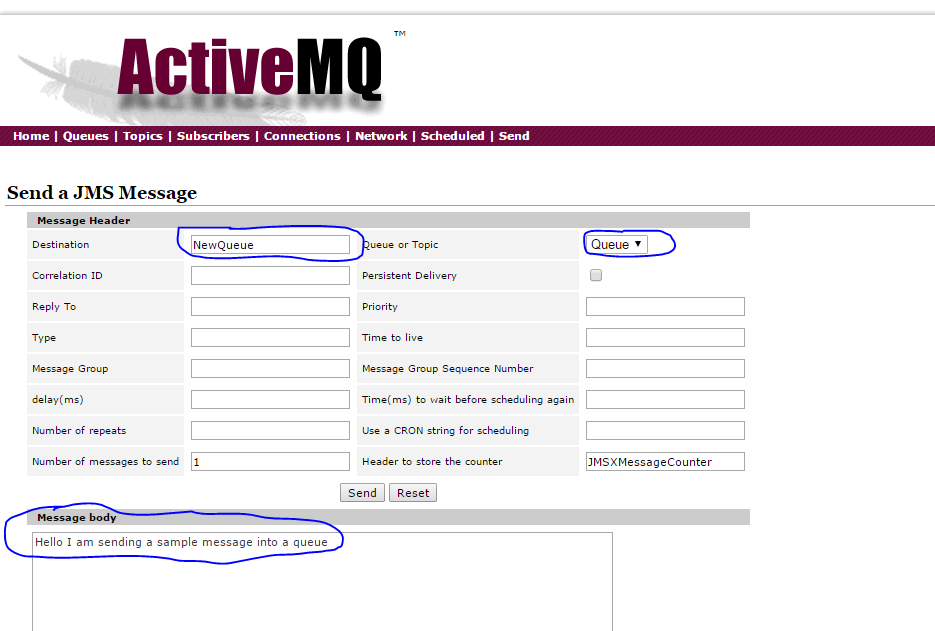
Here, the name of the queue I created is NewQueue and I sent a message into that queue. You can check the status of the queue.
3. Writing MuleSoft code to pass these queues messages into some target file system
For this I am going to set up a basic flow in MuleSoft that listens over queue and if it finds files with certain regex matches on file name, it will accept those messages (files in this case) and transfer them to the target location. See the code snapshot below for details:

Set up the JMS as the message source and file output as the destination. Configure the queue as the new queue name for message listening, re-delivery attempt values etc. as per your needs.
4. Testing the application:
Now go to the admin console, send a message in the new created queue and check the target directory created in the steps above. You should see the exact same message being delivered into the target location.